
Creating a cell model at home is more than just a school assignment—it's an opportunity to explore the microscopic world in a tangible way. Whether you're a student aiming to ace your biology project, a parent helping a child with homework, or a curious learner fascinated by life at the cellular level, building a model offers hands-on insight into how cells function. With the right approach, materials, and attention to biological accuracy, you can craft a model that’s both scientifically sound and visually engaging.
Why Build a Cell Model at Home?
The human body contains trillions of cells, each performing specialized tasks essential to life. Yet, because they’re invisible to the naked eye, understanding their structure can be abstract. A physical model bridges that gap, transforming complex organelles into recognizable components. When built thoughtfully, these models reinforce learning by linking form to function—such as seeing how mitochondria resemble power plants or how the nucleus acts as the control center.
Beyond education, constructing a model fosters creativity, problem-solving, and fine motor skills. It encourages learners to make decisions: What materials best represent the cytoplasm? How can you show movement across the cell membrane? These questions deepen engagement far beyond textbook reading.
Step-by-Step Guide to Building Your Cell Model
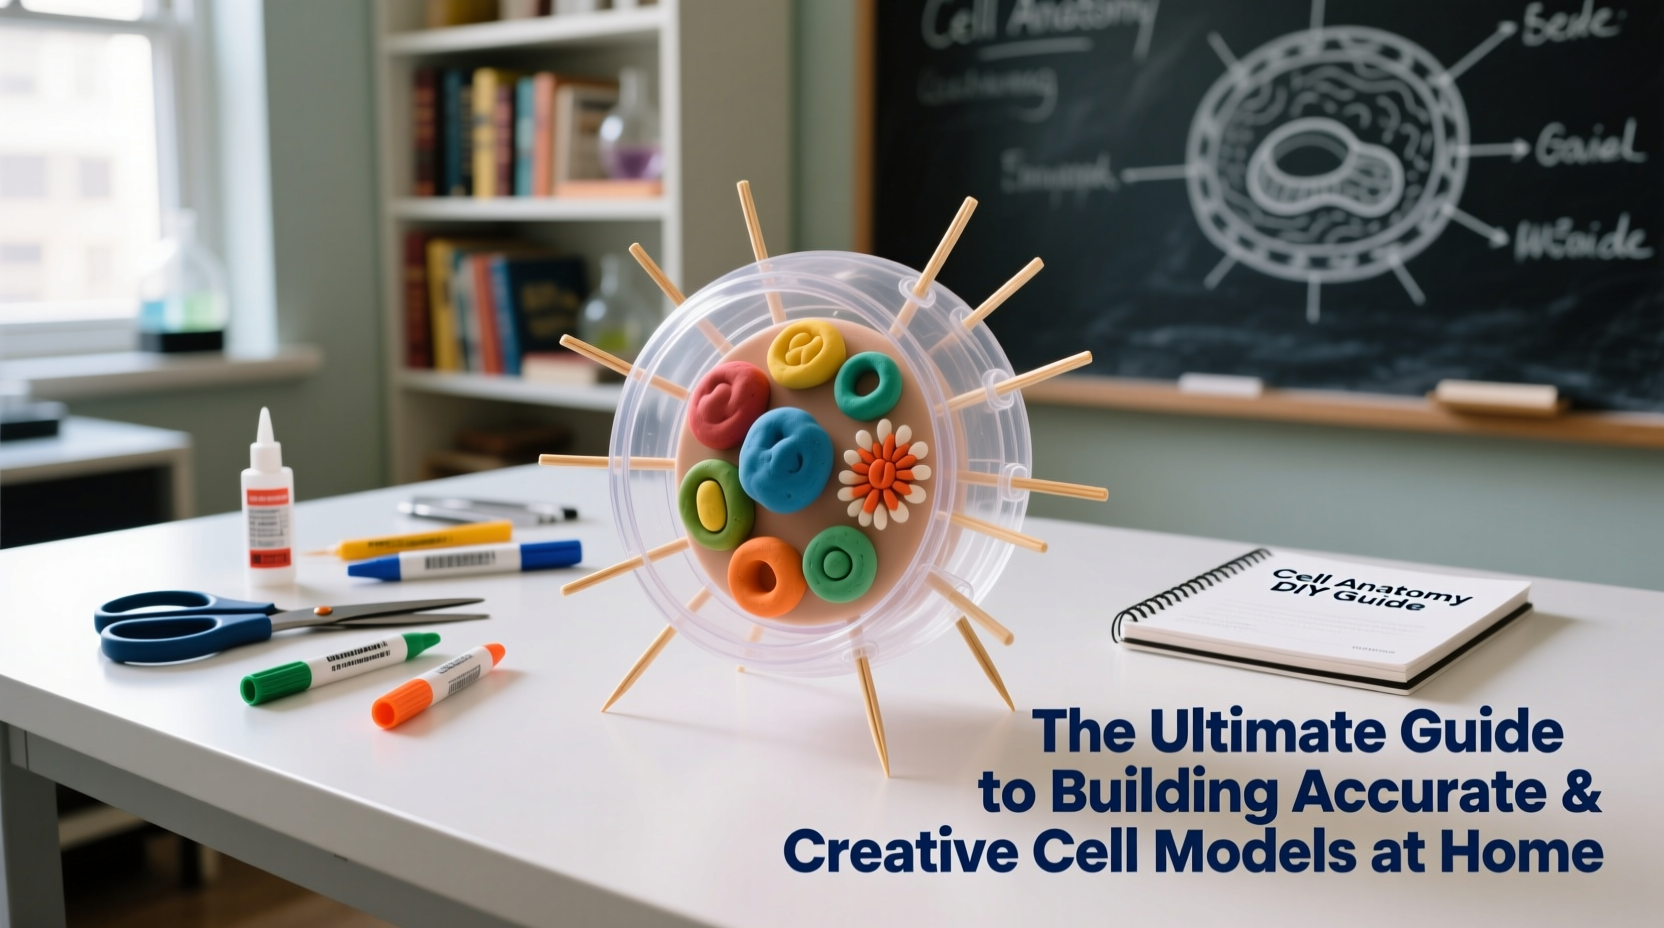
- Choose the type of cell: Decide whether you’ll model an animal cell, plant cell, or even a bacterial cell. Plant cells have rigid cell walls and chloroplasts; animal cells do not.
- Select a base material: Consider using foam balls, shoeboxes, cardboard trays, or even clear plastic containers as the foundation.
- Gather materials for organelles: Use everyday items like beads, pipe cleaners, clay, buttons, or candy to represent different parts.
- Label each component: Attach small tags or use toothpicks with labels to identify organelles clearly.
- Assemble with purpose: Position organelles according to their real-life locations—for example, mitochondria scattered throughout the cytoplasm, the nucleus centrally located.
- Add a legend or key: Include a separate card explaining what each material represents.
Choosing Between 2D and 3D Models
A two-dimensional model (like a poster) is easier and faster to create but may lack depth and realism. A three-dimensional model allows for spatial understanding and is often more impressive in presentations. For advanced learners, consider combining both: a 3D core with a 2D diagram explaining functions.
Material Comparison Table: Best Uses for Common Supplies
| Material | Best For Representing | Pros | Cons |
|---|---|---|---|
| Jell-O or gelatin | Cytoplasm | Transparent, wobbly texture mimics fluidity | Perishable, fragile |
| Modeling clay | Nucleus, mitochondria, lysosomes | Moldable, durable, colorful | Can dry out or crack |
| Pipe cleaners | Endoplasmic reticulum, cytoskeleton | Flexible, easy to shape | May not hold intricate forms |
| Plastic wrap | Cell membrane | Thin and transparent | Easily torn |
| Green marbles or pom-poms | Chloroplasts | Vivid color, spherical shape | Limited size options |
Ensuring Scientific Accuracy Without Sacrificing Creativity
Accuracy matters. A model should reflect real cellular anatomy, not just look artistic. Start by studying labeled diagrams from reliable sources like textbooks or university websites. Pay attention to relative sizes—mitochondria are smaller than the nucleus but larger than ribosomes. While exact scale is impossible in a homemade model, proportionality enhances credibility.
Be creative within boundaries. For instance, use blueberries for nuclei and gummy worms for Golgi apparatus—but explain why those choices make sense. This balance shows both imagination and understanding.
“Students who build accurate models retain up to 75% more information than those who only read about cells.” — Dr. Linda Perez, Science Education Researcher, University of Colorado
Mini Case Study: Eighth-Grader Wins Science Fair with Recycled Cell Model
Jamal Thompson, a middle school student from Portland, won first place in his school’s science fair with a plant cell model made entirely from recycled household items. He used a cardboard box as the cell wall, green bottle caps for chloroplasts, and twisted aluminum foil for the endoplasmic reticulum. His key innovation was a rotating lid that revealed a detailed breakdown of each organelle’s function. Teachers praised not only the craftsmanship but also the clarity of scientific explanation. Jamal later said, “I didn’t just memorize the parts—I had to think about what each one did while I was building it.”
Essential Checklist Before Presenting Your Model
- ✅ All major organelles are included (nucleus, mitochondria, ribosomes, ER, Golgi, lysosome, cell membrane)
- ✅ Plant cells include cell wall and chloroplasts; animal cells do not
- ✅ Each part is clearly labeled with durable tags
- ✅ A written or verbal explanation of each organelle’s function is prepared
- ✅ The model is sturdy enough to transport without damage
- ✅ A legend or key is attached explaining material choices
Frequently Asked Questions
Can I eat the cell model if I use food items?
Yes, if all components are edible and stored properly. However, avoid using non-food-safe adhesives like glue or paint. Opt for frosting, marshmallows, or fruit-based gels to keep it safe and tasty.
How do I make my model stand out in a science fair?
Incorporate interactivity—like removable organelles or a flip-up panel showing internal structures. Pair the model with a short presentation or QR code linking to a video explanation. Judges value both creativity and clarity.
What if I don’t have access to craft supplies?
Use what’s available: paper balls, fabric scraps, rubber bands, or even digital tools. You can create a highly effective model with minimal resources as long as the biological concepts are correctly represented.
Conclusion: Turn Learning Into a Living Experience
Building a cell model at home transforms abstract biology into a concrete, memorable experience. It’s not about perfection—it’s about engagement, understanding, and the joy of creation. Whether you’re crafting a simple 2D diagram or an elaborate 3D masterpiece, every choice you make deepens your grasp of life’s fundamental unit.
Start today with materials you already have. Sketch a plan, involve family or classmates, and let curiosity guide your design. When you finish, you won’t just have a model—you’ll have a story of discovery to share.


 浙公网安备
33010002000092号
浙公网安备
33010002000092号 浙B2-20120091-4
Comments
No comments yet. Why don't you start the discussion?