
Changing your own engine oil is one of the most empowering and cost-effective maintenance tasks you can perform as a vehicle owner. Beyond saving money—typically $20 to $50 per change—it gives you direct insight into your car’s condition and helps you stay proactive about its health. However, doing it incorrectly or unsafely can lead to engine damage, environmental harm, or personal injury. This guide walks you through every phase: preparation, execution, disposal, and optimization—so you can complete an oil change confidently, correctly, and cleanly.
Gather the Right Tools and Materials
Before lifting your hood, ensure you have all necessary tools and supplies on hand. A well-prepared workspace reduces mistakes and prevents mid-job trips to the auto store.
- Correct grade and amount of motor oil (refer to your owner’s manual)
- New oil filter compatible with your vehicle
- Socket wrench with correct-sized socket for the drain plug
- Oilst pan or large drain container (minimum 6-quart capacity)
- Oil filter wrench (strap or cartridge type, depending on filter)
- Funnel (preferably long-necked for narrow oil fill spouts)
- Ramps or jack stands (never rely solely on a hydraulic jack)
- Gloves and safety glasses
- Shop rags or paper towels
- Drip tray or cardboard to protect garage floor
Know Your Vehicle’s Specifications
Using the wrong oil or filter can cause serious engine wear. Always consult your owner’s manual for three key details:
- Oil viscosity (e.g., 5W-30, 10W-40): This affects performance in cold starts and high temperatures.
- Oil type: Conventional, synthetic blend, or full synthetic. Modern engines often require full synthetic for optimal protection.
- Oil capacity: Most engines hold between 4 to 7 quarts, but overfilling causes foaming and pressure issues.
The same applies to the oil filter. Filters vary by thread size, gasket diameter, and height. Using an incorrect filter may result in leaks or improper sealing under pressure.
| Vehicle Type | Common Oil Viscosity | Average Oil Capacity | Recommended Change Interval |
|---|---|---|---|
| Sedan (e.g., Honda Civic) | 0W-20 | 4.4 quarts | Every 7,500–10,000 miles |
| SUV (e.g., Toyota RAV4) | 0W-20 or 5W-30 | 5.2 quarts | Every 10,000 miles |
| Pickup Truck (e.g., Ford F-150) | 5W-30 | 6–7 quats | Every 7,500 miles (or 5,000 if towing) |
“Following manufacturer-recommended oil specifications isn’t just about warranty compliance—it’s about preserving internal engine tolerances that modern engines depend on.” — Mark Tran, ASE-Certified Master Technician
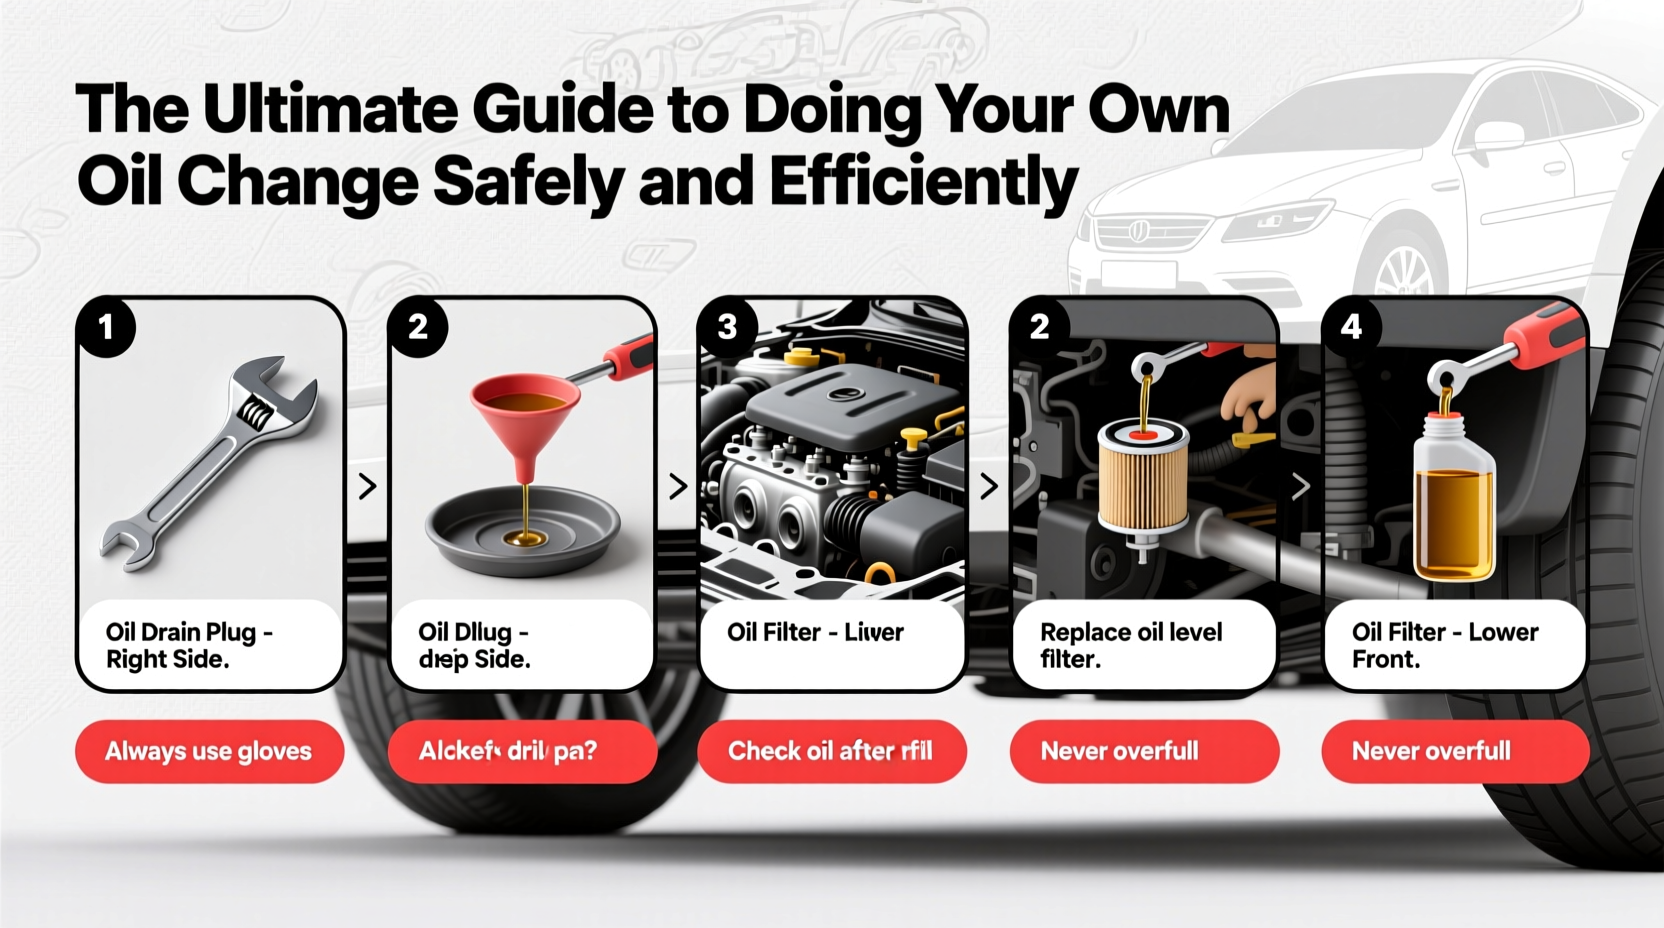
Step-by-Step: Performing the Oil Change
Follow this sequence to complete your oil change efficiently and without spills.
- Warm up the engine: Run the car for 5–10 minutes. Warm oil flows faster and carries more contaminants out with it.
- Position the vehicle safely: Park on level ground, engage the parking brake, and use wheel chocks. Raise the front end using ramps or securely placed jack stands.
- Locate the oil drain plug and filter: Typically found beneath the engine. Place the oil pan directly underneath the plug.
- Remove the drain plug: Use a socket wrench to loosen it counterclockwise. Let oil drain completely—this takes 5 to 10 minutes.
- Replace the drain plug: Once drained, wipe the plug clean, inspect the washer, and reinstall snugly (do not overtighten).
- Change the oil filter: Lubricate the new filter’s rubber gasket with fresh oil, then screw it on by hand until snug—about three-quarters turn past contact.
- Refill with new oil: Insert a funnel into the oil fill cap on top of the engine. Pour in the recommended amount slowly.
- Check the oil level: Wait a minute for oil to settle, then pull the dipstick, wipe, reinsert, and check again. Add small amounts if needed to reach the “full” mark.
- Start the engine and check for leaks: Run the car for 30 seconds, then shut off and recheck oil level. Inspect under the car for drips near the plug and filter.
- Dispose of used oil properly: Transfer old oil into a sealed container and take it to a recycling center, auto parts store, or municipal facility.
Avoid These Common Mistakes
Even experienced DIYers make errors that compromise safety or engine longevity. Here are frequent pitfalls and how to avoid them:
| Mistake | Consequence | How to Avoid |
|---|---|---|
| Over-tightening the drain plug | Stripped threads, costly repairs | Tighten to manufacturer torque spec (usually 20–30 ft-lbs) |
| Forgetting to replace the drain plug washer | Oil leak from degraded seal | Always install a new crush washer if required |
| Not pre-filling the new oil filter | Delayed oil pressure at startup | Fill filter halfway with oil before installing |
| Disposing of oil in trash or storm drains | Environmental contamination, legal penalties | Recycle at approved drop-off locations |
Real-World Example: Sarah’s First Oil Change
Sarah, a first-time car owner with a 2018 Subaru Impreza, decided to try her first oil change to save money and gain mechanical confidence. She watched tutorials, bought the right 0W-20 full synthetic oil, and sourced a matching filter. On a Saturday morning, she drove her car onto ramps, warmed the engine, and began draining.
She removed the drain plug smoothly but forgot to inspect the washer. After reassembly, she started the engine—and noticed a steady drip. Panicked, she shut it off and consulted a mechanic friend, who pointed out the missing washer. She replaced it, tightened properly, and completed the job. Though messy, the experience taught her the importance of double-checking each step. Now, she changes her oil every 7,500 miles and logs each service in her maintenance journal.
Frequently Asked Questions
How often should I change my oil?
Modern vehicles with synthetic oil typically need changes every 7,500 to 10,000 miles. Older cars or those used for towing, idling, or short trips may require changes every 3,000 to 5,000 miles. Always follow your manufacturer’s recommendation.
Can I reuse the oil filter?
No. The filter traps contaminants and loses efficiency over time. Reusing it risks clogging and reduced oil flow, potentially leading to engine damage.
Is it safe to mix different oil brands?
Yes, as long as they meet the same viscosity and specification standards (e.g., API SN, GF-6). However, sticking to one reputable brand ensures consistency in additive chemistry.
Final Checklist Before You Begin
Use this checklist to ensure you’re fully prepared before starting your next oil change:
- ✅ Vehicle parked on level surface with parking brake engaged
- ✅ Correct oil type and quantity purchased
- ✅ New oil filter and drain plug washer (if needed) on hand
- ✅ Ramps or jack stands securely positioned
- ✅ Oil drain pan and funnel ready
- ✅ Gloves, safety glasses, and cleanup materials available
- ✅ Recycling plan for used oil and filter
Take Control of Your Car’s Health
Performing your own oil change is more than a money-saving hack—it’s a hands-on way to build trust in your vehicle and deepen your understanding of its needs. With the right tools, knowledge, and attention to detail, you can complete the job in under an hour, leaving your engine running cleaner and smoother. Each successful change strengthens your confidence and reduces reliance on service centers for basic maintenance.


 浙公网安备
33010002000092号
浙公网安备
33010002000092号 浙B2-20120091-4
Comments
No comments yet. Why don't you start the discussion?