
Moving to a new iPad should feel like an upgrade in every sense—not a technical headache. Yet many users hesitate at the thought of losing photos, messages, app settings, or documents during the transition. The good news: Apple has refined its ecosystem to make data migration smoother than ever. With the right approach, you can transfer everything from your old iPad to your new one in under an hour, often with minimal manual input. Whether you're upgrading for performance, screen size, or simply replacing a worn device, this guide walks you through every reliable method, common pitfalls, and expert-backed tips to ensure a flawless transition.
Understanding Your Transfer Options
Apple provides three primary methods for transferring data between iPads: Quick Start, iCloud Backup, and Finder (or iTunes on Windows). Each has distinct advantages depending on your internet speed, available storage, and how much time you have.
- Quick Start: Best for direct, wireless transfers between devices in close proximity.
- iCloud Backup: Ideal if you’re setting up your new iPad remotely or want a cloud-based fallback.
- Finder/iTunes: Most reliable for large transfers or when Wi-Fi is unstable.
Choosing the right method depends on your setup, but all three preserve apps, settings, messages, Health data, and even Home Screen layouts—provided your devices are updated to compatible iOS versions.
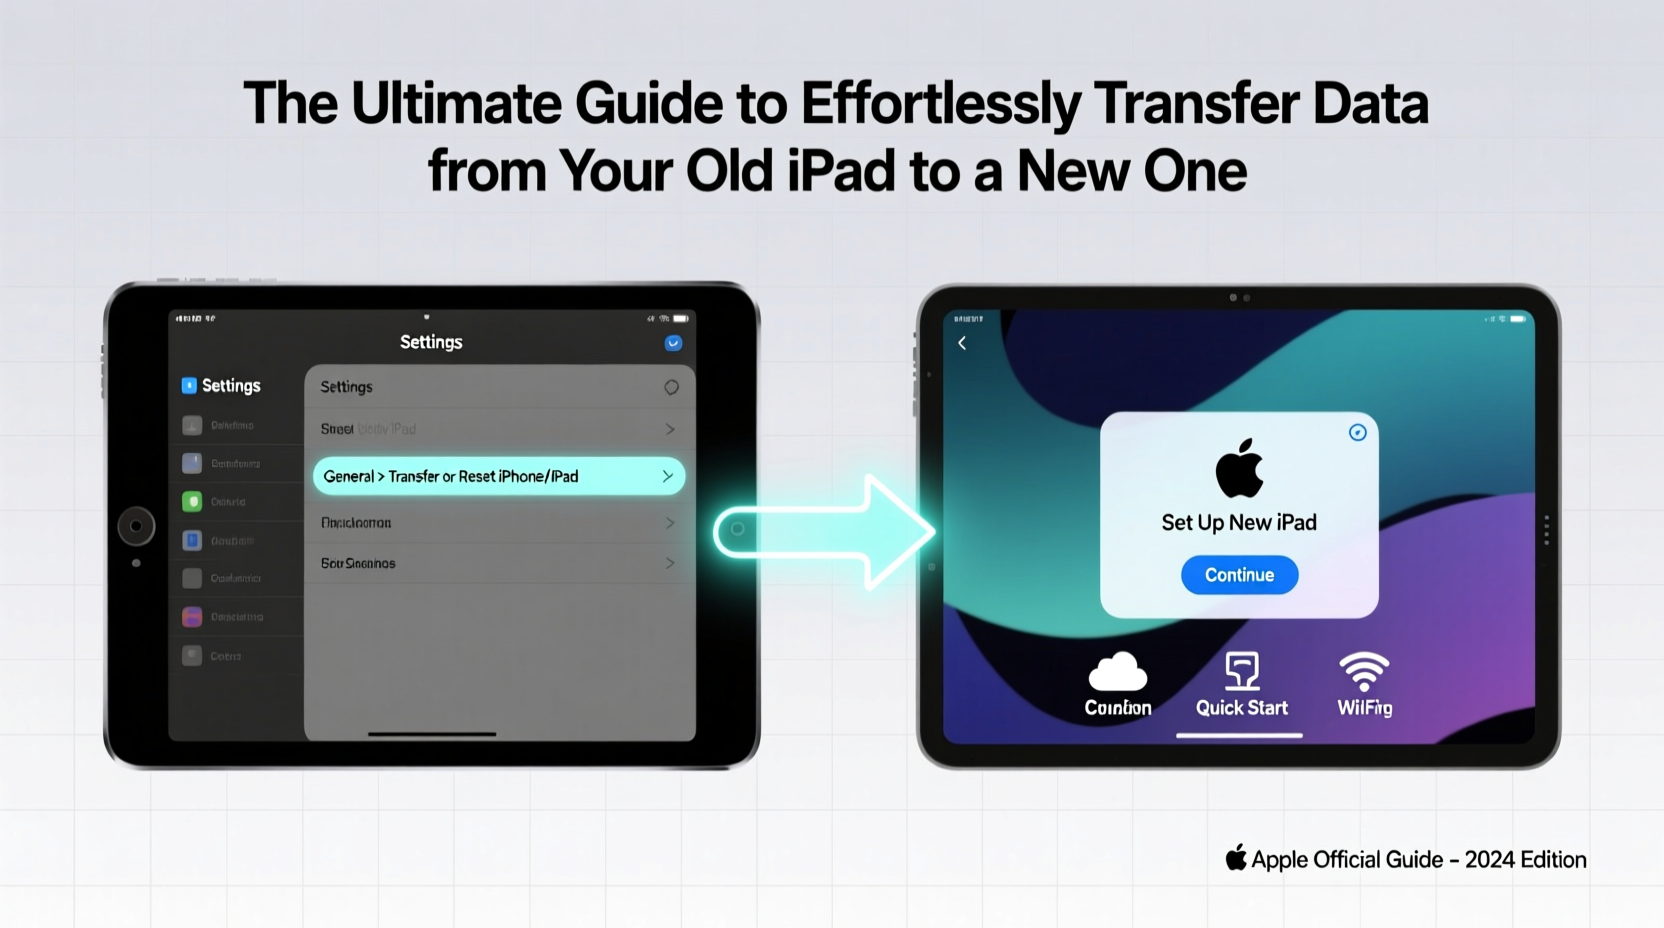
Step-by-Step: Using Quick Start for Seamless Migration
Quick Start leverages Bluetooth and peer-to-peer Wi-Fi to securely transfer data directly from your old iPad to the new one. It’s the fastest and most intuitive option when both devices are available.
- Power on your new iPad and place it near your old one.
- On the new iPad, select “Set Up Manually” or tap “Transfer Directly from iPad.”
- Use your old iPad to scan the swirling animation on the new device.
- Enter your old device’s passcode when prompted.
- Select “Transfer from [Your Old iPad]” and wait for the progress bar to complete.
- Once finished, your new iPad will restart and begin downloading apps and data.
This process typically takes 20–60 minutes, depending on data volume and connection stability. You’ll see a real-time progress indicator showing which elements are being transferred—photos, messages, accounts, and more.
“Quick Start is one of Apple’s most underappreciated features. It reduces user friction dramatically by handling encryption, authentication, and transfer logistics behind the scenes.” — David Lin, Senior iOS Systems Engineer
Using iCloud Backup: When Distance or Time Is a Factor
If your old iPad isn’t physically accessible, or you prefer a cloud-first strategy, iCloud Backup offers a dependable alternative. This method requires sufficient iCloud storage but allows you to restore your entire device state without needing both iPads present.
Preparing Your Old iPad for Backup
Before backing up, ensure you have enough space in iCloud. Free accounts come with 5GB—often insufficient for full backups. You may need to purchase additional storage via Settings > [Your Name] > iCloud > Manage Storage > Change Storage Plan.
- Connect your old iPad to Wi-Fi.
- Go to Settings > [Your Name] > iCloud > iCloud Backup.
- Tap “Back Up Now” and wait for completion (check the timestamp to confirm).
- Keep the device powered and connected until the backup finishes.
Restoring to Your New iPad
- Turn on the new iPad and follow setup prompts until you reach “Apps & Data.”
- Select “Restore from iCloud Backup.”
- Sign in with your Apple ID.
- Choose the most recent backup from the list.
- Wait as your data downloads. Initial setup may take longer, especially over cellular or slow Wi-Fi.
Note: Large photo libraries may continue syncing in the background after setup. Ensure your new iPad remains charged and connected to Wi-Fi.
Advanced Option: Transfer via Finder (macOS) or iTunes (Windows)
For users who prioritize control, speed, or are dealing with unreliable networks, a wired transfer via computer is often the most stable method. This approach creates an encrypted local backup that includes sensitive data like passwords and Health records.
Steps for Mac Users (macOS Catalina or later)
- Open Finder and connect your old iPad via USB.
- Select the device when it appears in the sidebar.
- Under “General,” click “Back Up Now” and check “Encrypt local backup” (recommended).
- Wait for completion, then disconnect.
- Connect your new iPad, choose “Restore from Mac or PC,” and follow prompts.
Windows or Older macOS Users
Use iTunes: Connect the old iPad, click the device icon, choose “Back Up Now,” enable encryption, then restore the new device from the same backup.
Comparison of Transfer Methods
| Method | Speed | Internet Required? | Includes All Data? | Best For |
|---|---|---|---|---|
| Quick Start | Fast (20–60 min) | No (peer-to-peer) | Yes | Same location, immediate setup |
| iCloud Backup | Slow to moderate | Yes (Wi-Fi recommended) | Yes (if encrypted) | Remote setup, limited access to old device |
| Finder/iTunes | Moderate to fast | No (after initial backup) | Yes (with encryption) | Large data, unstable Wi-Fi, maximum control |
Real-World Example: A Teacher’s Smooth Transition Before School Year
Sophia, a middle school educator, relied on her iPad for lesson plans, student records, and classroom apps. With the new school year approaching, she upgraded to an iPad Pro but couldn’t afford downtime. Using Quick Start during her weekend prep, she placed both devices side by side, initiated the transfer, and went grocery shopping while the data moved wirelessly. By evening, her new iPad was ready—apps reinstalled, notes intact, and even her stylus calibration preserved. She began Monday morning without missing a beat.
Essential Checklist Before You Begin
- ✅ Charge both iPads to at least 50% (ideally 80%+)
- ✅ Update both devices to the latest iPadOS version
- ✅ Connect the old iPad to a stable Wi-Fi network
- ✅ Free up space on the new iPad if restoring locally
- ✅ Back up critical files to iCloud or computer as a safety net
- ✅ Enable two-factor authentication on your Apple ID
- ✅ Unlock the old iPad and keep it awake during transfer
Frequently Asked Questions
Will my apps and purchases be transferred automatically?
Yes. All apps downloaded with your Apple ID will be restored. In-app purchases may require re-authentication but are generally reinstated automatically once you sign in.
What happens to my old iPad after the transfer?
Your old device remains functional. To protect your privacy, erase it via Settings > General > Transfer or Reset iPad > Erase All Content and Settings before selling or recycling.
Can I stop a transfer once it starts?
You can cancel, but doing so may result in incomplete data on the new device. It’s best to let the process finish uninterrupted. If interrupted, restart the setup and choose the same method.
Final Steps and Post-Transfer Tips
After your data migrates, take a few moments to verify key components: open Messages to confirm history, check Photos for albums, and test frequently used apps. Reconnect accessories like Apple Pencil or keyboards, and ensure Face ID or Touch ID is configured.
If certain apps appear but lack data, open them individually—they may sync content from their respective cloud services upon launch. Also, revisit Settings > [Your Name] > iCloud to manage storage and disable backups for rarely used apps to save space.
Conclusion: Make Your Upgrade Effortless
Transferring data from your old iPad to a new one doesn’t have to be stressful. With Apple’s robust tools and a little preparation, the switch can be smooth, secure, and nearly automatic. Whether you choose the immediacy of Quick Start, the flexibility of iCloud, or the reliability of a computer backup, the key is planning ahead and following proven steps. Your new iPad is more than a device—it’s a continuation of your digital life, now faster and fresher than before.


 浙公网安备
33010002000092号
浙公网安备
33010002000092号 浙B2-20120091-4
Comments
No comments yet. Why don't you start the discussion?