
Fresh coconut milk is a staple in many tropical and coastal cuisines, prized for its rich texture, natural sweetness, and versatility. Unlike canned versions, which may contain preservatives or stabilizers, homemade coconut milk offers pure, unadulterated flavor and creaminess. Whether you're preparing curries, desserts, smoothies, or plant-based beverages, extracting your own coconut milk ensures quality and freshness. This guide walks you through the most reliable methods, tools, and techniques to get the best results every time—no special equipment required.
Why Make Coconut Milk at Home?
Store-bought coconut milk often includes additives like guar gum, carrageenan, or emulsifiers to improve shelf life and consistency. While convenient, these ingredients can affect taste and digestion for some people. Homemade coconut milk contains only two ingredients: fresh coconut flesh and water. It’s richer in flavor, free from preservatives, and allows full control over thickness and fat content. Plus, it's surprisingly easy to make with minimal effort.
Step-by-Step Guide to Extracting Fresh Coconut Milk
The process of making fresh coconut milk involves three main stages: opening the coconut, preparing the flesh, and extracting the liquid. Follow this timeline for consistent results.
- Drain the coconut water: Locate the three soft \"eyes\" at one end of the coconut. Pierce two of them with a screwdriver or skewer and drain the liquid into a bowl. Save the water—it’s hydrating and great for drinking or cooking.
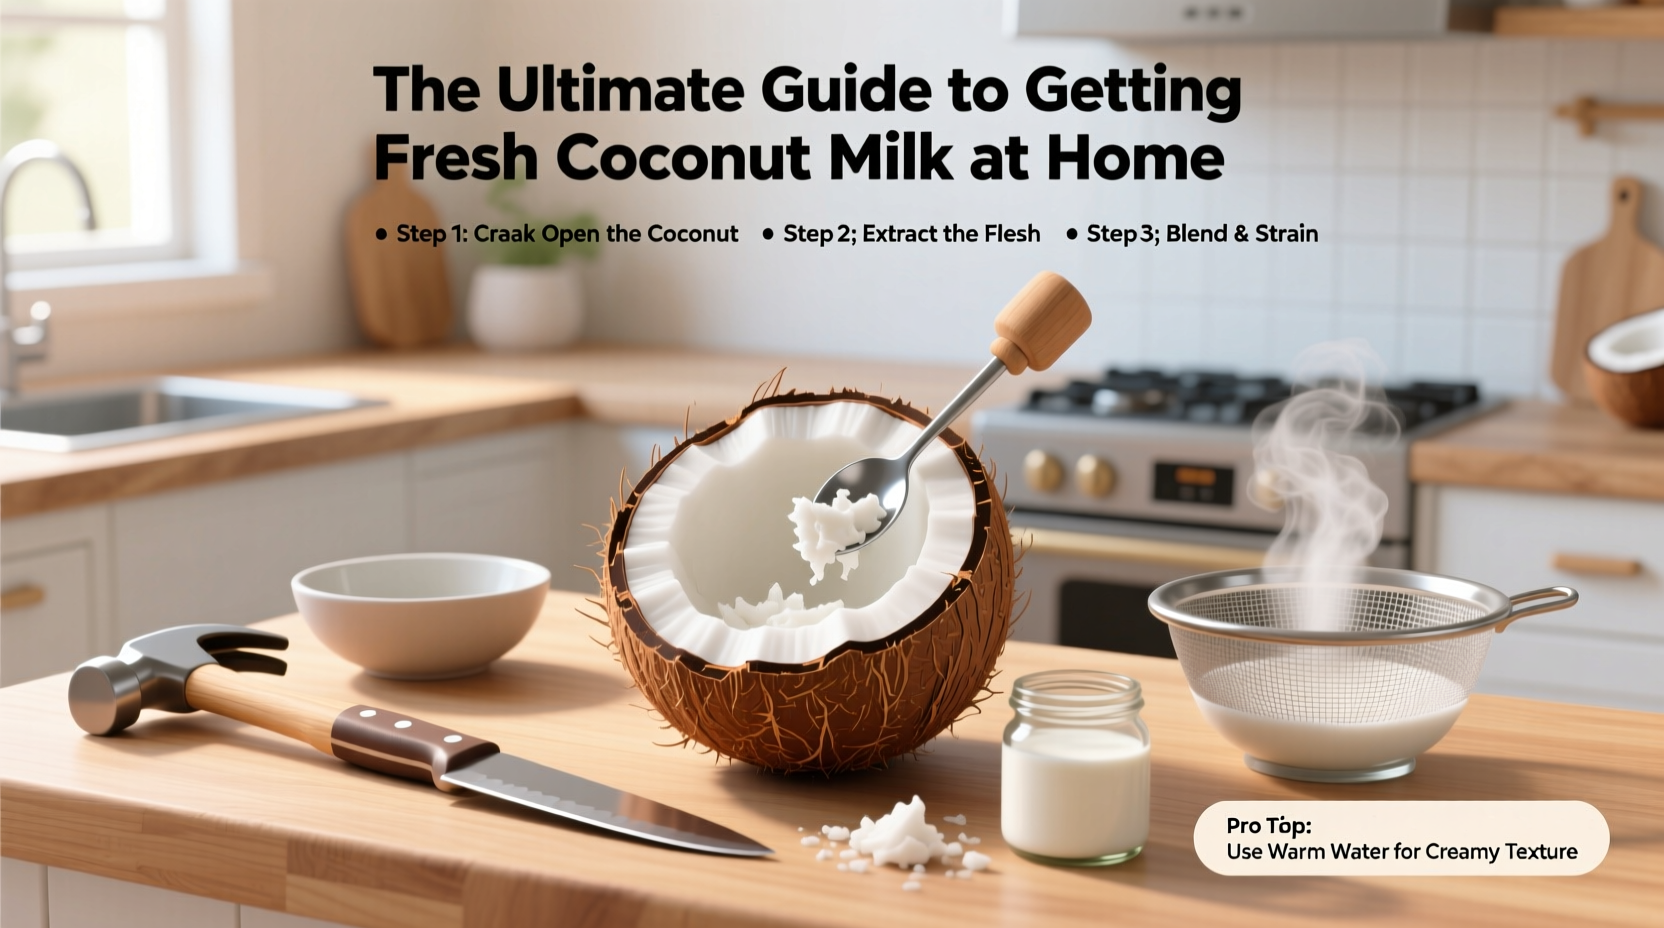
- Break open the shell: Tap firmly around the equator of the coconut using a hammer or the back of a heavy knife. Rotate as you tap until it cracks. Use a butter knife to pry the meat away from the shell.
- Grate or blend the flesh: Chop the white meat into small chunks. For traditional preparation, use a hand grater. For efficiency, pulse in a high-speed blender until finely shredded.
- Extract the milk: Combine 1 cup of grated coconut with 1 cup of warm (not boiling) water in a blender. Blend on high for 1–2 minutes until creamy.
- Strain the mixture: Pour through a fine-mesh sieve lined with cheesecloth or a nut milk bag. Squeeze firmly to extract all liquid. The thick milk collected is “first press” — the richest and creamiest.
- Second extraction (optional): Add another cup of warm water to the leftover pulp, blend again, and strain. This yields a thinner “second press” milk suitable for soups or rice.
Yield Comparison by Method
| Method | Coconut Used | Milk Yield (First Press) | Creaminess Level |
|---|---|---|---|
| Hand Grated + Squeezed | 1 medium coconut | ¾ cup | High |
| Blender + Straining | 1 medium coconut | 1 cup | Very High |
| Food Processor | 1 medium coconut | ⅔ cup | Moderate |
| Canned (store-bought) | N/A | 1 cup | Moderate (often diluted) |
Alternative Methods for Different Kitchens
Not everyone has a high-powered blender. Fortunately, there are low-tech ways to produce excellent coconut milk.
- Traditional mortar and pestle: Common in Southeast Asian households, this method involves grinding coconut flesh with a little water and squeezing through cloth. Labor-intensive but effective.
- Grater and muslin cloth: After grating, mix with warm water, then wrap in a clean cotton cloth and twist to extract milk. Ideal for small batches.
- Cold infusion (overnight method): Soak shredded dried coconut (unsweetened) in cold water overnight. Blend briefly and strain. Produces a milder, lighter milk.
Maximizing Flavor and Shelf Life
Freshness matters. Homemade coconut milk lacks preservatives, so proper handling extends usability.
Store in an airtight glass jar in the refrigerator for up to 4 days. A natural separation of cream and water will occur—this is normal. Simply shake or stir before use. For longer storage, freeze in ice cube trays and transfer to sealed bags. Thaw as needed for cooking.
To enhance flavor, lightly toast the coconut meat before blending. This deepens the aroma and adds a subtle nuttiness, perfect for curries and baked goods.
“Freshly extracted coconut milk has a floral, almost vanilla-like note that disappears in processed versions. It transforms simple dishes into something memorable.” — Chef Lani Torres, Culinary Instructor & Tropical Cuisine Specialist
Common Mistakes to Avoid
Even simple processes can go wrong. Here are frequent errors and how to prevent them:
| Mistake | Consequence | Solution |
|---|---|---|
| Using green coconuts | Less meat, watery milk | Choose mature brown coconuts |
| Boiling water in blend | Curdling or oily texture | Use warm, not hot, water |
| Incomplete straining | Grainy texture | Double-strain through cheesecloth |
| Storing in plastic containers | Odor absorption, faster spoilage | Use glass jars with tight lids |
What to Do with Leftover Pulp
Don’t discard the fiber-rich pulp after extraction. It’s still nutritious and useful.
- Dry it in a low oven (200°F) for 2–3 hours and grind into coconut flour for baking.
- Add to oatmeal, smoothies, or energy bars for fiber.
- Mix with essential oils and sugar for a natural body scrub.
- Use as a base for vegan crackers or cookies.
Mini Case Study: Maria’s Kitchen Transformation
Maria, a home cook from Miami, used to rely on canned coconut milk for her Puerto Rican-inspired stews. After switching to homemade milk, she noticed her sancocho tasted richer and more aromatic. She began cracking open coconuts weekly, saving time by pre-grating and freezing portions. Her family preferred the smoother texture, and her daughter, who had mild digestive issues with store-bought brands, tolerated the fresh version well. Within a month, Maria eliminated all canned coconut products from her pantry.
Checklist: How to Make Perfect Coconut Milk at Home
- ✔ Select a mature brown coconut with no cracks
- ✔ Drain the coconut water safely
- ✔ Break open and remove all white flesh
- ✔ Chop and blend with warm water (1:1 ratio)
- ✔ Strain through cheesecloth or nut milk bag
- ✔ Store in glass container; refrigerate or freeze
- ✔ Label with date for freshness tracking
Frequently Asked Questions
Can I use desiccated coconut instead of fresh?
Yes, unsweetened desiccated coconut works in a pinch. Use ¾ cup of dried coconut with 1 cup warm water. The result is slightly less creamy but still flavorful. Avoid sweetened or sulfited varieties.
Why does my coconut milk separate in the fridge?
Separation is natural due to the lack of emulsifiers. The cream rises to the top, forming a thick layer. Stir or whisk before using. This is a sign of purity, not spoilage.
Is fresh coconut milk healthier than canned?
Generally, yes. Homemade milk avoids additives and retains more natural enzymes and medium-chain fatty acids. However, both provide healthy fats—choose based on your ingredient preferences and dietary goals.
Final Thoughts and Call to Action
Making fresh coconut milk at home is simpler than most people think—and far more rewarding. With just a few minutes of effort, you unlock a deeper, cleaner flavor that elevates everything from morning porridge to evening curries. You also reduce reliance on processed foods and packaging waste. Once you taste the difference, there’s no going back.


 浙公网安备
33010002000092号
浙公网安备
33010002000092号 浙B2-20120091-4
Comments
No comments yet. Why don't you start the discussion?