
Attaching a phone chain to your iPhone case has become more than just a fashion statement—it’s a practical solution for preventing drops, enhancing grip, and expressing personal style. Whether you’re using a trendy beaded strap, a minimalist metal chain, or a durable nylon lanyard, the key is ensuring it's installed correctly. A poorly secured chain can snap, loosen, or damage your device. This guide walks you through every step of selecting, preparing, and attaching a phone chain securely so it stays put through daily use.
Why Use a Phone Chain?
Phone chains serve both functional and aesthetic purposes. They reduce the risk of accidental drops, especially in crowded spaces or while commuting. For those who frequently switch between holding their phone and doing other tasks—like taking notes or carrying bags—a chain keeps the device within reach. Fashion-forward users appreciate how a well-chosen chain complements outfits and adds flair to an otherwise plain case.
Additionally, many modern iPhone cases no longer include built-in lanyard holes, making DIY installation necessary. Understanding the right tools and techniques ensures your chain remains secure without compromising the integrity of your case or phone.
Selecting the Right Phone Chain and Case
Not all chains and cases are compatible. Before installation, consider these factors:
- Chain type: Metal, silicone, fabric, or beaded—each has different weight and attachment mechanisms.
- Attachment method: Some chains use clips, carabiners, or loops that require anchor points like rings or grommets.
- Case material: Rigid plastic, silicone, leather, or hybrid cases respond differently to modifications.
- Durability: The chain should support at least 5–10 times the weight of your iPhone to prevent strain.
Compatibility Checklist
| Chain Type | Best For | Avoid With |
|---|---|---|
| Metal link chain | Fashion-focused users, lightweight cases | Thin silicone cases (risk of tearing) |
| Nylon or polyester lanyard | Active lifestyles, outdoor use | Slippery glass-backed cases |
| Beaded decorative chain | Style emphasis, short-term wear | Rugged environments or heavy use |
| Silicone loop strap | Kids, frequent handling | Cases without reinforced corners |
“Many customers don’t realize that the weakest point isn’t the chain itself—it’s the connection point. Reinforcing the anchor makes all the difference.” — Jordan Lee, Mobile Accessory Designer
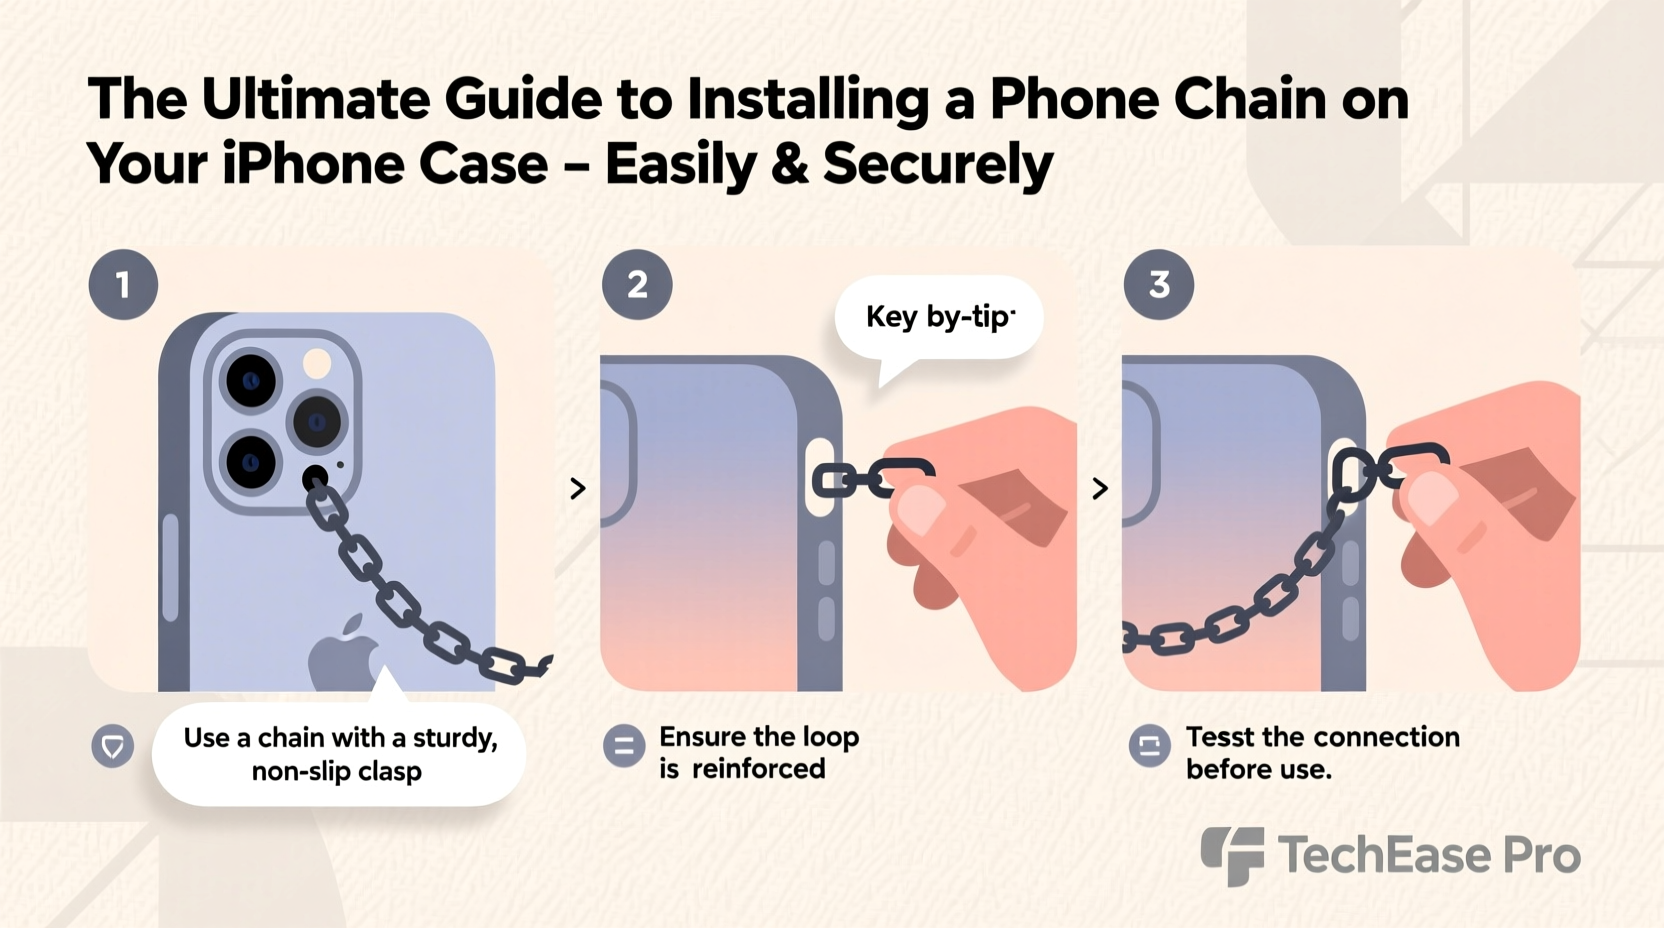
Step-by-Step Installation Guide
Follow this process to attach a phone chain securely to any iPhone case. This method works best with cases made from TPU, hard plastic, or silicone that allow for minor modification.
- Gather materials: Phone chain with connector (clip or ring), small metal D-ring or O-ring (6–8mm), rotary tool or pin, ruler, marker, rubber gloves (for grip).
- Choose attachment location: Opt for one of the lower corners of the case—this balances weight distribution and avoids interference with buttons or ports.
- Mark the drill point: Use a fine-tip marker to indicate where the hole will go, ideally near the edge but not too close to existing cutouts.
- Create the hole: If using a rotary tool, start slowly to avoid cracking. Alternatively, heat a thin needle and carefully pierce the spot. Widen gradually until the O-ring fits snugly.
- Insert the O-ring: Open the ring slightly with pliers, thread it through the new hole, then close securely.
- Attach the chain: Clip or loop the chain onto the O-ring. Ensure the closure mechanism locks firmly.
- Test stability: Gently tug the chain from multiple angles. There should be no wobbling or widening of the hole.
Alternative No-Drill Methods
If modifying your case isn't an option, consider these non-invasive approaches:
- Adhesive-backed hooks: Use ultra-strong double-sided tape (like 3M VHB) to mount a small hook on the back of the case.
- Case-specific add-ons: Brands like PopSockets and Moft offer snap-on accessories with lanyard loops compatible with MagSafe cases.
- Strap-through design: Thread the chain through existing openings such as camera bump surrounds or button covers—though this may compromise durability.
Common Mistakes and How to Avoid Them
Even experienced users make errors when installing phone chains. These pitfalls can lead to broken connections or damaged devices.
| Mistake | Consequence | Prevention |
|---|---|---|
| Placing the hole too close to edges | Cracking or splitting under stress | Keep at least 3mm distance from case perimeter |
| Using undersized O-rings | Chain detaches unexpectedly | Select rings rated for at least 5kg tensile strength |
| Over-tightening clips | Deforms soft case materials | Use smooth, rounded connectors instead of sharp-edged ones |
| Ignoring weight balance | Phone tilts or slips from hand | Center the chain or use dual-side straps for symmetry |
Real-World Example: Sarah’s Commute Upgrade
Sarah, a graphic designer in Brooklyn, used to lose her iPhone constantly during subway rides. After reading about lanyard trends, she bought a rose-gold chain with a magnetic clasp. She attempted to attach it using only adhesive, but it fell off twice within a week. Following the drilling method outlined here, she added a stainless steel O-ring to the corner of her rugged case. Six months later, the chain remains intact, even after being yanked when caught on a train door. “It’s held up better than I expected,” she said. “Now I never worry about dropping my phone while sketching on the go.”
FAQ
Can I install a phone chain on a MagSafe-compatible case?
Yes, but avoid drilling near the center ring where the MagSafe coil is located. Instead, place the O-ring in a lower corner. Many third-party MagSafe cases now come with built-in lanyard loops designed for easy attachment.
Will drilling a hole void my case warranty?
In most cases, yes. Modifying the case typically voids manufacturer warranties. Consider whether the convenience outweighs potential loss of coverage, especially with premium branded cases.
How do I clean and maintain my phone chain?
Wipe down metal chains weekly with a microfiber cloth and mild soap solution. Fabric straps should be removed and hand-washed monthly. Inspect connectors regularly for signs of wear, such as bent clasps or stretched rings.
Final Tips for Long-Term Security
To ensure lasting performance, inspect your phone chain setup every few weeks. Look for signs of stress on the case around the hole, check that the O-ring hasn’t loosened, and confirm the chain links aren’t fraying. Rotate between two chains if possible—one for daily wear, another for backup—to extend lifespan.
Also, consider your environment. Humidity, sweat, and exposure to sand or dirt accelerate wear. If you're heading to the beach or gym, remove the chain temporarily or opt for a quick-release system.
Conclusion
Installing a phone chain on your iPhone case doesn’t have to be risky or complicated. With the right tools, materials, and technique, you can create a secure, stylish, and functional accessory that enhances your everyday carry. From choosing durable components to precise hole placement and regular maintenance, each step contributes to long-term reliability. Now that you know how to do it safely, personalize your device with confidence.


 浙公网安备
33010002000092号
浙公网安备
33010002000092号 浙B2-20120091-4
Comments
No comments yet. Why don't you start the discussion?