
Making yogurt at home is simpler than most people think. With just two ingredients—milk and a starter culture—you can create a creamy, tangy, and nutritious yogurt free from additives, preservatives, and excess sugar. Unlike store-bought versions that often contain thickeners and stabilizers, homemade yogurt delivers pure flavor and superior texture when made correctly. This guide walks you through every detail: selecting the right milk, maintaining ideal temperatures, choosing a starter, and troubleshooting common issues—all so you can consistently produce luxuriously smooth yogurt in your own kitchen.
The Science Behind Yogurt Making
Yogurt forms when beneficial bacteria ferment lactose, the natural sugar in milk, into lactic acid. As lactic acid builds up, it lowers the pH of the milk, causing the proteins—mainly casein—to coagulate and thicken into the gel-like consistency we recognize as yogurt. The two primary bacterial strains used are Lactobacillus bulgaricus and Streptococcus thermophilus. These cultures not only transform texture but also enhance digestibility and support gut health.
Temperature control is critical. Too cold, and the bacteria won’t activate; too hot, and they’ll die. The ideal range for culturing is between 108°F and 112°F (42°C–44°C). Maintaining this warmth for 6 to 12 hours allows the bacteria to multiply and fully ferment the milk.
“Home fermentation gives you control over ingredient quality and probiotic potency—something commercial processing often diminishes.” — Dr. Lena Patel, Food Microbiologist
Essential Ingredients and Equipment
You don’t need fancy tools to make great yogurt. Most items are likely already in your kitchen.
Ingredients
- Milk: Whole milk produces the creamiest results due to its fat content. Ultra-pasteurized or pasteurized milk works well; avoid ultra-high-temperature (UHT) treated milk if possible, as excessive heat can damage proteins and affect texture.
- Starter Culture: Use plain, live-cultured yogurt from a previous batch or a store-bought container with active cultures listed on the label. Alternatively, use a freeze-dried yogurt starter for consistent results.
Equipment Checklist
- Heavy-bottomed saucepan
- Digital thermometer (instant-read or probe)
- Glass jars or containers with lids
- Whisk or spoon
- Insulated cooler, oven with pilot light, yogurt maker, or slow cooker for incubation
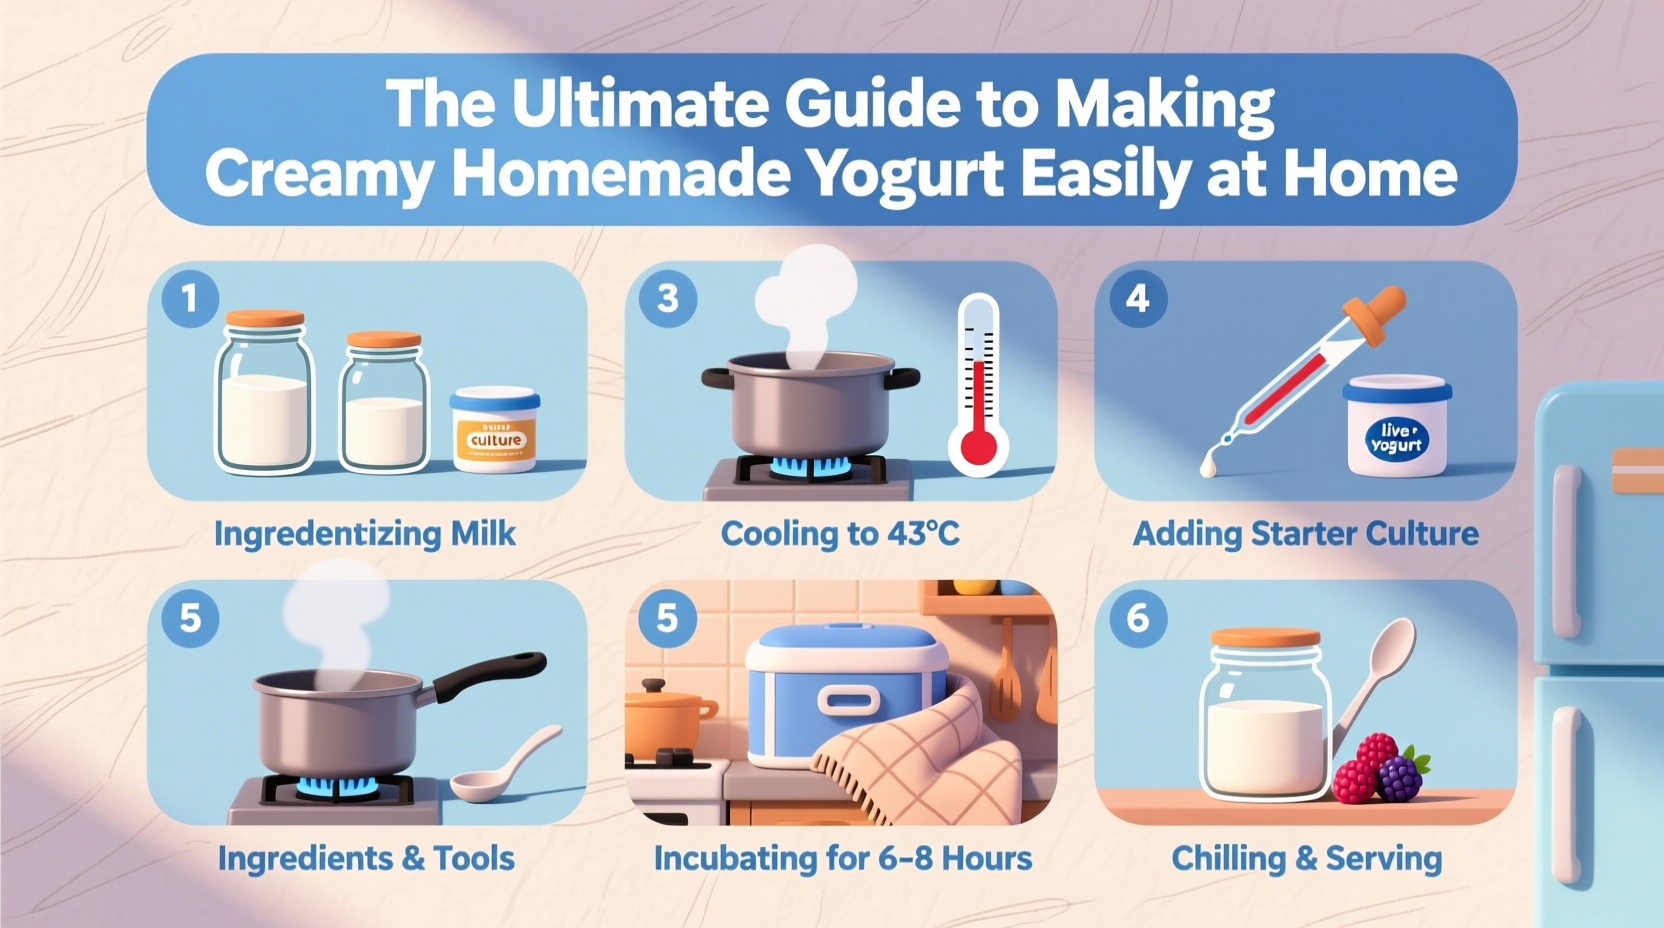
Step-by-Step Guide to Creamy Homemade Yogurt
- Heat the Milk: Pour 1 quart (about 1 liter) of milk into a saucepan. Heat slowly over medium heat until it reaches 180°F (82°C), stirring occasionally to prevent scorching. Holding it at this temperature for 20 minutes—or even just 5 minutes—denatures the whey proteins, which improves thickness.
- Cool the Milk: Transfer the milk to a clean container and cool it down to 110°F (43°C). You can speed this process by placing the pot in an ice bath, but monitor closely to avoid overshooting.
- Add the Starter: Once cooled, whisk in 2 tablespoons of live-cultured plain yogurt or a packet of freeze-dried starter. Mix thoroughly to distribute the bacteria evenly.
- Incubate: Pour the mixture into clean jars. Place them in a warm environment maintained at 108–112°F (42–44°C) for 6 to 12 hours. Longer incubation increases tartness and probiotic content but may lead to slight separation (whey on top).
- Chill: After incubation, refrigerate the yogurt for at least 6 hours. This halts fermentation and allows the texture to firm up significantly.
Choosing Your Incubation Method
Not everyone has a yogurt maker. Fortunately, several low-cost alternatives maintain stable temperatures effectively.
| Method | How It Works | Pros | Cons |
|---|---|---|---|
| Oven with Pilot Light | Turn off oven, leave door closed; residual heat maintains warmth | No extra energy use, consistent temp if pilot stays lit | Unreliable in modern ovens without pilot lights |
| Insulated Cooler | Fill with jars and top with warm water (110°F) | Excellent temperature stability, reusable | Requires monitoring and occasional water replacement |
| Slow Cooker | Preheat on low, turn off, place jars inside with lid on | Large capacity, retains heat well | May require reheating water halfway through |
| Yogurt Maker | Electric appliance designed to hold steady warmth | Precise, hands-off, ideal for regular batches | Additional cost, limited capacity |
| Instant Pot / Pressure Cooker | Use “Yogurt” function or keep warm mode | Programmable, consistent, multi-use | Initial investment required |
Tips for Consistently Creamy Results
Achieving restaurant-quality texture at home depends on small but impactful details.
- Use high-fat milk: Whole milk or adding cream yields a richer mouthfeel. For non-dairy options, full-fat coconut milk works best.
- Don’t skip the heating step: Heating to 180°F alters protein structure, enabling better water retention and a firmer set.
- Keep everything clean: Sterilize jars and utensils with boiling water to prevent contamination by unwanted microbes.
- Use fresh starters: Reusing homemade yogurt as a starter beyond 5–7 generations risks weakening cultures and inconsistent results.
- Minimize disturbance during incubation: Avoid shaking or moving jars, which can disrupt gel formation.
Real-Life Example: From Failed Batches to Perfect Texture
Sarah, a home cook in Portland, struggled for months with runny yogurt. She used skim milk, skipped the heating phase, and incubated in a turned-off microwave. After learning about protein denaturation and temperature precision, she switched to whole milk, heated it properly, and began using a cooler with warm water. Her next batch was thick, creamy, and slightly tangy—exactly what she wanted. Now she makes a new batch weekly, straining some for dips and using others in smoothies.
Frequently Asked Questions
Can I use raw milk to make yogurt?
Yes, but with caution. Raw milk contains natural bacteria that may compete with starter cultures. Some prefer to gently heat it to 165°F (74°C) to reduce competing microbes while preserving enzymes, then cool and inoculate as usual.
Why did my yogurt turn out grainy or lumpy?
This usually happens when the milk overheats or cools too quickly before adding the starter. Rapid temperature changes cause uneven protein coagulation. Always cool gradually and stir gently after adding the culture.
How long does homemade yogurt last?
Properly stored in sealed containers, it lasts 2 to 3 weeks in the refrigerator. The acidity preserves it, though it may become more sour over time. Always check for mold or off smells before consuming.
Final Thoughts and Next Steps
Homemade yogurt isn’t just economical—it’s customizable, healthier, and deeply satisfying to make. Once you master the basics, experiment with goat milk, add vanilla or honey post-incubation, or culture longer for higher probiotic content. Each batch deepens your understanding of fermentation and builds confidence in your kitchen skills.


 浙公网安备
33010002000092号
浙公网安备
33010002000092号 浙B2-20120091-4
Comments
No comments yet. Why don't you start the discussion?