
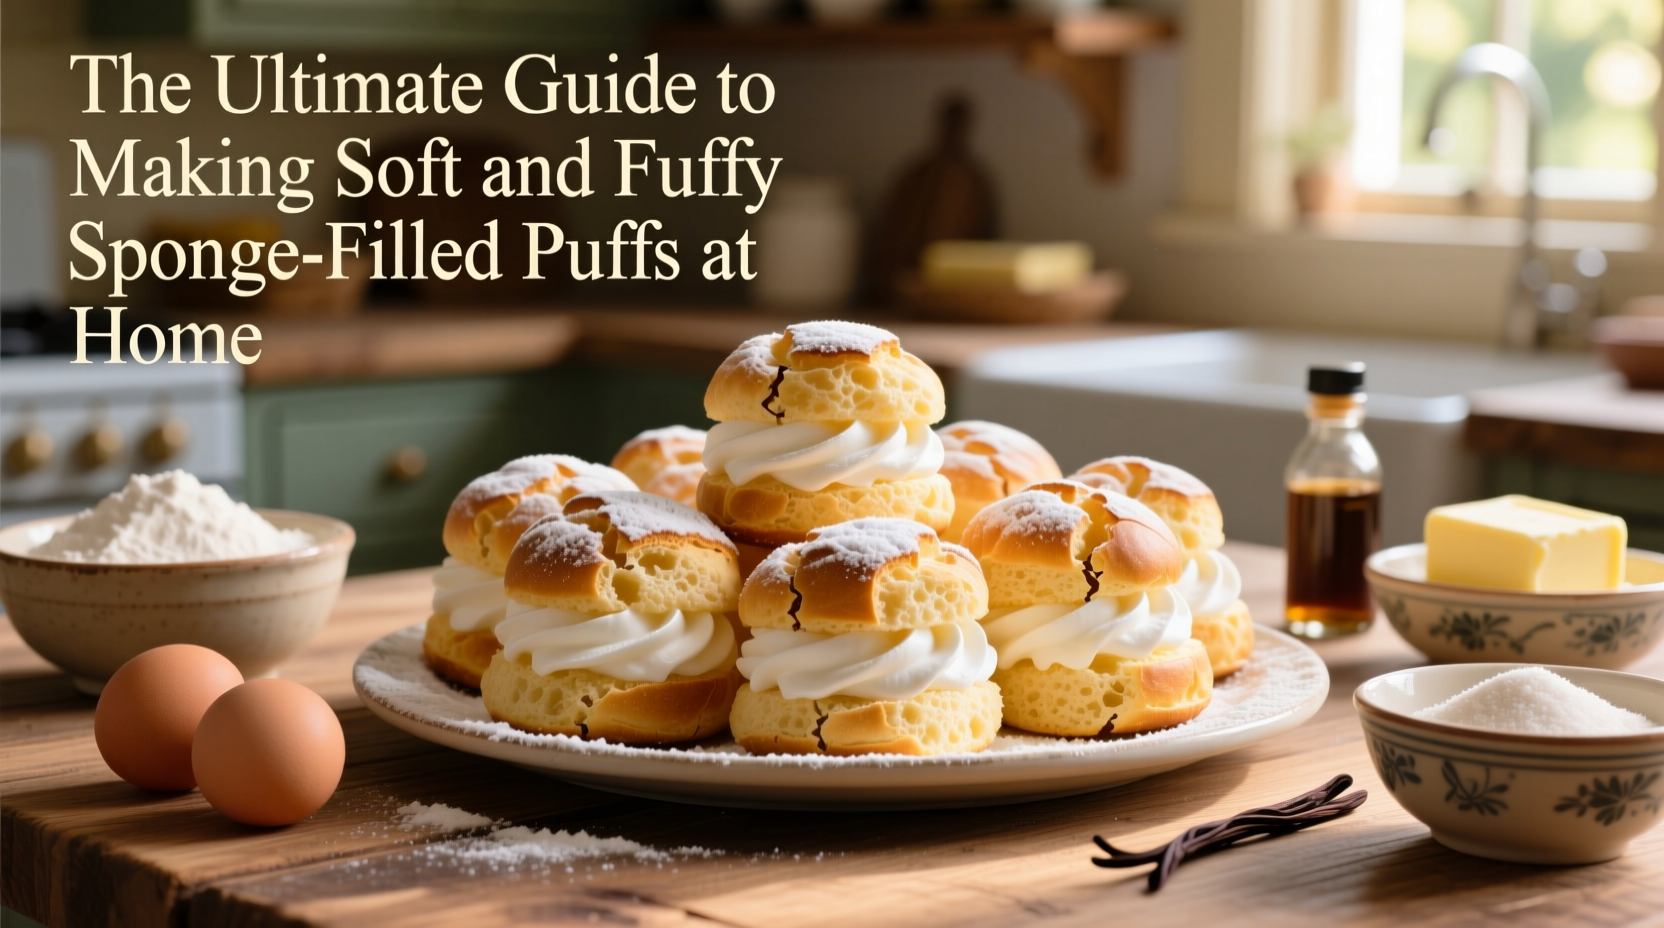
There’s something deeply satisfying about biting into a perfectly baked puff—light as air, tender on the inside, and filled with a creamy or fruity surprise. Sponge-filled puffs are a staple in patisseries around the world, but they don’t need to stay behind glass cases. With the right techniques and attention to detail, you can recreate these delicate pastries in your own kitchen. This guide walks you through every step: from crafting a flawless sponge to filling and finishing with professional precision.
The Science Behind the Perfect Sponge
The foundation of any great filled puff is the sponge cake layer. Unlike dense cakes, sponge relies on whipped eggs to create its airy structure. The key lies in incorporating air during the egg-whipping phase. When eggs (whole or separated) are beaten vigorously with sugar, they trap air bubbles that expand in the oven, giving the cake lift and tenderness.
Two primary methods dominate sponge-making: the whole-egg method and the separated-egg (genoise-style) method. The former involves whisking whole eggs and sugar over heat until lukewarm, then whipping them to ribbon stage. The latter separates yolks from whites, beating each separately before folding together. Both work well, but the separated method often yields a lighter crumb due to stiffer meringue-like peaks from the whites.
Essential Ingredients and Equipment
High-quality ingredients matter, but simplicity is key. A classic sponge requires only four core components: eggs, sugar, flour, and a touch of fat or liquid for moisture. Overcomplicating the recipe can weigh down the delicate structure.
- Eggs: Large, free-range if possible. They provide structure and leavening.
- Granulated sugar: Helps stabilize the egg foam and adds sweetness without altering texture.
- Cake flour: Lower in protein than all-purpose, ensuring a softer crumb.
- Unsalted butter or neutral oil: A small amount enhances richness without deflating the batter.
- Filling options: Pastry cream, whipped cream, fruit curd, or chocolate ganache.
Equipment-wise, you’ll need a stand mixer or hand mixer, a silicone spatula, a sifter, a baking sheet with parchment paper, and a piping bag for filling.
Step-by-Step Guide to Making Sponge-Filled Puffs
- Preheat and prepare: Set your oven to 350°F (175°C). Line a baking sheet with parchment paper.
- Whip the eggs and sugar: In a heatproof bowl, combine eggs and sugar. Place over a simmering water bath, whisking constantly until the mixture reaches 110°F (43°C). Remove and beat with a mixer on high speed for 8–10 minutes until thick, pale, and tripled in volume.
- Sift in flour: Gently fold in sifted cake flour in two batches using a silicone spatula. Rotate the bowl while folding to maintain volume.
- Add fat: Melt a tablespoon of butter and mix with a spoonful of batter. Fold this back into the main mixture to lighten it before spreading.
- Bake: Spread evenly onto the prepared sheet, about ½ inch thick. Bake for 12–15 minutes until golden and springy to the touch.
- Cool completely: Let the sponge cool on a wire rack. Do not skip this step—warm sponge will collapse when cut or filled.
- Prepare filling: While cooling, make your chosen filling. For pastry cream, scald milk, whisk yolks and sugar, temper, return to heat, and cook until thick. Cool with plastic wrap touching the surface.
- Cut and fill: Cut the sponge into rectangles or squares. Slice horizontally to create layers, pipe in filling, and reassemble.
Common Pitfalls and How to Avoid Them
Even experienced bakers face challenges with sponge cakes. Here’s a breakdown of frequent issues and solutions:
| Problem | Possible Cause | Solution |
|---|---|---|
| Sponge collapses after baking | Underbaked, opened oven too soon, or overmixed batter | Bake until set, avoid opening oven door early, fold gently |
| Dense or rubbery texture | Eggs not whipped enough or flour overfolded | Whip eggs to ribbon stage, fold flour carefully |
| Cracks on surface | Oven too hot or batter too stiff | Lower temperature slightly, ensure proper mixing |
| Filling leaks out | Overfilled or sponge too soft | Use firm fillings like stabilized whipped cream, don’t oversaturate |
“Sponge is forgiving if you respect the aeration process. The moment you stop treating the batter like a fragile cloud, you lose the magic.” — Chef Lila Nguyen, Pastry Instructor at Paris Culinary Atelier
Mini Case Study: From Kitchen Fail to Café Favorite
Sarah, a home baker from Portland, tried making sponge puffs for her daughter’s birthday. Her first attempt resulted in flat, gummy layers. After reviewing her technique, she realized she’d used cold eggs and skipped the water bath. She also folded the flour too aggressively. On her second try, she warmed the eggs, whipped them longer, and folded with care. The result? A batch so light and flavorful that her neighbors began placing orders. Within months, she launched a weekend pop-up selling seasonal puffs—strawberry-lime in summer, spiced pear in winter.
Her secret? Consistency and patience. “I treat each batch like it’s going into a five-star hotel,” she says. “And now, people tell me mine taste better than store-bought.”
Flavor Variations and Creative Fillings
Once you’ve mastered the base sponge, experimentation opens up endless possibilities. Consider infusing flavor directly into the sponge or focusing on inventive fillings.
- Lemon-vanilla sponge: Add zest and extract to the batter.
- Chocolate swirl: Mix cocoa powder into part of the batter and marble it.
- Matcha sponge: Sift in 1–2 tsp of ceremonial-grade matcha.
For fillings:
- Pastry cream infused with lavender or espresso
- Whipped mascarpone with honey and berries
- Coconut custard with toasted flakes
- Dark chocolate ganache with orange zest
Storage and Serving Tips
Sponge-filled puffs are best enjoyed within 24 hours. Store them in an airtight container in the refrigerator, but bring to room temperature before serving for optimal texture. Avoid freezing assembled puffs—filling tends to separate. However, unfilled sponge layers can be frozen for up to a month. Wrap tightly in plastic and thaw slowly before use.
FAQ
Can I make sponge puffs without a mixer?
Yes, but it’s labor-intensive. Whisking by hand requires 15–20 minutes of vigorous effort to achieve proper volume. A hand mixer is a practical middle ground.
Why did my sponge shrink after baking?
Shrinkage often results from underbaking or insufficient aeration. Ensure your oven is properly preheated and that eggs are whipped to full ribbon stage.
Can I use gluten-free flour?
Yes, but choose a high-quality gluten-free cake blend. Some brands include xanthan gum, which helps mimic gluten’s binding properties. Test in small batches first.
Conclusion: Bring the Patisserie Home
Creating soft, fluffy sponge-filled puffs isn’t reserved for professionals. With careful attention to ingredient temperature, mixing technique, and gentle handling, anyone can produce bakery-worthy treats. The joy of slicing into a homemade puff—revealing a lush center nestled in pillowy cake—is unmatched. Whether you're baking for family, impressing guests, or starting a small venture, this skill opens doors to creativity and delight.


 浙公网安备
33010002000092号
浙公网安备
33010002000092号 浙B2-20120091-4
Comments
No comments yet. Why don't you start the discussion?