
Selecting the perfect ring goes beyond style and metal choice—fit is everything. A ring that's too tight cuts off circulation and causes discomfort; one that's too loose slips off at the worst moment. Whether you're shopping online, surprising a loved one, or resizing an heirloom, accurate measurement is non-negotiable. This guide breaks down how to measure ring size with precision for both closed (traditional) and open (adjustable) styles, using reliable methods, practical tools, and expert-backed insights.
Understanding Ring Sizing Systems
Rings are sized differently around the world. The most common systems include the US numeric scale (e.g., size 6), UK alphabetical (e.g., L½), and millimeter-based inner diameter measurements. Conversion between these systems exists, but inconsistencies can occur across brands and regions.
Closed rings have a fixed circumference, so precise sizing is critical. Open rings, often called adjustable or hinged bands, offer flexibility in fit but still require proper alignment to maintain comfort and durability. Misjudging even half a size can compromise wearability.
“Over 40% of online ring returns are due to incorrect sizing. Measuring correctly the first time saves time, money, and heartache.” — Daniel Reeves, Master Jeweler & GIA Certified Appraiser
How to Measure Closed Ring Size Accurately
Closed rings demand exact internal diameter or circumference measurement. Use one of the following proven methods:
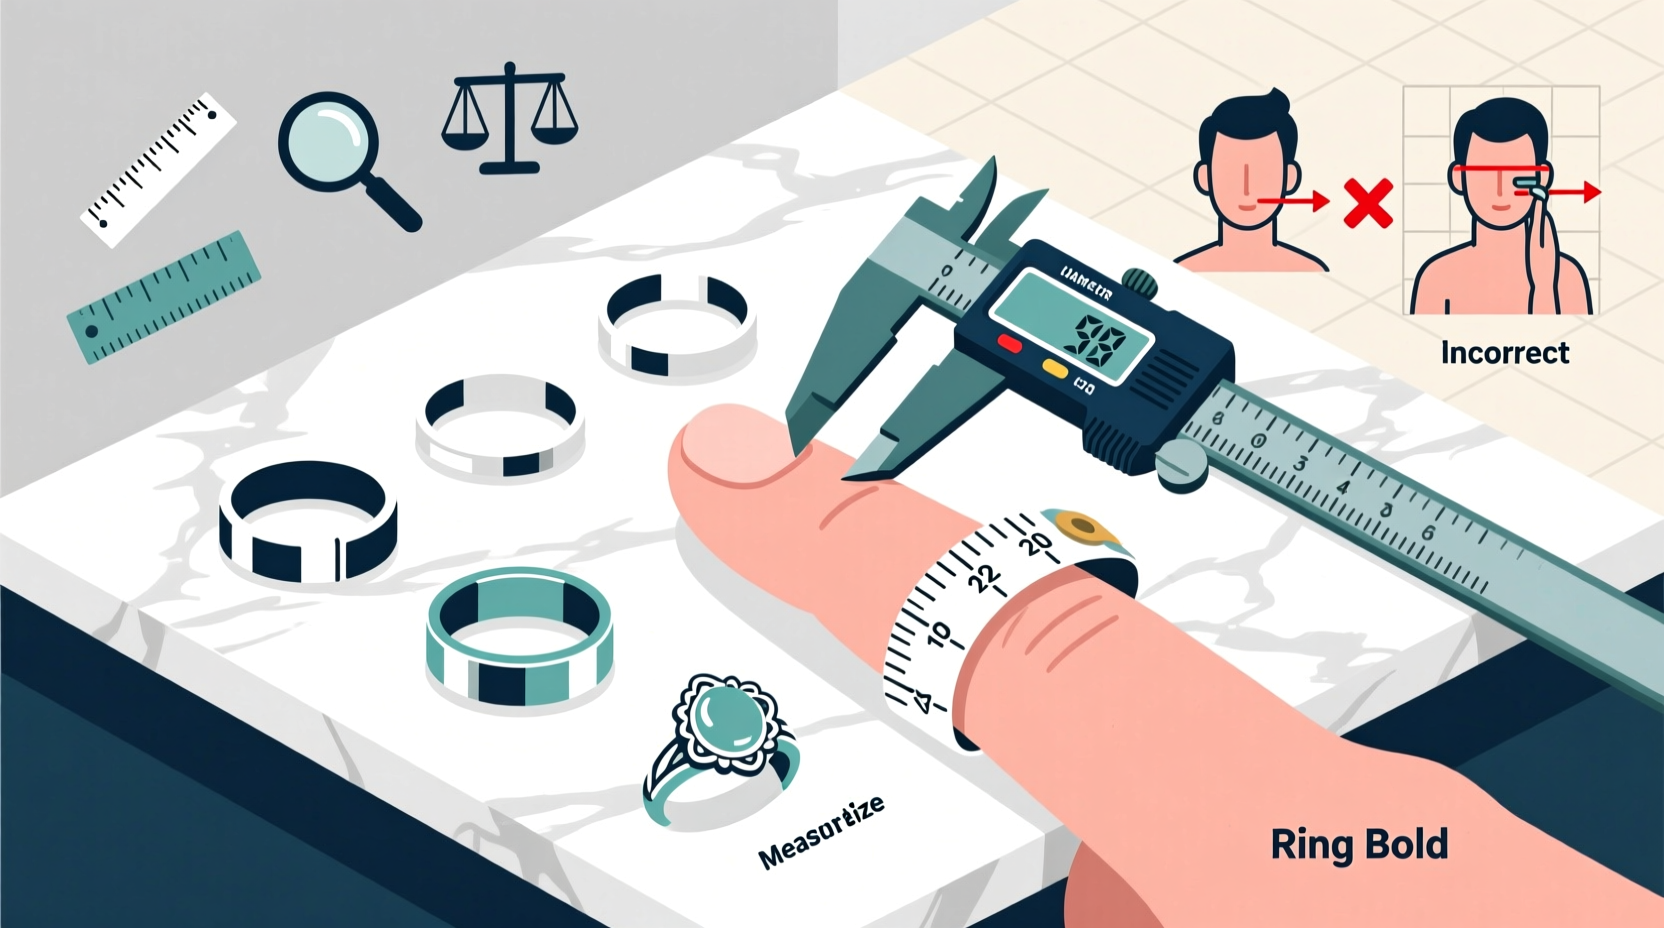
Method 1: Using a Ring You Already Own
If the wearer already has a well-fitting ring, this is the most accurate starting point.
- Choose a ring from the correct finger—the ring finger on the dominant hand is typically larger than the non-dominant side.
- Measure the inner diameter in millimeters using a digital caliper or ruler.
- Convert the diameter to a standard ring size using a conversion chart.
Method 2: String or Paper Strip Technique
This DIY method works when no existing ring is available.
- Cut a thin strip of paper or use a non-stretchy string (about 15 cm long).
- Wrap it snugly around the base of the intended finger, just below the knuckle.
- Mark where the ends overlap.
- Lay the strip flat and measure the length in millimeters—this is your finger’s circumference.
- Use a ring size chart to convert the measurement.
Note: Avoid wrapping too tightly. You should be able to slide the strip over the knuckle comfortably once, simulating how a real ring moves.
Method 3: Printable Ring Sizer
Download a calibrated ring sizer PDF from a reputable jeweler or gemological institute. Print it at 100% scale (no resizing) and verify accuracy using the test square provided. Align the ring or finger with the circles until a perfect fit is found.
| Finger Circumference (mm) | US Size | UK Size | Diameter (mm) |
|---|---|---|---|
| 48.8 | 4 | H | 15.5 |
| 51.9 | 5 | J | 16.5 |
| 54.9 | 6 | L | 17.5 |
| 58.0 | 7 | N | 18.5 |
| 61.1 | 8 | P | 19.5 |
| 64.2 | 9 | R | 20.5 |
| 67.3 | 10 | T | 21.5 |
Measuring Open or Adjustable Rings Correctly
Open rings differ from closed ones because they lack a full band. Their fit depends on spring tension and curvature rather than fixed diameter. However, many buyers assume any open ring fits all sizes—an assumption that leads to poor ergonomics and damage over time.
To determine compatibility:
- Check the manufacturer’s specified range (e.g., “fits sizes 5–8”).
- Compare your measured finger size to this range.
- Ensure the gap between the band ends is no more than 5–7 mm when worn—larger gaps reduce structural integrity.
When trying on an open ring, press gently on the band ends. It should resist slight pressure without spreading excessively. If it opens easily under touch, it’s too loose and may deform.
Common Mistakes That Skew Ring Measurements
Even careful attempts fail when subtle errors go unnoticed. These pitfalls routinely compromise accuracy:
| Mistake | Why It Matters | How to Avoid |
|---|---|---|
| Measuring cold fingers | Fingers shrink in cold weather, leading to oversizing | Warm hands first; measure indoors after 15 minutes |
| Using stretchy thread | Stretches during measurement → inaccurate circumference | Use dental floss or thin twine instead |
| Ignoring knuckle size | A ring may fit the shaft but not slide over the knuckle | Test fit by sliding a known ring on and off |
| Guessing based on jewelry boxes | Old rings may have been resized or poorly fitted | Verify with current, comfortable rings only |
Professional Tools vs. At-Home Methods
While home techniques work in a pinch, professionals rely on precision instruments:
- Ring Mandrel: A tapered steel cone marked with size increments. Sliding a ring down reveals its exact position.
- Digital Calipers: Measure internal diameter to 0.1mm accuracy—ideal for verifying online purchases.
- Ring Gauge Set: A set of metal rings in incremental sizes used to test fit directly on the finger.
For engagement or wedding bands meant to last decades, consider visiting a local jeweler for a free professional sizing. Most stores offer this service without obligation.
Mini Case Study: The Overseas Proposal
Sarah wanted to surprise her partner with an engagement ring while traveling abroad. With no access to his rings, she used photos to estimate size. She noted he wore a watch on his left hand and compared it visually to a ring he wore on another finger. She then asked a mutual friend to discreetly borrow one of his rings for 20 minutes, measured it with a caliper, and cross-referenced the diameter with three international charts. The ring arrived perfectly sized—no resizing needed. Her attention to detail avoided a costly mistake.
Step-by-Step Checklist for Perfect Ring Sizing
Follow this sequence whether buying for yourself or someone else:
- Measure at the end of the day when fingers are average size.
- Use a ring already worn on the target finger, if possible.
- If no ring is available, use the paper-and-ruler method with non-stretch material.
- Double-check measurements twice, 10 minutes apart.
- Account for ring width—wider bands (over 6mm) often feel tighter; consider going up half a size.
- Consult a conversion chart specific to the brand’s origin country.
- For open rings, confirm the adjustability range matches your measurement.
- When in doubt, opt for a slightly looser fit—you can always add sizing beads later.
Frequently Asked Questions
Can I resize any ring after purchase?
Most precious metal rings can be resized professionally, but limitations exist. Tungsten, ceramic, and wood-inlay rings cannot be resized. Bands with intricate channel settings or engravings risk damage during resizing. Always check with the jeweler before assuming resizability.
Do men’s and women’s rings use different sizing standards?
No. Ring sizing is gender-neutral. The US scale runs from size 3 to 15 for both men and women. Average female size ranges from 5–7; male averages from 8–10. The system is universal within each region.
How often should I remeasure my ring size?
At least every two years. Weight fluctuations, aging, pregnancy, and medical conditions like arthritis can alter finger size significantly. Seasonal changes may also affect fit—some people need different rings for summer and winter.
Final Thoughts: Precision Makes All the Difference
A perfectly fitting ring feels invisible—secure, balanced, and effortless. Whether choosing a lifelong band or a statement piece, taking the time to measure correctly transforms uncertainty into confidence. Combine trusted methods with awareness of material behavior and anatomical variation, and you’ll avoid common pitfalls that lead to disappointment.


 浙公网安备
33010002000092号
浙公网安备
33010002000092号 浙B2-20120091-4
Comments
No comments yet. Why don't you start the discussion?