
Clean floors are more than just a visual standard—they’re essential for hygiene, safety, and the longevity of your flooring. Yet, many people mop incorrectly, spreading dirt, damaging surfaces, or creating slipping hazards. The truth is, effective mopping isn’t about effort; it’s about method. With the right tools, technique, and timing, you can achieve spotless, dry, and sanitized floors in less time and with less strain.
This guide breaks down everything you need to know: from choosing the correct mop and solution for your floor type, to avoiding common mistakes that undermine your cleaning efforts. Whether you have hardwood, tile, vinyl, or laminate, these strategies will help you clean smarter, not harder.
Understanding Your Floor Type
Not all floors respond well to water and traditional mopping. Using the wrong method can lead to warping, discoloration, or mold growth. Before you even pick up a mop, identify your flooring material and its care requirements.
| Floor Type | Water Tolerance | Recommended Mop | Avoid |
|---|---|---|---|
| Hardwood (sealed) | Low – damp only | Microfiber flat mop | Steam mops, excess water |
| Laminate | Very low – minimal moisture | Dry or slightly damp microfiber | Wet mopping, steam |
| Vinyl (LVT) | Moderate – water-safe | Sponge or microfiber mop | Harsh chemicals, abrasive pads |
| Ceramic/Stone Tile | High – water-resistant | String mop, sponge mop, or microfiber | Acidic cleaners on natural stone |
Using inappropriate moisture levels is one of the top causes of premature floor damage. Always check manufacturer guidelines before cleaning.
The Right Tools Make All the Difference
Even the most diligent cleaner will struggle with outdated or poorly suited equipment. Modern mopping systems offer better control, efficiency, and hygiene than traditional string mops and buckets.
- Microfiber flat mops: Ideal for hardwood and laminate. They trap dust, allergens, and fine debris without scratching. Washable and reusable.
- Sponge mops: Effective on tile and vinyl. Absorb more liquid but require thorough wringing to avoid oversaturation.
- Spin mops with bucket systems: Feature built-in wringers for consistent moisture control. Save time and reduce back strain.
- Washable mop pads: More sustainable and cost-effective than disposable pads. Change them weekly or after heavy messes.
“Over-wetting floors is the number one mistake homeowners make. A damp mop—not a dripping one—is what keeps floors clean and safe.” — Laura Simmons, Professional Home Organizer & Cleaning Consultant
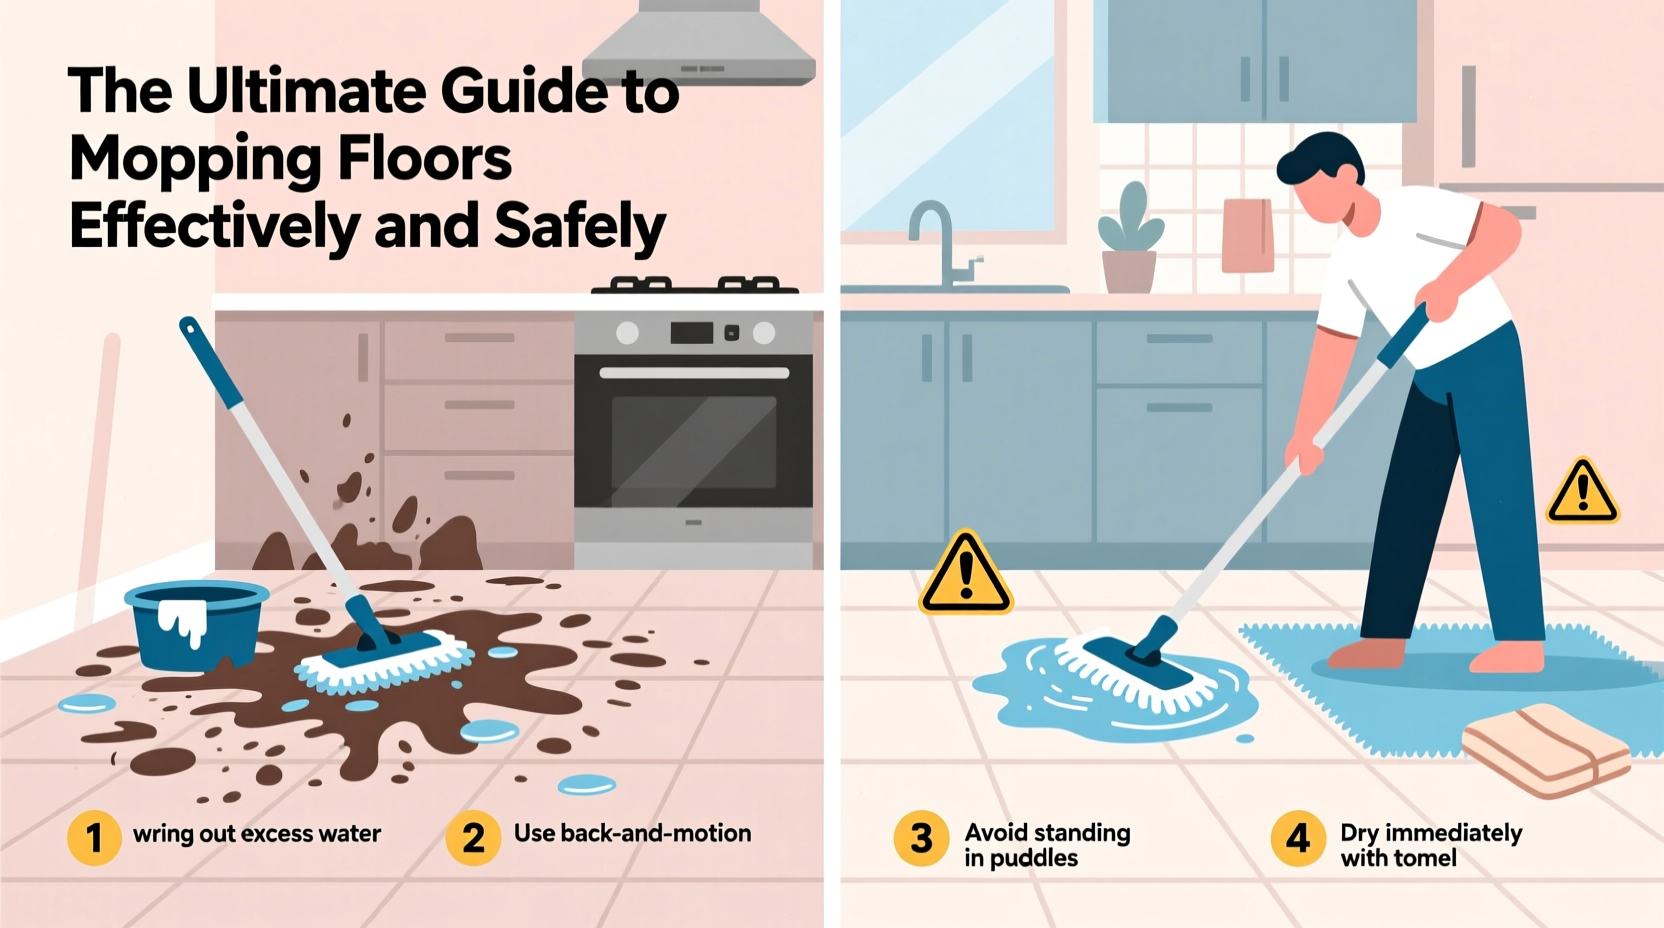
Step-by-Step: How to Mop Floors Effectively and Safely
Follow this sequence to ensure maximum cleanliness and minimize risk of slips or damage.
- Clear the area: Remove small rugs, furniture, and obstacles. This prevents missed spots and reduces tripping hazards.
- Dry sweep or vacuum: Eliminate loose dirt, pet hair, and crumbs. Mopping over debris turns your mop into a mud-spreader.
- Prepare the cleaning solution: Use a pH-neutral cleaner for most floors. For tile, a mix of warm water and a few drops of dish soap works. Never use vinegar on natural stone—it etches the surface.
- Fill and wring properly: Dip the mop and wring until it’s damp, not wet. If using a spin mop, follow the bucket’s indicator lines.
- Mop in sections: Work in 3x3 foot areas, using S-shaped motions. Start from the farthest corner and move toward the exit to avoid walking on cleaned floors.
- Rinse and re-wring frequently: Every 2–3 sections, rinse the mop head and wring again. Dirty water spreads grime.
- Dry if needed: On sensitive floors like laminate, go over with a dry microfiber cloth to prevent moisture buildup.
- Clean your tools: Rinse the mop head thoroughly and hang it to dry. Wash reusable pads in hot water weekly.
Common Mistakes That Undermine Your Efforts
Even experienced cleaners fall into these traps:
- Skipping pre-cleaning: Mopping over grit scratches floors and dulls finishes.
- Using too much cleaner: Leaves behind sticky residue that attracts more dirt.
- Reusing dirty water: Spreads bacteria and soil instead of removing it.
- Ignoring corners and edges: Use a microfiber cloth or edge brush to reach baseboards and tight spaces.
- Walking on wet floors: Causes streaks and reintroduces footprints and oils.
Mini Case Study: The Kitchen Dilemma
Janet, a homeowner in Portland, noticed her kitchen floor was always dull and sometimes felt sticky despite daily mopping. She switched from a string mop and bleach solution to a microfiber flat mop with a pH-neutral cleaner and began sweeping first. Within a week, her floor looked visibly brighter and stayed cleaner longer. The change wasn’t in frequency—it was in method.
Essential Mopping Checklist
Use this checklist before every mopping session to ensure consistency and effectiveness:
- ☐ Remove rugs and small furniture
- ☐ Sweep or vacuum thoroughly
- ☐ Check mop pad condition—replace if frayed or stained
- ☐ Fill bucket with clean, warm water
- ☐ Add appropriate cleaner (follow dilution instructions)
- ☐ Wring mop until damp, not dripping
- ☐ Mop in S-patterns, section by section
- ☐ Rinse and re-wring mop every few feet
- ☐ Allow floor to air-dry or buff with dry cloth
- ☐ Clean and store mop properly after use
FAQ: Frequently Asked Questions
How often should I mop different types of floors?
High-traffic areas like kitchens and entryways benefit from mopping once a week. Less-used rooms can be mopped every two weeks. Hardwood and laminate need only light damp mopping monthly unless soiled.
Can I use vinegar to mop my floors?
Vinegar is effective on sealed tile and porcelain but should never be used on natural stone, waxed wood, or unsealed grout. Its acidity can degrade finishes over time. For general use, a commercial pH-neutral cleaner is safer.
Why does my floor leave streaks after mopping?
Streaks usually result from using too much water, dirty mop water, or not rinsing the mop frequently enough. Try switching to a microfiber mop and change your water mid-clean. Dry buffing with a clean towel can also eliminate streaks.
Final Thoughts and Call to Action
Mopping doesn’t have to be a dreaded chore. When done correctly, it takes less time, protects your investment in quality flooring, and contributes to a healthier home environment. The key lies in preparation, precision, and using the right tools for your specific floor type.
You don’t need expensive products—just smart habits. Start applying these steps today: sweep first, wring well, mop in sections, and maintain your tools. Small changes yield big results.


 浙公网安备
33010002000092号
浙公网安备
33010002000092号 浙B2-20120091-4
Comments
No comments yet. Why don't you start the discussion?