
Adjustable rings offer unmatched versatility, allowing wearers to customize fit across fingers without needing multiple sizes. Whether it’s a sentimental gift, a trendy accessory, or a handmade piece, knowing how to adjust it properly ensures comfort, longevity, and confidence in its appearance. While many assume only a professional jeweler can handle such tasks, most adjustable rings are designed for at-home sizing. With the right technique and care, you can achieve a flawless fit in minutes—without damaging the metal or design.
Understanding Adjustable Ring Mechanics
Not all rings labeled “adjustable” function the same way. The two most common types are open-band and sliding-adjustment designs. Open-band rings have a gap between the ends of the band, allowing gentle bending to tighten or loosen the circumference. Sliding-adjustment rings feature interlocking grooves or a screw mechanism that lets you resize by shifting components along the band.
Before making any adjustments, identify your ring type:
- Open-band: Usually made from malleable metals like sterling silver, gold-filled, or brass. These can be carefully bent using fingertips or pliers.
- Sliding/groove-based: Often seen in puzzle rings or modern minimalist bands. Adjustment involves aligning ridges or tightening screws.
- Screw-type: Less common but highly precise. Requires a tiny screwdriver to expand or contract the band.
Misidentifying the mechanism can lead to breakage. For example, forcing an open-band ring beyond its elastic limit may cause cracking, especially in brittle alloys or vintage pieces.
“Most damage to adjustable rings happens not from use, but from over-adjusting or using improper tools.” — Daniel Reyes, Master Jeweler & Repair Specialist
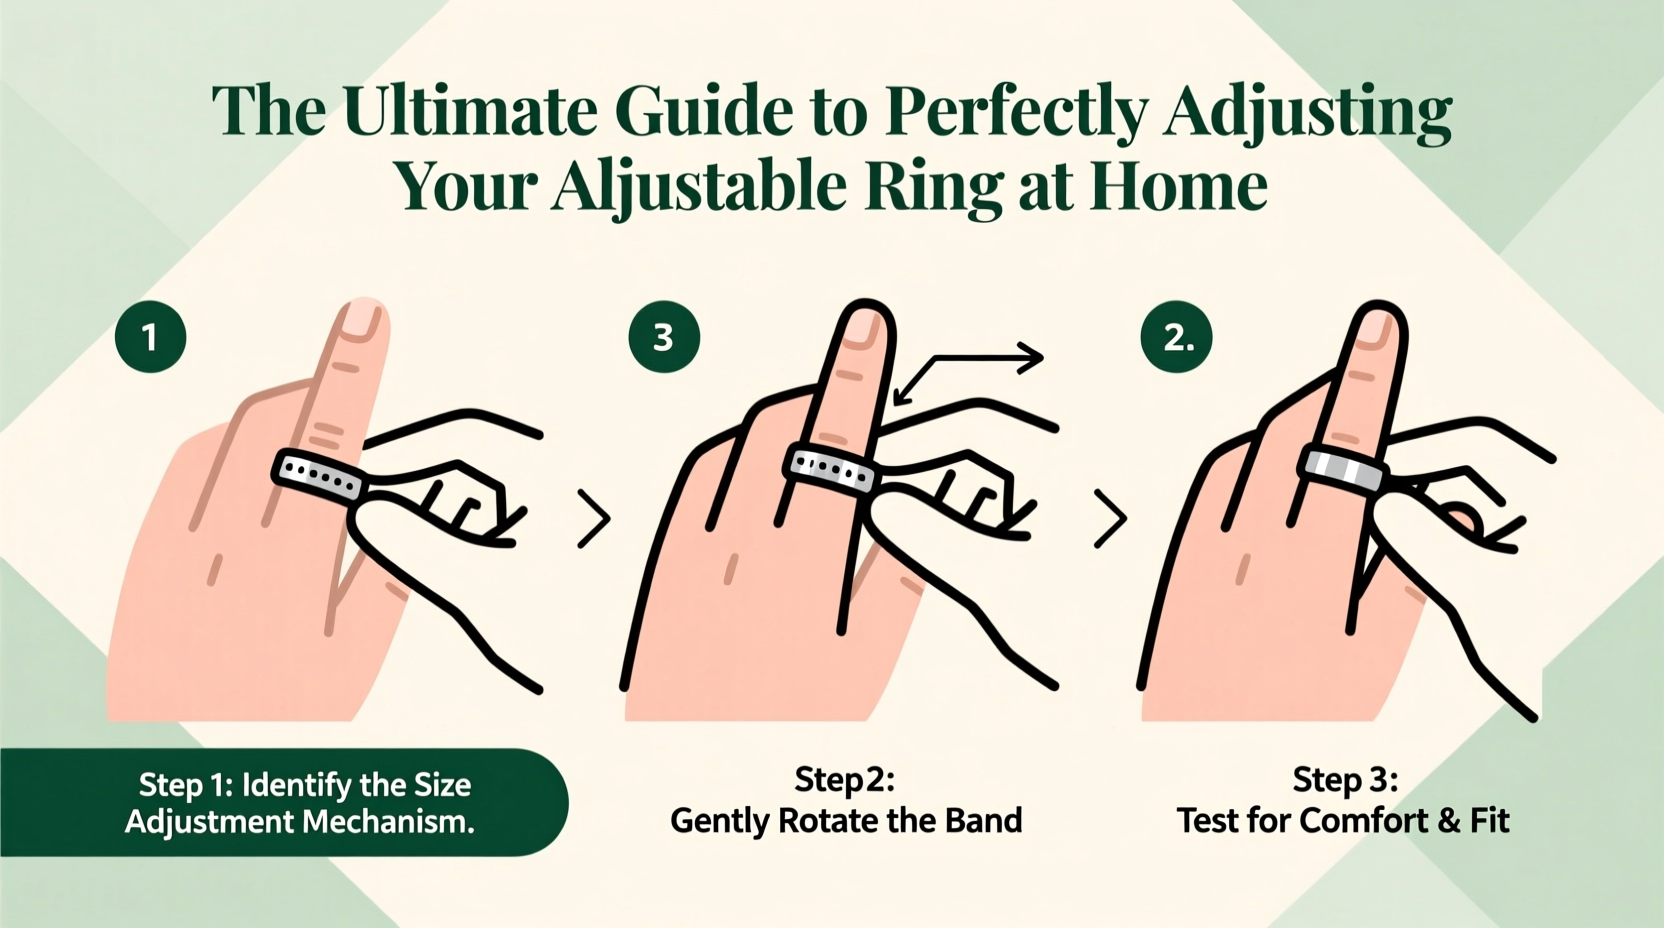
Step-by-Step Guide to Resizing Your Adjustable Ring
Follow this detailed process to resize your ring safely and accurately. This method applies primarily to open-band styles, which make up over 70% of adjustable rings on the market.
- Measure your finger size: Use a printable ring sizer or wrap a thin strip of paper around your finger. Mark where it overlaps, then measure the length with a ruler. Compare it to a standard ring size chart.
- Clean the ring: Wipe it with a soft cloth dampened with mild soapy water. Dry thoroughly to prevent slippage during adjustment.
- Position the ring correctly: Hold the ring with both hands, placing your thumbs on the inside curve and index fingers on the outside edges.
- Make small adjustments: Gently press the ends toward each other to tighten, or pull them apart to loosen. Apply even pressure—never twist or torque the band.
- Test the fit frequently: Slide the ring onto your finger every few millimeters of change. It should slide on with slight resistance but not pinch.
- Finalize and smooth: Once the fit feels right, check for symmetry. If one side sits higher than the other, gently realign by hand.
Essential Tools and Materials
While some adjustments require only bare hands, having the right tools increases precision and reduces risk. Here’s what to keep on hand:
| Tool | Purpose | When to Use |
|---|---|---|
| Felt-tipped tweezers | Grip delicate surfaces without scratching | For thin bands or engraved designs |
| Rubber-jawed pliers | Provide grip with zero metal-to-metal contact | When more force is needed without marring |
| Ring mandrel (mini) | Offers accurate sizing reference | For frequent adjustments or multiple rings |
| Jeweler’s loupe (10x magnifier) | Detects micro-cracks or stress points | Before and after resizing |
| Micro-screwdriver set | Tightens screw mechanisms | Exclusive to screw-type adjustable rings |
Avoid using household pliers with metal jaws—they can leave permanent scratches or deform soft metals. If you don’t own specialized tools, wrap regular pliers in masking tape for a temporary protective layer.
Common Mistakes and How to Avoid Them
Even experienced users sometimes damage their rings due to simple oversights. Below are the most frequent errors—and how to sidestep them.
- Over-tightening: Can cause the band to lose elasticity or snap under pressure. Always stop when the ring fits snugly but doesn’t dig into the skin.
- Uneven pressure: Applying force to just one side leads to misalignment. Use both hands symmetrically.
- Ignoring metal fatigue: Repeated bending weakens the metal over time. Limit resizing to once per week unless absolutely necessary.
- Adjusting in extreme temperatures: Cold metal is more brittle. Never resize a ring straight from the fridge or outdoors in winter.
Real Example: Restoring a Gifted Heirloom Ring
Sophia inherited a delicate floral-patterned adjustable ring from her grandmother. The band was too loose for her slender fingers, constantly rotating and slipping off. She tried squeezing it by hand, but the design became lopsided. After researching proper techniques, she used rubber-jawed pliers to apply gradual, even pressure. She tested the fit every 30 seconds and finished by checking alignment under natural light. The result? A secure, symmetrical fit that honored the ring’s craftsmanship. More importantly, she preserved its emotional value without costly repairs.
Care and Maintenance After Adjustment
Resizing places stress on the metal, so post-adjustment care is critical. Clean the ring again after handling to remove oils from your skin that can accelerate tarnishing. Store it separately in a soft pouch to prevent dents or friction with harder jewelry.
For silver or copper-based rings, consider applying a thin coat of clear nail polish on the inner band if irritation occurs—this creates a barrier between metal and skin. Reapply every few weeks as it wears down.
“The key to long-term success with adjustable rings isn’t perfection in one session—it’s patience and consistency.” — Lena Patel, Sustainable Jewelry Advocate
Checklist: Perfect At-Home Ring Adjustment
- ☑ Identify your ring’s adjustment mechanism
- ☑ Measure your finger accurately
- ☑ Gather appropriate tools (or improvise safely)
- ☑ Clean the ring before touching
- ☑ Apply slow, even pressure
- ☑ Test fit frequently
- ☑ Inspect for cracks or warping afterward
- ☑ Store properly post-adjustment
Frequently Asked Questions
Can I resize an adjustable ring permanently?
No—not without altering its fundamental design. Adjustable rings rely on flexibility. Permanent resizing would require soldering, which eliminates adjustability and risks damaging intricate details.
Why does my ring keep loosening throughout the day?
This often happens due to temperature fluctuations or activity-induced finger shrinkage. Try tightening it slightly more than usual in the morning, or opt for a ring with textured inner bands for better grip.
Is it safe to adjust a plated or coated ring?
Yes, but extra caution is needed. Bending can expose underlying base metal, especially at stress points. Use padding on tools and avoid sharp bends to preserve the finish.
Conclusion
Mastering the art of adjusting your ring at home empowers you to maintain comfort and style on your terms. With a clear understanding of mechanics, the right tools, and a patient approach, you can confidently resize your jewelry without relying on external help. Each careful bend preserves both the physical integrity and sentimental worth of your pieces.


 浙公网安备
33010002000092号
浙公网安备
33010002000092号 浙B2-20120091-4
Comments
No comments yet. Why don't you start the discussion?