
Every day, millions of images flood the internet—some real, some misleading, many without clear origins. Whether you're trying to track down the source of a photo, verify if an image is authentic, or simply identify an object in a picture, Google’s reverse image search is one of the most powerful tools available. While desktop users have long enjoyed access to this feature, mobile users often struggle to navigate it effectively. The good news? Performing a reverse image search on your phone is not only possible but also simple once you know the right methods.
This guide walks through everything you need to know to use Google reverse image search efficiently on Android and iOS devices. From built-in browser techniques to app-based workarounds and lesser-known tips, you’ll gain full control over visual information at your fingertips.
Why Reverse Image Search Matters on Mobile
Smartphones are now our primary tools for browsing, capturing, and sharing photos. When you see an intriguing product, a strange meme, or a suspicious profile picture, your instinct is to investigate—right from your phone. Reverse image search empowers you to:
- Determine if a photo has been manipulated or used out of context
- Find higher-resolution versions of an image
- Discover where a photo originally appeared online
- Identify unknown plants, animals, landmarks, or fashion items
- Verify the authenticity of secondhand goods or dating profiles
According to Google, over 20% of mobile searches now begin with an image. As visual content dominates social media and messaging platforms, the ability to analyze what you see becomes essential for digital literacy.
Step-by-Step: How to Perform a Reverse Image Search on iPhone and Android
The process varies slightly depending on your device and browser, but the core functionality remains consistent across platforms. Follow these steps based on your current setup.
Method 1: Using Google Lens in the Chrome App (Android & iOS)
- Open the Chrome app on your phone.
- Navigate to a webpage with an image you want to search.
- Tap and hold the image until a menu appears.
- Select Search Image with Google Lens.
- Wait for results to load—Google will show visually similar images, related websites, and contextual information.
If Google Lens isn’t enabled, go to Chrome Settings > Accessibility > Google Lens and toggle it on.
Method 2: Upload from Your Gallery (iOS Safari + Google App)
- Open the Google app or go to images.google.com in Safari.
- Tap the camera icon in the search bar.
- Choose “Upload an image” and select a photo from your camera roll.
- Google will analyze the image and return matching or related results.
Note: On iPhones, this method works best through the Google app rather than Safari due to integration limitations.
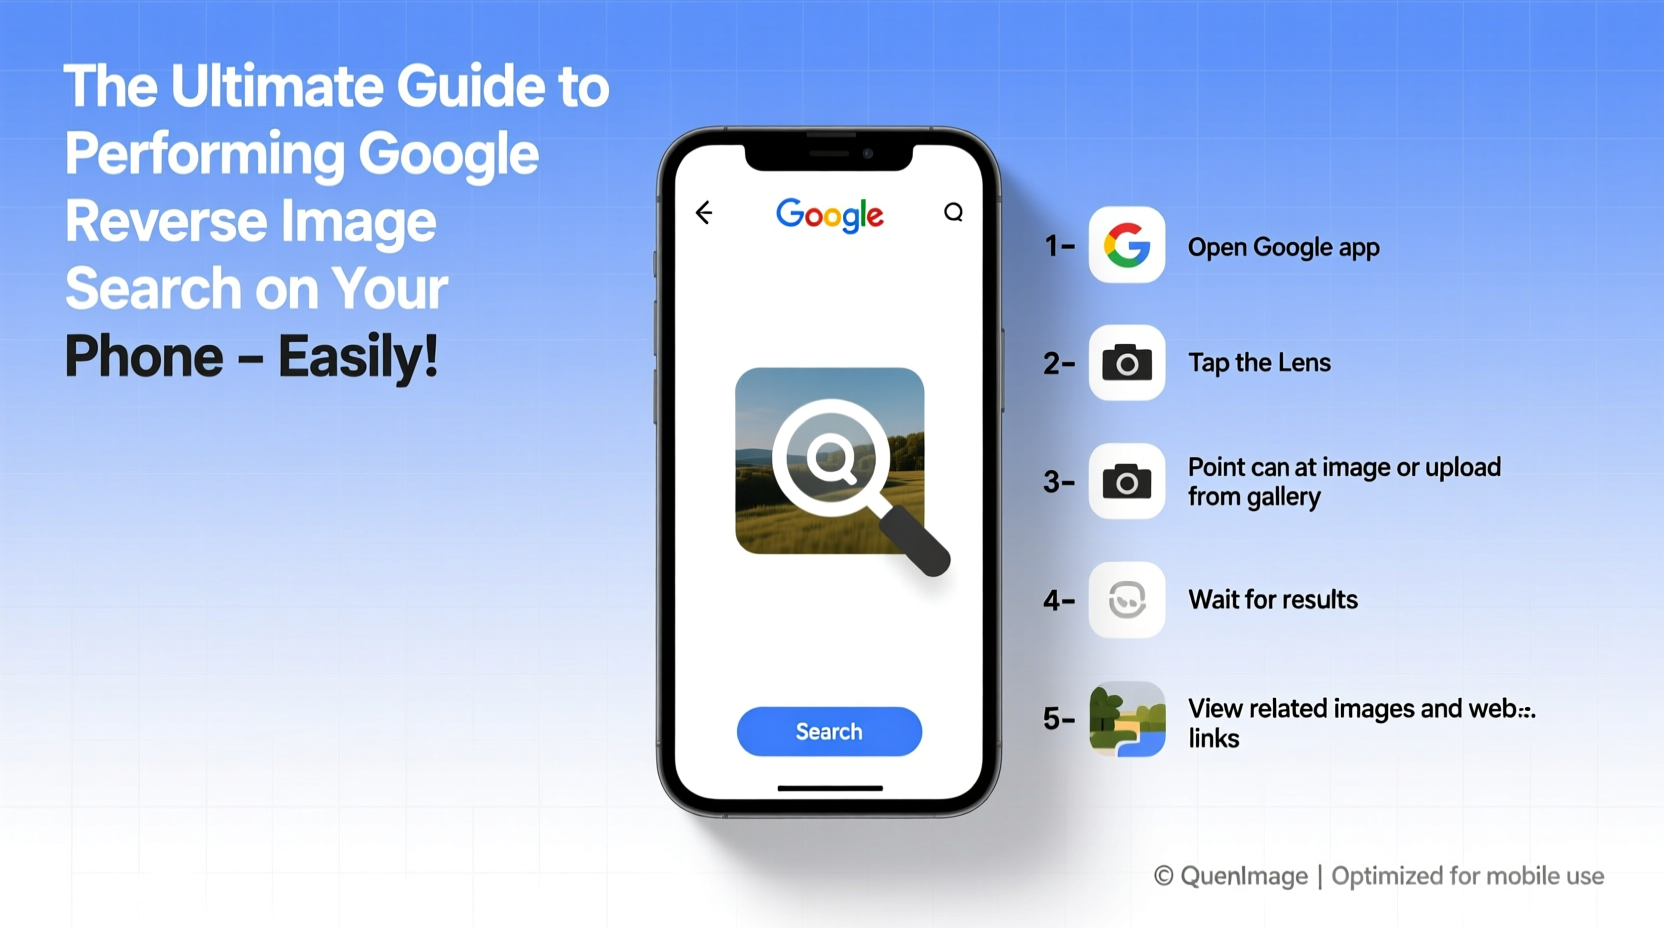
Method 3: Direct Camera Search via Google Lens (Real-Time)
- Open the Google app.
- Tap the Lens icon next to the microphone in the search bar.
- Point your camera at any physical object or printed image.
- Tap the shutter button; Google will instantly provide relevant search results.
This is ideal for identifying products on shelves, translating text, or learning about artwork or nature.
Do’s and Don’ts of Mobile Reverse Image Search
| Do’s | Don’ts |
|---|---|
| Use high-quality, well-lit images for better results | Expect perfect matches every time—results vary by image uniqueness |
| Crop the image to focus on the main subject | Assume all results are authoritative—always cross-check sources |
| Try multiple methods if one fails | Upload sensitive personal photos to public search engines |
| Use reverse search to fact-check viral social media content | Rely solely on thumbnails—zoom in when possible |
Real Example: Spotting a Fake Online Seller
Sophia was browsing a local marketplace app when she found a designer handbag listed at half retail price. The seller claimed it was “genuine with receipt.” Skeptical, Sophia took a screenshot of the listing photo and performed a reverse image search using Google Lens in Chrome. Within seconds, she discovered the same image on a counterfeit goods website in another country. She reported the listing and avoided a scam.
This scenario happens daily. Reverse image search acts as a first line of defense against fraud, misinformation, and intellectual property theft.
“Reverse image search is no longer just a tech novelty—it's a critical tool for digital verification in an era of deepfakes and misinformation.” — Dr. Alan Reyes, Digital Forensics Researcher at Stanford University
Advanced Tips for Better Results
Not all searches yield useful results. Improve accuracy with these expert-backed strategies:
- Crop strategically: Focus on the central object. Remove cluttered backgrounds that distract Google’s algorithm.
- Adjust lighting: If uploading a dark or blurry photo, edit brightness first using your phone’s gallery tools.
- Combine text and image: After getting initial results, refine your search by adding keywords like brand names, locations, or dates.
- Check timestamps: Look at cached pages in results to see when the image first appeared online.
- Use incognito mode: Prevent personalized search bias by running the query in private browsing mode.
Checklist: Optimize Your Reverse Image Search Workflow
- ✅ Choose the clearest version of the image
- ✅ Crop to highlight the subject
- ✅ Open Chrome or the Google app
- ✅ Tap and hold the image or use the Lens icon
- ✅ Select “Search Image with Google Lens”
- ✅ Review top results and check multiple links
- ✅ Verify claims using additional sources
Frequently Asked Questions
Can I reverse search screenshots?
Yes. Screenshots work just like any other image. However, added text overlays, borders, or low resolution may affect recognition accuracy. For best results, capture the image cleanly and avoid zooming too far.
Is reverse image search free and safe?
Yes, Google’s reverse image search is completely free and does not store your uploaded images permanently. However, avoid uploading private or sensitive photos (e.g., ID documents, personal family pictures) to minimize exposure risk.
Why don’t I see “Search Image” in Chrome?
This usually means Google Lens isn’t enabled. Go to Chrome Settings > Accessibility > Google Lens and turn it on. Also ensure your app is updated to the latest version from the App Store or Google Play.
Conclusion: Take Control of What You See Online
In a world saturated with visual content, the ability to question and verify images is no longer optional—it’s essential. With just a few taps, Google reverse image search transforms your smartphone into a truth-finding device. Whether you’re shopping online, researching art, or protecting yourself from scams, mastering this skill gives you a significant advantage.
You don’t need special software or technical knowledge. All it takes is awareness and practice. Start today: pick a photo from your gallery, run a search, and see what you uncover. The next time you encounter a questionable image, you’ll know exactly how to respond—with confidence and clarity.


 浙公网安备
33010002000092号
浙公网安备
33010002000092号 浙B2-20120091-4
Comments
No comments yet. Why don't you start the discussion?