
A cracked phone screen is one of the most common—and frustrating—issues smartphone owners face. Whether it’s a spiderweb of fine lines or a gaping hole in the display, a damaged screen affects usability, aesthetics, and even safety. While many assume a trip to the repair shop is the only solution, countless users successfully replace their own screens every year. With the right tools, preparation, and technique, you can restore your device to full functionality without breaking the bank.
This guide walks you through every phase of the process: from diagnosing the damage and sourcing parts, to executing a clean replacement and testing the results. Done correctly, a DIY screen swap can save hundreds compared to manufacturer or third-party repair services.
Understanding Your Phone’s Screen Structure
Before reaching for a screwdriver, it's crucial to understand what you're working with. Modern smartphones typically use one of two screen configurations:
- LCD + Digitizer (older models): The display (LCD) and touch layer (digitizer) are separate components. Damage may require replacing just the digitizer if the LCD remains intact.
- OLED/AMOLED with Integrated Assembly (modern smartphones): Most current devices, especially flagships, feature fused displays where the touchscreen, display panel, and sometimes even the front camera housing are a single unit. In these cases, even minor cracks often necessitate replacing the entire front module.
Misdiagnosing your phone’s screen type leads to purchasing the wrong part—a costly mistake. Check your model number and consult repair databases like iFixit or RepairWiki to confirm compatibility.
“Over 60% of DIY screen replacements fail due to incorrect part selection or improper handling of ribbon cables.” — Carlos Mendez, Mobile Repair Technician with 12 years of experience
Essential Tools and Materials Checklist
Success hinges on preparation. Gather everything before starting. Rushing mid-repair risks damaging fragile connectors or losing tiny screws.
Checklist: What You’ll Need
- Replacement screen assembly (verified compatible)
- Pentalobe and Phillips #000 screwdrivers
- Pry tools or plastic opening picks
- Suction cup (small, for lifting the screen)
- Torx T5 and T6 bits (for some Samsung and Google models)
- Spudger or flat tool for disconnecting ribbon cables
- Heat gun or hair dryer (to soften adhesive)
- Cleaning wipes and microfiber cloth
- Tweezers (non-metallic preferred)
- Double-sided adhesive strip or glue (if not pre-applied)
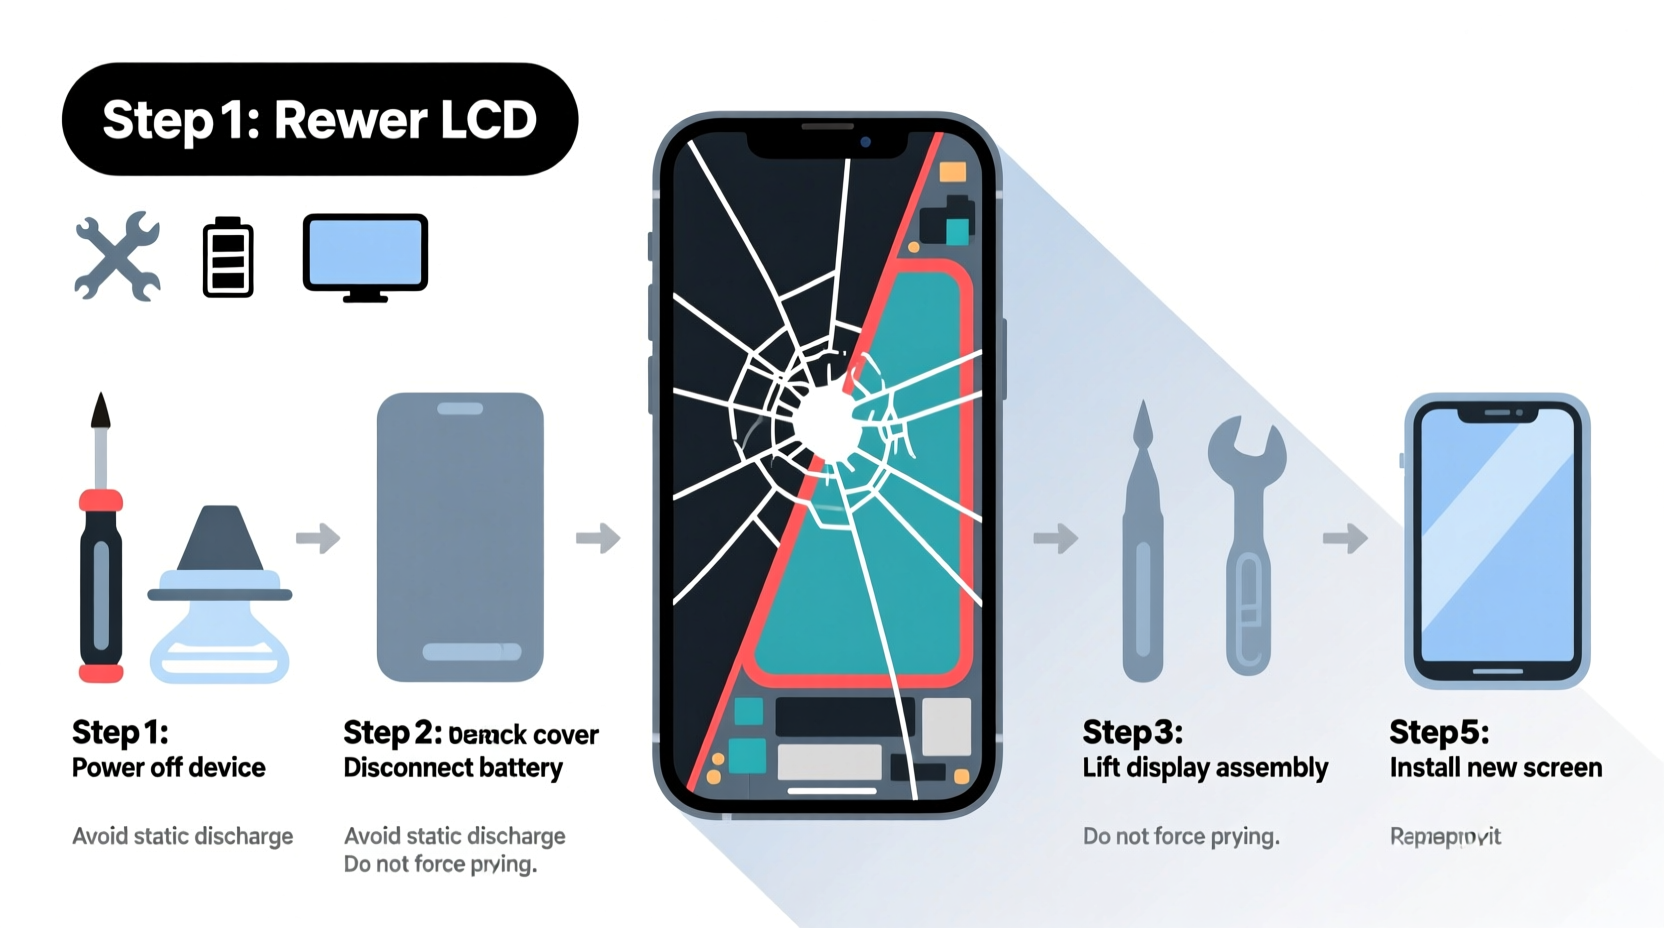
Step-by-Step Replacement Process
Follow this sequence carefully. Each step builds on the last, and skipping ahead increases the risk of irreversible damage.
- Power Off Completely: Turn off your phone. Never work on a powered device—accidental contact with circuitry could short internal components.
- Apply Heat to the Edges: Use a hair dryer or heat gun on low setting to warm the perimeter of the screen for 60–90 seconds. This softens the adhesive bonding the display to the frame.
- Attach the Suction Cup: Place it near the bottom edge (below the home button or chin area). Gently pull upward while inserting a plastic pry tool into the gap.
- Separate the Front Panel: Work around the edges slowly. Avoid prying near the charging port or volume buttons—these areas are more fragile.
- Remove Screws and Shields: Once open, locate and remove any screws securing metal shields over the display connectors. Keep them organized.
- Disconnect the Old Screen: Use a spudger to gently lift the ribbon cable connectors from their sockets on the logic board. Do not pull on the cables themselves.
- Install the New Screen: Align the new assembly and reconnect each ribbon cable firmly. Reattach shields and screws.
- Test Before Sealing: Power on the phone. Verify touch response, color accuracy, brightness, and front camera function. If issues arise, power down and reseat connectors.
- Secure the Display: Apply new adhesive strips or press the screen into place if pre-glued. Allow 1–2 hours undisturbed for bond strength to develop.
Do’s and Don’ts During Replacement
| Do’s | Don’ts |
|---|---|
| Work in a clean, well-lit space free of static | Work on carpet or dusty surfaces |
| Label screws as you remove them | Mix screws from different locations |
| Use minimal force when disconnecting cables | Yank or twist ribbon cables |
| Test functionality before final sealing | Glue the screen in place before testing |
| Ground yourself to prevent electrostatic discharge | Handle internal components with bare hands frequently |
Real Example: Sarah’s Successful iPhone XR Fix
Sarah dropped her iPhone XR on tile flooring, cracking the screen diagonally across the top left. Faced with a $279 quote from Apple, she researched DIY options. She purchased a high-quality OEM-equivalent screen kit for $58, including tools. After watching a trusted tutorial and organizing her workspace, she followed the steps methodically.
The critical moment came when disconnecting the battery connector—she almost used metal tweezers but remembered the risk of shorts and switched to a plastic spudger. After 45 minutes of careful work, the new screen lit up perfectly. Touch sensitivity was restored, and facial recognition worked without recalibration. Total savings: $221. “I was nervous,” she said, “but taking it slow made all the difference.”
Frequently Asked Questions
Can I replace just the glass if only the outer layer is cracked?
In most modern phones, no. Manufacturers now bond the display, digitizer, and glass into one sealed unit. Even if the underlying display works, structural integrity is compromised, and moisture can seep in. Full assembly replacement is recommended.
Will I lose data during the screen replacement?
No, replacing the screen does not erase your data. However, always back up your phone before beginning any repair. Accidents happen, and a backup ensures peace of mind.
How long should a DIY screen replacement take?
For first-timers, expect 60 to 90 minutes, including prep and testing. Experienced technicians can complete the job in under 30 minutes. Rushing increases error risk—prioritize precision over speed.
Final Tips for Long-Term Success
Once your new screen is installed, protect your investment. Immediately apply a tempered glass protector to guard against future cracks. Pair it with a shock-absorbent case that extends slightly above the screen when placed face-down.
Also, resist the urge to use your phone immediately after reassembly. Let the adhesive cure for at least an hour to ensure a secure, dust-free seal. Skipping this step can lead to gaps, water exposure, or screen lifting over time.
Conclusion: Take Control of Your Device’s Lifespan
Replacing a cracked phone screen doesn’t require a technician’s license—just patience, attention to detail, and access to reliable information. By mastering this skill, you extend your device’s life, reduce electronic waste, and gain confidence in managing future repairs.


 浙公网安备
33010002000092号
浙公网安备
33010002000092号 浙B2-20120091-4
Comments
No comments yet. Why don't you start the discussion?