
Vintage enamel top tables evoke a sense of nostalgia—clean lines, soft pastels or bold primaries, and a smooth, glass-like surface that reflects mid-century charm. Found in kitchens, diners, and sunrooms across generations, these tables were once the centerpiece of family meals and late-night conversations. But decades of use, exposure to sunlight, and improper cleaning can leave them chipped, dull, or rusted. The good news: with the right approach, most vintage enamel tables can be safely restored and preserved for years to come. This guide walks you through every step—from initial assessment to ongoing maintenance—with real-world advice, practical checklists, and insights from restoration experts.
Understanding Enamel Top Tables: What You’re Working With
Enamel, also known as vitreous enamel, is a coating made by fusing powdered glass to a metal substrate—typically cast iron or steel—at high temperatures. The result is a hard, durable surface that resists stains, heat, and moisture. Vintage enamel tables were popular from the 1930s through the 1960s, prized for their sleek appearance and ease of cleaning. However, because enamel is brittle, it’s prone to chipping if impacted or exposed to sudden temperature changes.
The integrity of your table depends on both the enamel layer and the underlying metal. When chips expose the metal base, rust can form quickly, especially in humid environments. Left unchecked, rust compromises structural stability and spreads beneath intact enamel, causing further flaking.
“Enamel is unforgiving but honest—it shows its age, but with proper care, it can outlive us all.” — Lydia Grant, Restoration Specialist, Mid-Century Furniture Conservatory
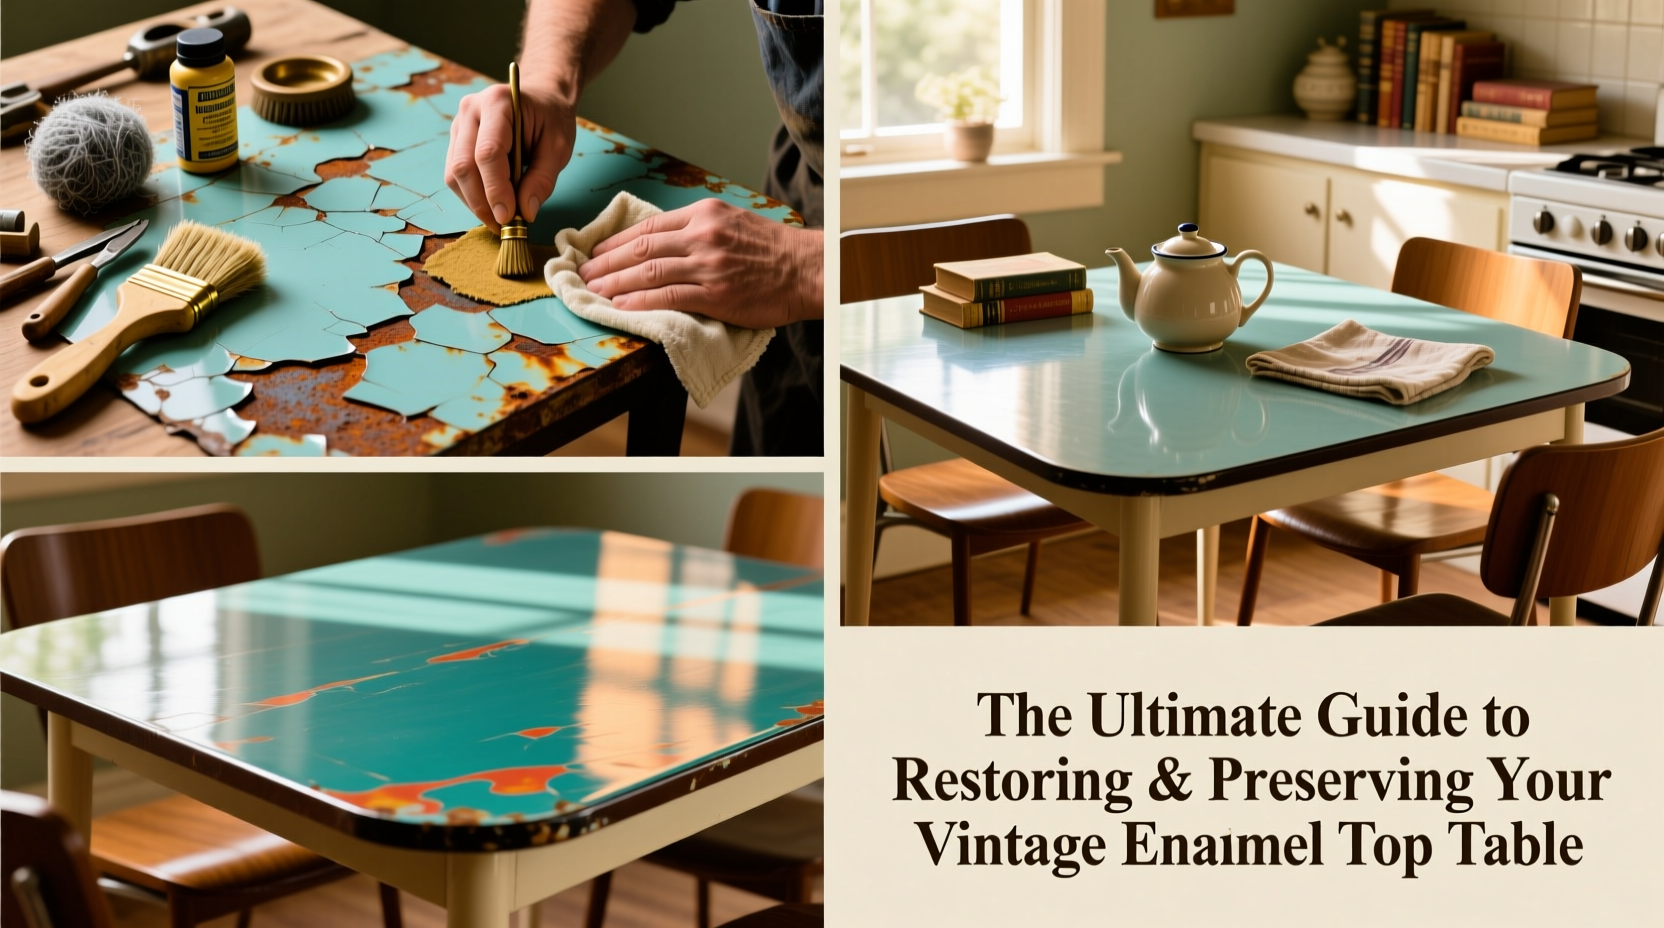
Step-by-Step Guide to Restoring Your Enamel Table
Restoration isn’t about making the table look brand new; it’s about honoring its history while stabilizing damage and preventing future deterioration. Follow this timeline-based process to restore your piece safely and effectively.
- Assessment (Day 1): Inspect the entire surface under natural light. Look for deep chips, rust spots, cracks, and areas where the enamel has lifted. Note any wobbling legs or loose joints.
- Cleaning (Day 2): Wash the surface with warm water and a few drops of mild dish soap using a non-abrasive sponge. Avoid steel wool or harsh scrubbers. Dry thoroughly with a microfiber cloth.
- Rust Treatment (Day 3): For exposed metal, gently sand the area with 400-grit sandpaper until smooth. Wipe clean with rubbing alcohol. Apply a rust-inhibiting primer designed for metal surfaces.
- Touch-Up Painting (Day 4): Use a high-gloss appliance epoxy paint that matches the original color. Apply thin layers with a fine brush, blending into surrounding enamel. Let dry 24 hours between coats.
- Sealing (Day 6): Once paint is fully cured, apply a clear automotive-grade enamel sealant to protect the repair and unify the sheen.
- Structural Check (Day 7): Tighten bolts, reinforce weak joints with epoxy resin if needed, and level the legs using adjustable floor glides.
Do’s and Don’ts: Caring for Enamel Surfaces
Maintaining a restored enamel table requires consistent, gentle habits. The following table outlines key practices to adopt—and those to avoid.
| Do | Don’t |
|---|---|
| Wipe spills immediately with a damp cloth | Use abrasive cleaners like Comet or Bar Keepers Friend |
| Clean weekly with mild soapy water | Place hot pans directly on the surface |
| Use placemats and trivets for dishes | Stack heavy objects that could chip edges |
| Dust regularly to prevent grit buildup | Expose the table to direct sunlight for prolonged periods |
| Apply a wax polish every 6 months for shine | Use vinegar or acidic cleaners frequently |
Preservation Checklist for Long-Term Care
To keep your vintage enamel table looking its best, integrate these actions into your routine:
- Inspect the surface monthly for new chips or signs of rust
- Clean with pH-neutral cleaner and dry immediately
- Reapply protective wax every 6 months (use carnauba-based paste wax)
- Keep the table away from radiators, windows, and exterior doors
- Rotate decor items periodically to prevent uneven fading
- Store indoors—never leave enamel furniture outdoors, even under cover
- Use felt pads under lamps, vases, or other decorative objects
A Real Example: Restoring a 1950s Kitchen Table
Sarah M., a homeowner in Portland, inherited her grandmother’s 1952 turquoise enamel table. It had been stored in a damp garage for years. The surface was covered in grime, one leg was loose, and several chips along the edge revealed rust spots. After researching restoration methods, Sarah followed a seven-day plan similar to the one outlined above. She cleaned the surface with diluted dish soap, treated rust with naval jelly and a rust converter, then repainted damaged areas using a custom-mixed appliance epoxy. She reinforced the leg with a hidden bracket and applied three coats of clear sealant. Six months later, the table sits proudly in her breakfast nook, used daily without fear of further damage. “It’s not perfect,” she says, “but it feels alive again.”
Frequently Asked Questions
Can I use baking soda to clean stubborn stains?
Yes, but cautiously. Make a paste with water and baking soda, apply with a soft cloth, and rinse immediately. Do not let it sit, and never scrub aggressively. Baking soda is mildly abrasive and may dull the finish over time.
Is it possible to re-enamel a table professionally?
Yes, though it’s rare and expensive. Some specialty metal shops offer re-enameling services, where the old coating is stripped and a new layer fused in a kiln. However, this process risks warping thin metal and often removes original patina. Most restorers recommend careful touch-ups instead.
How do I know if my table’s damage is too far gone?
If the metal base is severely rusted, warped, or structurally compromised (e.g., large holes or cracks), restoration may not be viable. However, surface-level chipping—even extensive—can usually be repaired cosmetically and stabilized to prevent worsening.
Final Thoughts: Honor the Past, Protect the Future
A vintage enamel top table is more than a piece of furniture—it’s a tactile connection to design history, craftsmanship, and everyday life from another era. Proper restoration doesn’t erase its age; it respects it. By addressing damage early, adopting mindful cleaning habits, and protecting against environmental stressors, you ensure that your table remains functional and beautiful for decades to come.
Whether it’s a family heirloom or a flea market find, your enamel table deserves thoughtful care. Start today: inspect its condition, clean it gently, and commit to a preservation routine. These small acts compound into lasting legacy.


 浙公网安备
33010002000092号
浙公网安备
33010002000092号 浙B2-20120091-4
Comments
No comments yet. Why don't you start the discussion?