
Modern homes demand high-speed, reliable internet connections. Whether you're streaming in 8K, hosting video conferences, or managing a smart home ecosystem, Wi-Fi alone may not deliver the performance you need. That’s where Cat 7 Ethernet cable comes in. Offering speeds up to 10 Gbps at 600 MHz and superior shielding against electromagnetic interference (EMI), Cat 7 is ideal for future-proofing your network. But installing it correctly—safely and efficiently—is critical to realizing its full potential.
This guide walks through every step of planning, installing, and testing Cat 7 cabling within residential environments. From understanding technical specs to avoiding common pitfalls, you’ll learn how to maximize performance while maintaining safety and compliance with building standards.
Understanding Cat 7: What Sets It Apart?
Cat 7 (Category 7) cable is engineered for high-bandwidth applications. Unlike older categories like Cat 5e or Cat 6, Cat 7 features individually shielded twisted pairs (S/FTP) wrapped in an overall braided shield. This dual-layer protection minimizes crosstalk and EMI, making it especially effective in electrically noisy environments such as homes with HVAC systems, refrigerators, or nearby power lines.
It supports 10 Gigabit Ethernet up to 100 meters when terminated properly with GG45 or TERA connectors, though most residential installations use standard RJ45 connectors compatible with backward-compatible patch panels.
“Cat 7 isn’t just about speed—it's about signal integrity. In dense urban homes or multi-device setups, its shielding makes a measurable difference.” — David Lin, Network Infrastructure Engineer
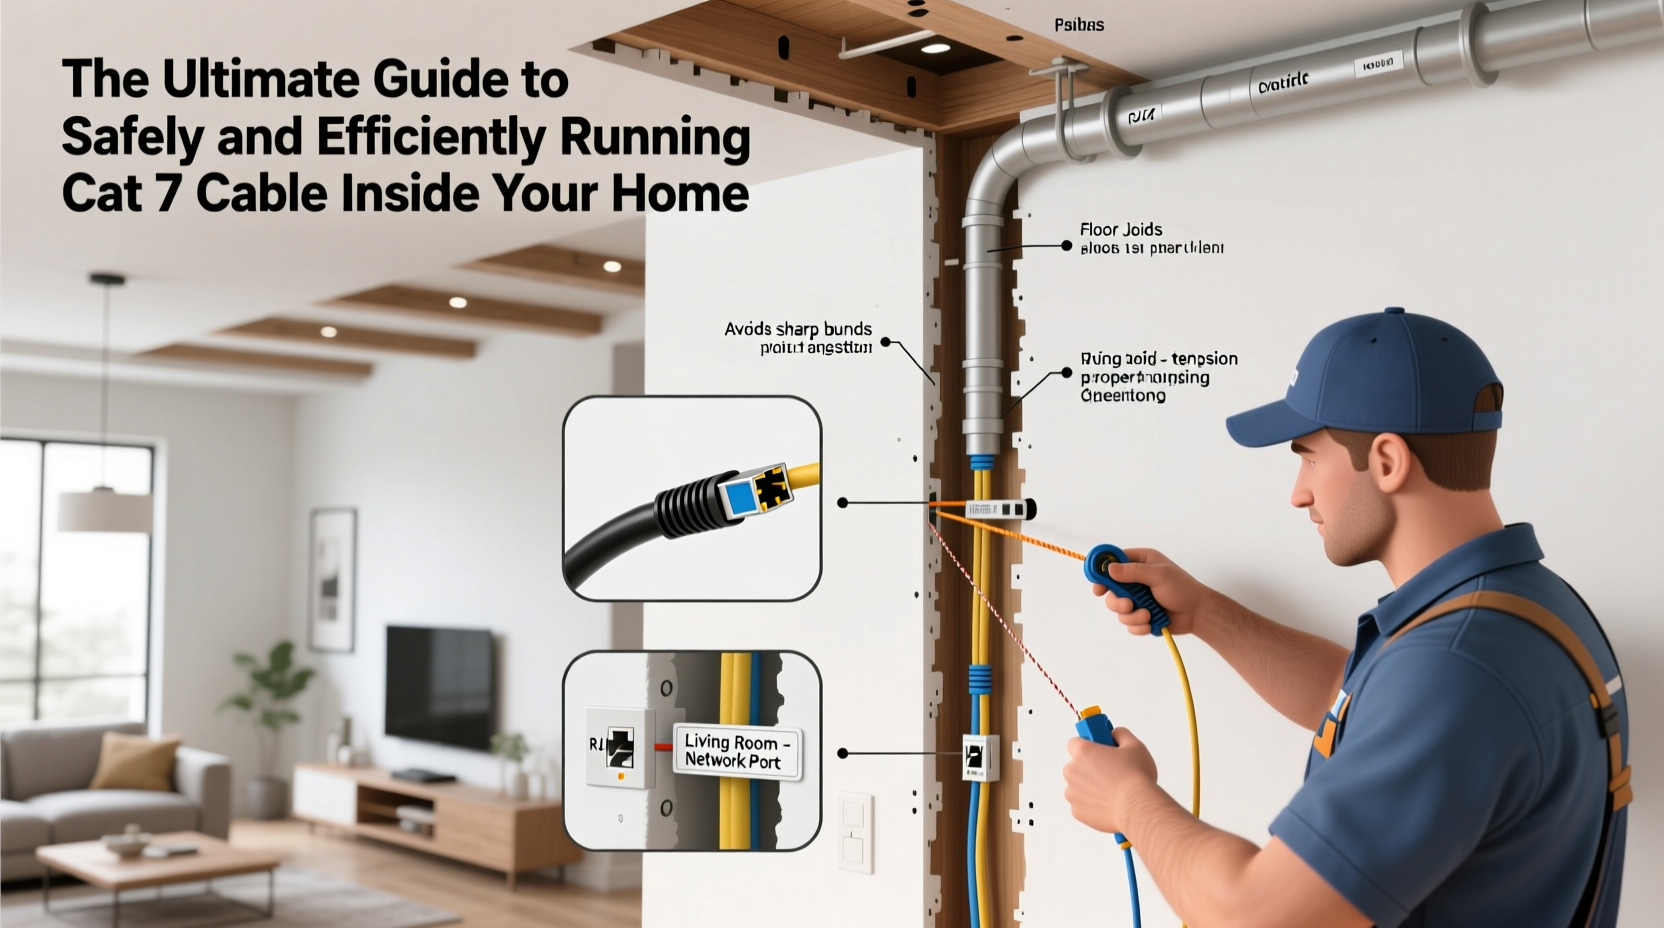
Planning Your In-Wall Cable Layout
Before cutting drywall or drilling holes, create a detailed plan. Start by identifying key locations: primary router, access points, desktop PCs, gaming consoles, smart TVs, and any future expansion zones (e.g., home office, media room).
Use floor plans—hand-drawn or digital—to map out each run. Prioritize direct paths to minimize cable length and avoid sharp bends. Remember: Cat 7 has a minimum bend radius of four times the outer diameter (~1.6 inches); exceeding this can damage internal conductors and shielding.
Key Planning Steps:
- Identify all device endpoints needing wired connections.
- Determine central networking location (typically near modem or main router).
- Map shortest, safest routes between endpoints and the central hub.
- Note obstacles: load-bearing walls, electrical conduits, plumbing stacks.
- Check local building codes regarding low-voltage wiring and fire ratings.
Installation Best Practices: Running Cable Safely
Safety and code compliance are non-negotiable. While Cat 7 carries low voltage, improper installation can pose fire risks or violate municipal regulations—especially if cables pass through plenums (air-handling spaces).
Choose the Right Cable Type
For in-wall residential use, always select CMR (Communications Riser) or CMP (Plenum)-rated Cat 7 cable. CMR is sufficient for vertical runs between floors; CMP is required if running through air ducts or suspended ceilings used for airflow.
| Cable Rating | Fire Resistance | Typical Use Case | Smoke Emission |
|---|---|---|---|
| CM | Low | External devices, short patches | High |
| CMR | Moderate (riser-rated) | In-wall, between floors | Moderate |
| CMP | High (plenum-rated) | Air handling spaces | Low (required) |
Drilling and Fish Tape Techniques
When accessing interior walls, drill holes through wall studs at least 1.25 inches from the edge to protect against nail penetration. Use a ¾-inch bit for easy cable feeding. Never run data cables parallel to electrical wires within the same stud bay. If crossing is unavoidable, do so perpendicularly and maintain at least 12 inches of separation from high-voltage lines.
Termination and Connection Setup
Proper termination ensures optimal performance. Cat 7 requires precise termination using shielded keystone jacks and patch panels rated for 600 MHz. Standard unshielded Cat 6 jacks will degrade performance due to lack of grounding continuity.
Follow the T568B wiring standard consistently across all jacks and patch panels. Strip only enough jacket to reach terminals—exposing too much conductor breaks shielding integrity. After terminating, secure the drain wire to the jack’s grounding point to maintain EMI protection.
Testing Every Run
Never assume a cable works after installation. Use a professional-grade cable certifier or at minimum a basic continuity tester to verify:
- All eight pins are connected correctly.
- No shorts or reversals.
- Shield continuity (if supported by tester).
- Signal loss below acceptable thresholds.
If a run fails, recheck terminations first. Poor crimping or untwisting beyond 0.5 inches is the most common cause of failure.
Real-World Example: Home Office Upgrade
Consider Mark, a remote software developer living in a two-story suburban home. His Wi-Fi suffered latency spikes during video calls, especially when his family streamed movies downstairs. He decided to install Cat 7 from his basement router to his second-floor office and entertainment center.
He mapped the route through unfinished basement ceiling joists and up an interior closet wall. Using CMR-rated Cat 7, he maintained 18 inches of separation from electrical lines and avoided bending cables tighter than recommended. After termination with shielded keystone jacks and testing each line, he achieved stable 940 Mbps speeds—up from fluctuating 150–400 Mbps over Wi-Fi.
The upgrade eliminated lag, improved Zoom call quality, and enabled seamless cloud backups—all without impacting aesthetics, since cables were hidden behind baseboards and in-wall.
Essential Checklist for DIY Cat 7 Installation
- ☐ Plan Your Network Map
- Sketch all connection points and determine cable lengths.
- ☐ Purchase Correct Cable Type
- Use CMR or CMP-rated Cat 7 with S/FTP shielding.
- ☐ Gather Tools
- Includes fish tape, stud finder, drill, punch-down tool, cable stripper, labels.
- ☐ Follow Separation Rules
- Keep data cables at least 12” from power lines; cross at 90° if needed.
- ☐ Terminate with Shielded Jacks
- Use only jacks rated for Cat 7/600 MHz with proper grounding.
- ☐ Test Each Cable
- Verify connectivity, pinout, and shielding before closing walls.
- ☐ Label Everything Clearly
- Prevents confusion later during maintenance or upgrades.
Frequently Asked Questions
Can I use Cat 7 with my existing router?
Yes. Cat 7 is backward compatible with all modern routers and switches. Even if your equipment doesn’t support 10 Gbps, the improved shielding still enhances reliability over long distances.
Is Cat 7 better than Wi-Fi 6?
They serve different purposes. Wi-Fi 6 excels in mobility and convenience; Cat 7 offers lower latency, higher consistency, and immunity to wireless congestion. For mission-critical devices, wired Cat 7 is superior.
Do I need special connectors for Cat 7?
While Cat 7 technically supports GG45 and TERA connectors, most residential setups use shielded RJ45 connectors and patch panels designed for high-frequency transmission. Ensure compatibility with 600 MHz performance.
Final Thoughts: Build a Network That Lasts
Installing Cat 7 cable in your home is an investment in speed, stability, and scalability. With careful planning and adherence to best practices, you can achieve enterprise-grade networking in a residential setting. The effort pays off in smoother streaming, faster file transfers, and rock-solid remote work performance.
Unlike temporary fixes or range extenders, structured cabling provides a permanent solution that evolves with your needs. Once installed, these cables can support next-generation technologies for a decade or more.


 浙公网安备
33010002000092号
浙公网安备
33010002000092号 浙B2-20120091-4
Comments
No comments yet. Why don't you start the discussion?