
Ticks are more than just a nuisance—they can transmit serious diseases such as Lyme disease, Rocky Mountain spotted fever, and anaplasmosis. With tick populations expanding due to climate change and increased outdoor activity, knowing how to respond when one attaches itself is essential. Immediate, correct removal and post-bite care significantly reduce the risk of infection. This guide provides clear, science-based steps for safe tick removal, prevention strategies, and signs of illness to watch for—so you can enjoy the outdoors with confidence.
Why Tick Removal Must Be Done Correctly
Improper tick removal can increase the risk of infection. When a tick bites, it inserts its mouthparts deep into the skin and may secrete saliva containing pathogens. If the tick is crushed, twisted, or pulled improperly, parts of its head or body can remain embedded, increasing the chance of local infection or leaving the pathogen-laden feeding tube in place.
The goal is to remove the tick intact, without squeezing its body or jerking it out. Prompt removal—within 24 to 36 hours—is critical. For example, the bacterium that causes Lyme disease, Borrelia burgdorferi, is typically not transmitted until the tick has been attached for at least 36 hours.
“Removing a tick within 24 hours reduces the risk of Lyme disease to less than 5%. The longer it stays, the higher the danger.” — Dr. Lisa Thompson, Infectious Disease Specialist, CDC
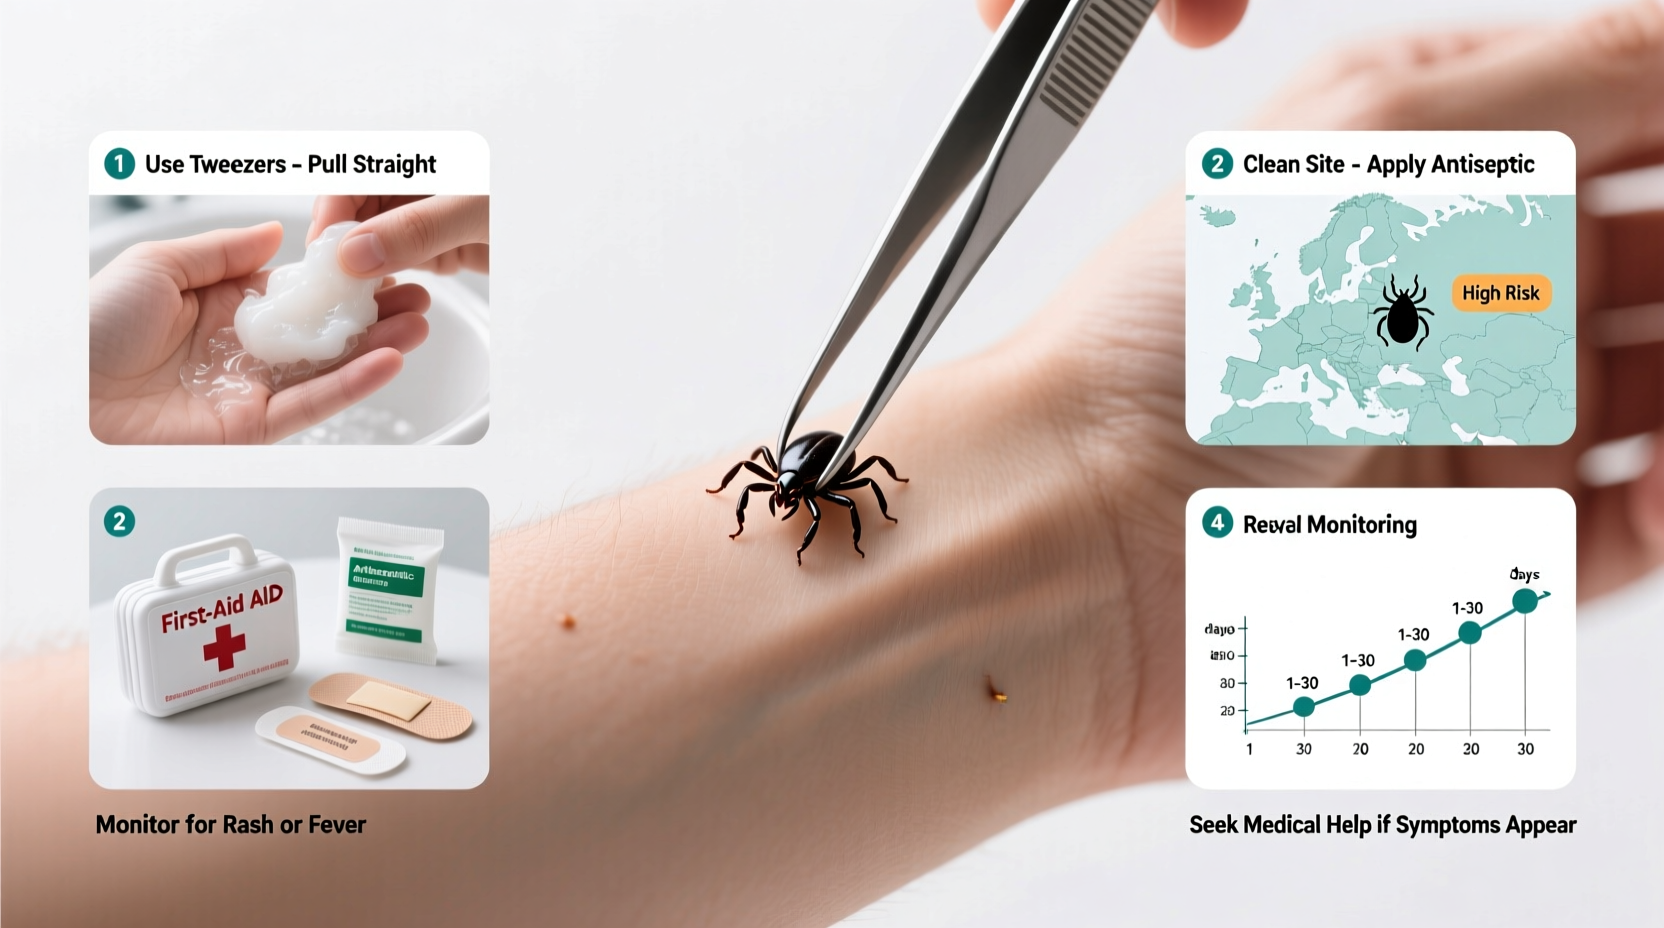
Step-by-Step Guide to Safe Tick Removal
Follow these six precise steps to remove a tick safely and minimize health risks:
- Prepare your tools. Use fine-tipped tweezers or a tick removal tool. Avoid using bare hands, matches, nail polish, petroleum jelly, or heat—the latter methods can cause the tick to regurgitate infected fluids into the wound.
- Grasp the tick close to the skin. Position the tweezers as close to the skin’s surface as possible, targeting the tick’s head or mouthparts where they meet your skin.
- Pull upward with steady, even pressure. Do not twist or jerk. Sudden movements may cause the mouthparts to break off and remain in the skin.
- Clean the bite area. After removal, wash the site with soap and water, then apply rubbing alcohol or an antiseptic.
- Dispose of the tick properly. Place it in a sealed bag, wrap it tightly in tape, or flush it down the toilet. Some people save the tick in a labeled container with the date and location of the bite for potential future testing.
- Monitor the site and your health. Watch for rash, swelling, or flu-like symptoms in the days and weeks following the bite.
What Not to Do When Removing a Tick
Avoiding common misconceptions is just as important as knowing what to do. Here’s a comparison of recommended actions versus harmful myths:
| Do | Don't |
|---|---|
| Use fine-tipped tweezers | Use fingers or blunt tools |
| Pull straight up with steady pressure | Twist, jerk, or squeeze the tick |
| Clean the bite after removal | Apply heat, oil, or chemicals to make it “back out” |
| Save the tick for identification (optional) | Crush the tick with your fingers |
| Wash hands and tools after | Leave the tick alive near living spaces |
Preventing Tick Bites Before They Happen
Prevention is the most effective defense. Ticks thrive in wooded areas, tall grass, and leaf litter—but they can also be found in backyards and urban parks. Adopt these proactive measures to reduce exposure:
- Wear protective clothing. Long sleeves, long pants tucked into socks, and light-colored fabrics make ticks easier to spot.
- Use EPA-approved repellents. Products containing DEET, picaridin, or permethrin (on clothing only) are proven effective.
- Treat gear and clothing. Permethrin-treated clothing kills ticks on contact and remains effective through several washes.
- Perform thorough tick checks. After spending time outdoors, inspect your body, especially underarms, behind ears, in hair, around the waist, and between legs.
- Shower soon after outdoor activities. Showering within two hours of coming indoors can wash off unattached ticks and provides an opportunity for inspection.
- Protect pets. Use veterinarian-recommended tick preventatives and check them daily, especially after walks in high-risk areas.
Recognizing Signs of Tick-Borne Illness
Not all tick bites lead to disease, but early detection saves lives. Symptoms can appear anywhere from 3 to 30 days after a bite. Key warning signs include:
- A bullseye-shaped rash (erythema migrans), often expanding over several days
- Fever, chills, and fatigue
- Headache, muscle, and joint aches
- Nausea or swollen lymph nodes
Lyme disease is the most common tick-borne illness in North America, but others like anaplasmosis, babesiosis, and Powassan virus require immediate medical attention. Early treatment with antibiotics is highly effective for many of these conditions.
Mini Case Study: A Hiker’s Close Call
Mark, a 38-year-old hiker from Vermont, returned from a weekend trail hike feeling unusually fatigued. Two days later, he noticed a circular red rash on his thigh. Remembering a tick bite he’d removed three days earlier, he photographed the rash and visited his doctor. Blood tests confirmed early-stage Lyme disease. Thanks to prompt antibiotic treatment, Mark recovered fully within three weeks. His experience underscores the importance of monitoring bites and acting quickly when symptoms arise.
FAQ: Common Questions About Tick Removal and Safety
Can I get sick even if I remove the tick quickly?
Yes, though the risk is much lower. While most pathogens require extended feeding time, rare cases of transmission within 24 hours have been reported. Always monitor for symptoms regardless of removal timing.
What should I do if the tick’s head stays in my skin?
If mouthparts remain, clean the area and let the body expel them naturally like a splinter. Do not dig into the skin with a needle. Infection risk is low if the area is kept clean, but watch for redness, pus, or worsening pain.
Should I have the tick tested for diseases?
Routine tick testing is not generally recommended by the CDC. Most labs cannot determine if transmission occurred. Instead, focus on symptom monitoring and consult a healthcare provider if illness develops.
Final Checklist: Your Tick Safety Protocol
Stay prepared with this actionable checklist for every outdoor adventure:
- ✅ Apply insect repellent before heading outside
- ✅ Wear long sleeves and tuck pants into socks
- ✅ Perform a full-body tick check after returning indoors
- ✅ Shower and wash clothes on high heat
- ✅ Keep tweezers or a tick remover in your emergency kit
- ✅ Remove ticks promptly and correctly if found
- ✅ Monitor for rashes or flu-like symptoms for 30 days
- ✅ Seek medical advice if symptoms develop
Take Control of Your Outdoor Health
Tick encounters don’t have to derail your love for nature. With the right knowledge and habits, you can reduce risks and respond confidently when a tick appears. Prevention, proper removal, and vigilance are your strongest defenses. Share this guide with family, friends, and fellow adventurers—because staying safe isn’t just personal, it’s communal. Step outside with awareness, act fast when needed, and protect your health with every journey into the wild.


 浙公网安备
33010002000092号
浙公网安备
33010002000092号 浙B2-20120091-4
Comments
No comments yet. Why don't you start the discussion?