
Few facial features influence overall appearance as dramatically as eyebrows. Properly shaped and filled brows frame the face, enhance the eyes, and convey expression with subtlety and precision. Yet, achieving that polished, natural look requires more than just haphazard strokes of a pencil. The difference between over-plucked chaos and sculpted elegance lies in technique, understanding your face shape, and consistency in application. This comprehensive guide breaks down every element—from choosing the right tools to mastering the most flattering arch—so you can create brows that look professionally groomed, not overdone.
Understanding Your Natural Brow Shape
Before reaching for tweezers or pigment, assess your brows in their natural state. Every face has a unique bone structure, eye placement, and hair growth pattern. Attempting to force a universal \"perfect brow\" onto your features often leads to imbalance. Instead, use the following method to determine your ideal shape:
- Start Point: Hold a straight edge (like a brush) vertically against the side of your nose. Where it intersects your brow is the ideal starting point.
- Arch Point: Angle the same tool from the outer edge of your nostril through the center of your iris. The intersection marks where your arch should peak.
- End Point: Extend the line from your nostril through the outer corner of your eye. This indicates where your brow should naturally end.
This technique ensures symmetry and proportion tailored to your face. Remember: the goal isn’t to erase your natural brows but to refine them.
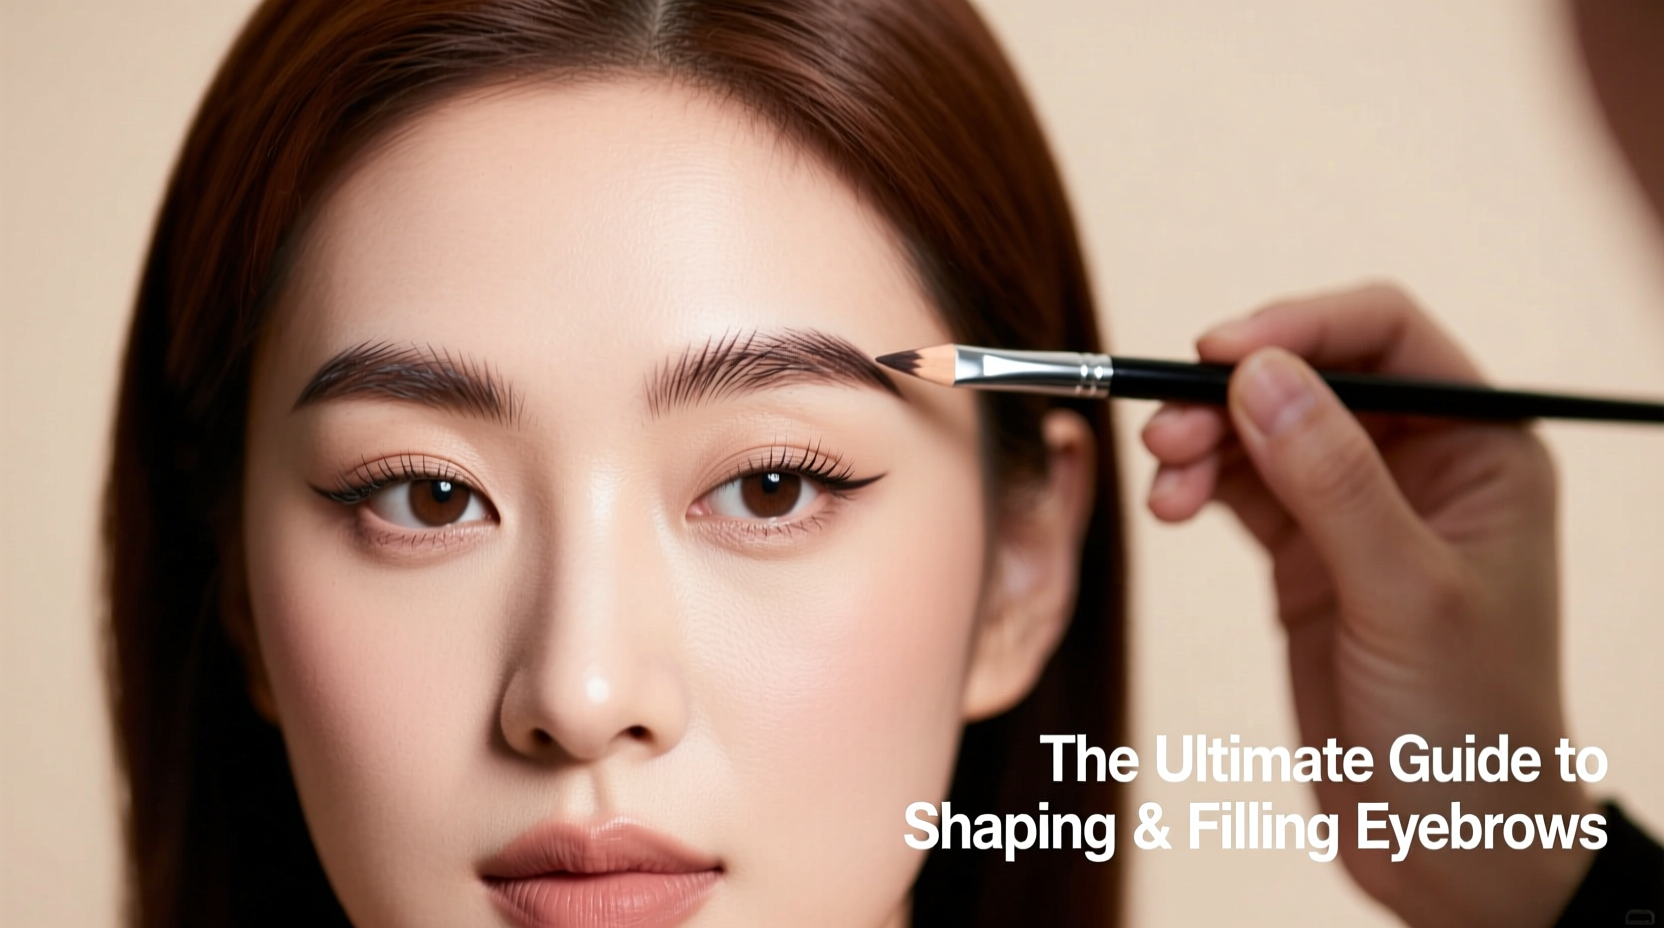
The Step-by-Step Process: Shaping and Filling Brows
Creating flawless brows is a two-phase process: shaping and filling. Each phase demands attention to detail and the right tools.
Phase 1: Shaping Your Brows
Whether you’re maintaining at home or prepping for makeup, shaping sets the foundation.
- Brush Up: Use a spoolie to comb hairs upward. This reveals stray hairs outside your natural shape.
- Define Edges: With a fine-tipped concealer brush, lightly trace along the bottom and top lines based on your measurements.
- Tweeze Strategically: Remove only the hairs clearly outside your defined shape. Work in natural light and pluck in the direction of growth to minimize breakage.
- Check Symmetry: Blink, frown, and raise your eyebrows to see how the shape holds during movement. Adjust if needed.
Phase 2: Filling and Defining
Now that your framework is set, enhance with pigment.
- Choose Your Product: Pencils offer precision, powders give softness, and pomades provide bold definition. Beginners often find pencils easiest to control.
- Map Sparse Areas: Identify gaps—typically near the start or tail—and focus on those rather than coloring the entire brow.
- Feather-Like Strokes: Mimic natural hairs using short, light strokes. Avoid drawing a single solid line; this looks artificial.
- Blend and Soften: Use a clean spoolie to blend product evenly and soften harsh edges.
- Set in Place: Apply clear or tinted brow gel to hold hairs in place all day.
“Brow grooming is about enhancement, not reconstruction. Work with what you have—your natural shape is already designed for your face.” — Lila Chen, Celebrity Makeup Artist
Choosing the Right Tools and Products
Selecting suitable products makes a significant difference in both application ease and final appearance. Here’s a comparison of common brow products:
| Product Type | Best For | Pros | Cons |
|---|---|---|---|
| Brow Pencil | Beginners, precise definition | Easy to control, mimics hair strokes | Can look harsh if over-applied |
| Brow Powder | Natural, soft finish | Blends easily, ideal for sparse brows | Less precise for shaping |
| Pomade & Brush | Full coverage, bold brows | Long-lasting, highly pigmented | Requires skill to avoid smudging |
| Tinted Brow Gel | Quick fix, added volume | Fast application, adds color and hold | May not fill gaps effectively |
Avoiding Common Mistakes
Even experienced users fall into pitfalls that undermine their efforts. Awareness is the first step to correction.
- Overplucking: Removing too much hair leads to unnatural thinness and long-term regrowth issues.
- Harsh Lines: Drawing a thick, unbroken line creates a tattooed effect. Always use light, feathery strokes.
- Ignoring the Arch: A poorly placed arch can make eyes appear droopy or uneven.
- Mismatched Color: Orange, ashy, or overly dark shades look unnatural and age the face.
- Skipping the Set: Without gel, brows can become unruly by midday, especially in humidity.
Real-World Example: Transforming Everyday Brows
Sarah, a 32-year-old teacher, had been over-plucking her brows since college, leaving her with thin, disconnected arches. She relied heavily on thick pencil lines to compensate, which looked obvious in photos. After consulting a brow specialist, she stopped tweezing for three months and began using a micro-pencil to draw individual hairs in the sparse areas. She switched to a taupe-brown powder for softness and finished with a clear gel. Within weeks, her brows appeared fuller and more natural. Her students even commented, “You look more awake!”—a testament to how impactful well-groomed brows can be.
Essential Checklist for Flawless Brows
Follow this checklist each time you shape and fill your brows:
- ✔ Determine start, arch, and end points using the ruler method
- ✔ Brush brows upward with a spoolie
- ✔ Tweeze only stray hairs outside the natural shape
- ✔ Choose a brow product that matches your hair tone
- ✔ Fill in gaps with hair-like strokes, not solid lines
- ✔ Blend with a clean spoolie
- ✔ Set with clear or tinted brow gel
- ✔ Check symmetry in natural light
Frequently Asked Questions
How often should I reshape my brows?
Most people need touch-ups every 2–3 weeks, depending on hair growth speed. Over-plucking slows regrowth, so patience is key when growing brows back in.
Can I use eyeshadow as brow powder?
Yes—neutral taupe, gray-brown, or cocoa shadows work well. Avoid shimmery formulas, which can highlight texture and look unnatural on brows.
What if my brows grow in patchy?
Use a combination of micro-strokes with a fine pencil and a lightweight pomade to build density. Consider a nourishing brow serum with peptides to support healthier growth over time.
Final Thoughts: Elevate Your Look One Brow at a Time
Flawless eyebrows aren’t about perfection—they’re about balance, intention, and enhancing your natural beauty. With the right tools, an understanding of your facial geometry, and consistent technique, you can achieve polished brows that elevate your entire look. Whether you're preparing for a meeting, a date, or simply want to feel put together, well-defined brows deliver confidence with minimal effort. Start small, practice daily, and soon shaping and filling will become second nature.


 浙公网安备
33010002000092号
浙公网安备
33010002000092号 浙B2-20120091-4
Comments
No comments yet. Why don't you start the discussion?