
Photos are at the heart of how we share life’s moments online. On Facebook, where over 350 million photos are uploaded daily, knowing how to efficiently upload, organize, and manage your images isn’t just helpful—it’s essential. Whether you’re preserving family memories, promoting a small business, or simply staying connected with friends, mastering photo management on Facebook ensures your content is seen, appreciated, and protected.
Understanding Facebook’s Photo Upload Options
Facebook offers multiple ways to add photos, each suited to different needs. The platform supports uploads from desktop browsers, mobile apps, and even automated backups through its Moments app (now discontinued but replaced by integrated gallery features).
From a desktop, users can drag and drop images directly into a status update box or use the “Photo/Video” button in any post composer. Mobile users benefit from one-tap uploads via the Facebook app, with options to select multiple images, apply filters, or write captions before sharing.
Albums are automatically created when multiple photos are uploaded together, making it easy to group events like vacations or birthday parties. Individual photos posted outside albums appear in your main timeline and are added to a default “Timeline Photos” collection.
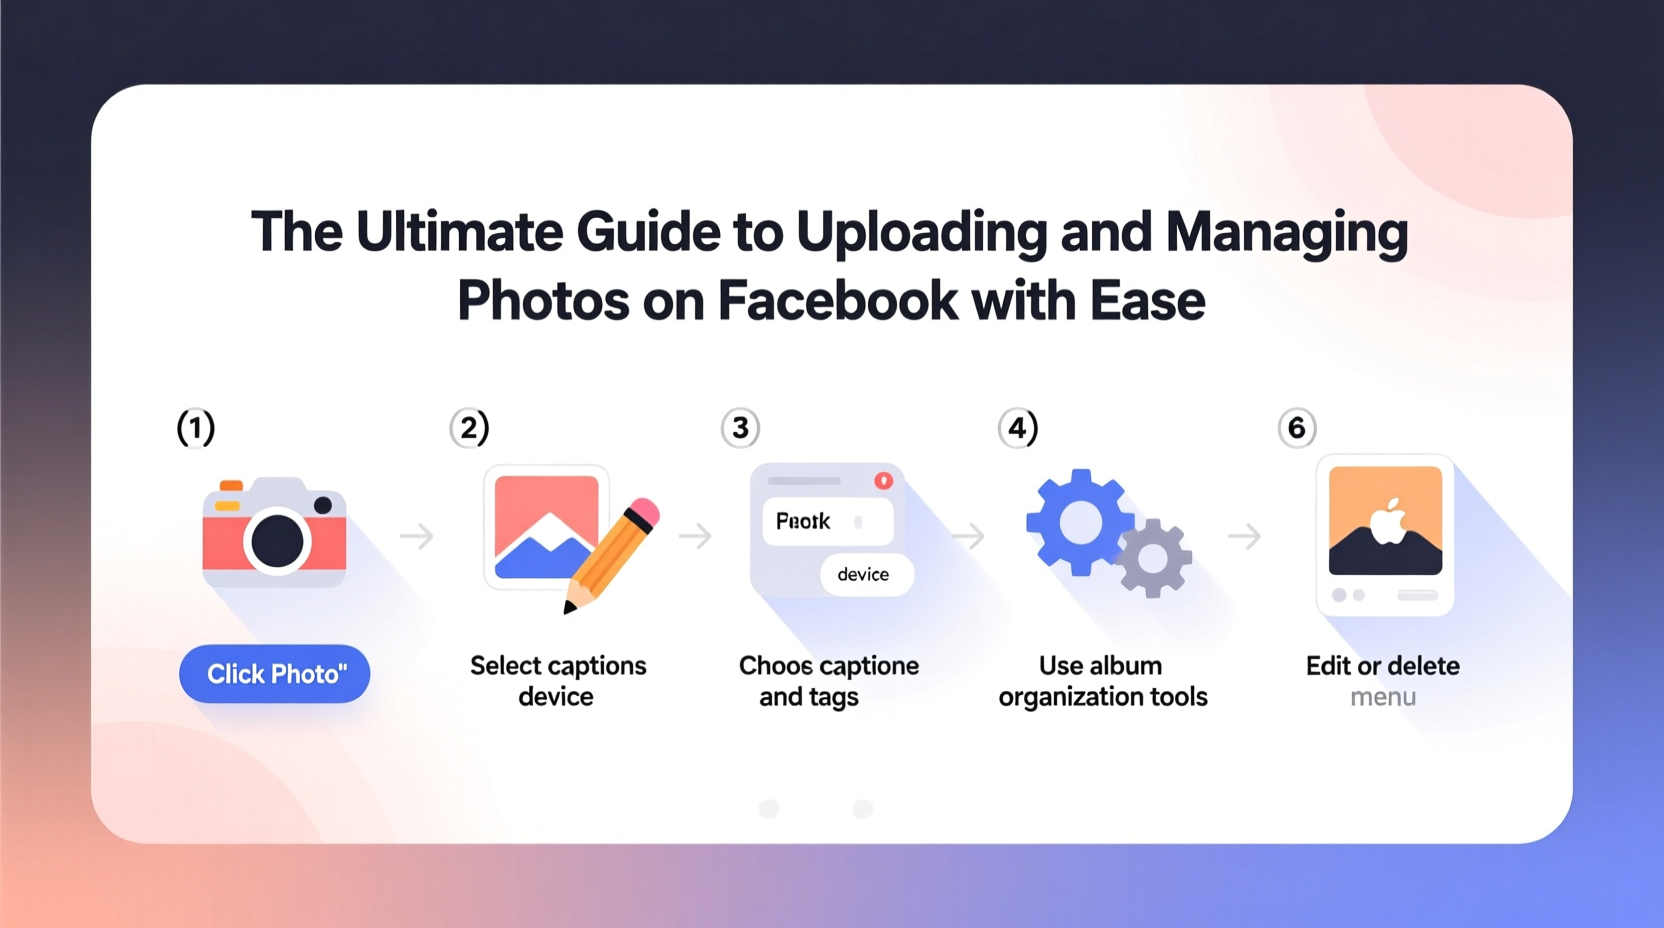
Step-by-Step Guide to Uploading Photos
Follow this streamlined process to upload photos effectively across devices:
- Log in to your Facebook account via browser or app.
- Navigate to your profile, a friend’s timeline, a group, or a page where you want to post.
- Click or tap the “Photo/Video” option in the post composer.
- Select one or multiple images from your device.
- Add a caption, tag people, choose an audience (public, friends, custom), and select an album (or create a new one).
- Click “Post” or “Share.”
For bulk uploads, especially on desktop, consider using the built-in album creator. This allows you to assign a title, description, and privacy settings once for all selected photos, saving time and ensuring consistency.
Organizing and Managing Your Photo Library
Over time, unorganized uploads lead to cluttered timelines and difficulty finding specific images. Facebook provides tools to keep your visual content structured and accessible.
Visit your profile and click “Photos” to access all your uploaded content. Here, you’ll find tabs for Albums, Timeline Photos, Posted Photos, and Profile Pictures. Creating themed albums—such as “Summer 2024 Trip” or “Family Reunion”—helps maintain order.
You can edit album details anytime: rename them, change cover photos, adjust privacy, or rearrange image order. To move photos between albums, download and re-upload them, as direct transfers aren’t supported.
| Feature | Purpose | Access Method |
|---|---|---|
| Albums | Group related photos | Create during upload or in Photos section |
| Privacy Settings | Control who sees each photo or album | Edit during upload or afterward in album settings |
| Tagging | Identify people in photos | Click “Tag People” in album view |
| Archive Old Posts | Hide without deleting | Three-dot menu on any photo post |
Protecting Privacy While Sharing Visually
Photos often contain sensitive information—locations, children’s faces, home exteriors. Facebook gives granular control over who sees what, but these settings must be actively managed.
When uploading, choose from audience options: Public, Friends, Only Me, or Custom lists. You can set different permissions per album or individual photo. For example, a baby’s first steps might be shared only with close family.
Review tags before they appear on your timeline by enabling “Review posts you're tagged in before they appear on your timeline” under Settings > Profile and Tagging. This prevents unwanted exposure from others’ uploads.
“Over 60% of users regret posting photos they later deleted due to privacy concerns.” — Digital Safety Report, 2023, Internet Security Alliance
Real Example: How Maria Streamlined Her Family Photos
Maria, a mother of two, used to scatter photos across her timeline—birthday parties next to grocery runs, with inconsistent tagging and mixed privacy levels. After months of confusion, she decided to reorganize.
She created private albums titled “Kids’ Milestones,” “Vacations,” and “Extended Family Events,” moving older photos into appropriate categories. She set each album’s audience to “Friends Only” or “Immediate Family” and enabled tag review.
The result? Her parents could easily find holiday pictures, strangers couldn’t see her children’s school locations, and her timeline looked more intentional. She now uploads new photos directly into pre-labeled albums, saving time and stress.
Common Mistakes to Avoid
- Ignoring compression effects: Facebook reduces image quality. Avoid relying on fine text or intricate details in photos.
- Over-tagging: Tagging too many people in irrelevant photos can annoy contacts and reduce engagement.
- Skipping alt text: Not adding descriptive alternative text limits accessibility for visually impaired users.
- Forgetting mobile backups: Relying solely on manual uploads risks losing photos if your phone is damaged.
Checklist: Optimize Your Facebook Photo Workflow
Use this checklist every time you upload or manage photos:
- ✅ Confirm internet connection stability before large uploads
- ✅ Select high-quality images (min. 720px width)
- ✅ Write meaningful captions that provide context
- ✅ Add alt text for accessibility (found under editing options)
- ✅ Choose the right audience for privacy
- ✅ Tag relevant people—but only if appropriate
- ✅ Organize multi-photo uploads into named albums
- ✅ Review existing albums quarterly for cleanup
Frequently Asked Questions
Can I recover a deleted photo on Facebook?
Once deleted, photos are permanently removed from public view and cannot be restored through Facebook’s interface. However, if you have downloaded copies or backed up your data via “Download Your Information,” you can re-upload them.
Why do my photos look blurry after uploading?
Facebook compresses all images to save bandwidth. To minimize quality loss, upload larger files (up to 2048px wide) in JPEG format with moderate compression. Avoid PNG unless transparency is needed.
How do I stop someone from tagging me in photos?
You can’t prevent others from taking photos of you, but you can control visibility. Go to Settings > Profile and Tagging, then enable “Review tags people add to your posts before they appear.” You’ll get a notification and can approve or reject each tag.
Conclusion: Take Control of Your Visual Story
Uploading and managing photos on Facebook doesn’t have to be chaotic. With intentional organization, smart privacy choices, and consistent habits, you can turn scattered snapshots into a coherent, secure, and meaningful digital narrative. Whether you're documenting personal milestones or building a brand presence, clarity and care make all the difference.


 浙公网安备
33010002000092号
浙公网安备
33010002000092号 浙B2-20120091-4
Comments
No comments yet. Why don't you start the discussion?