
Bringing a cat into your home is a joyful experience, but it comes with responsibilities—chief among them, managing their bathroom needs. A clean, well-maintained litter tray isn’t just about convenience; it’s essential for your cat’s health, comfort, and behavior. Many litter problems stem not from the cat, but from how the tray is set up or maintained. This comprehensive guide walks you through every stage—from choosing the right tray to long-term hygiene practices—so both you and your cat can enjoy a stress-free routine.
Choosing the Right Litter Tray
The foundation of successful litter use begins with selecting an appropriate tray. While it might seem like a simple plastic box, the design, size, and placement significantly impact your cat’s willingness to use it.
- Size matters: The tray should be 1.5 times the length of your cat from nose to tail base. Larger cats or those with mobility issues need extra space.
- Type of tray: Open trays are easier to clean and allow better airflow. Covered trays reduce odor and scatter but may trap smells, discouraging sensitive cats.
- Entry height: Older or arthritic cats benefit from low-entry trays. Consider side cutouts if your cat struggles with high sides.
- Automatic vs. manual: Self-cleaning trays offer convenience but can startle some cats with noise or sudden movements. Introduce them gradually.
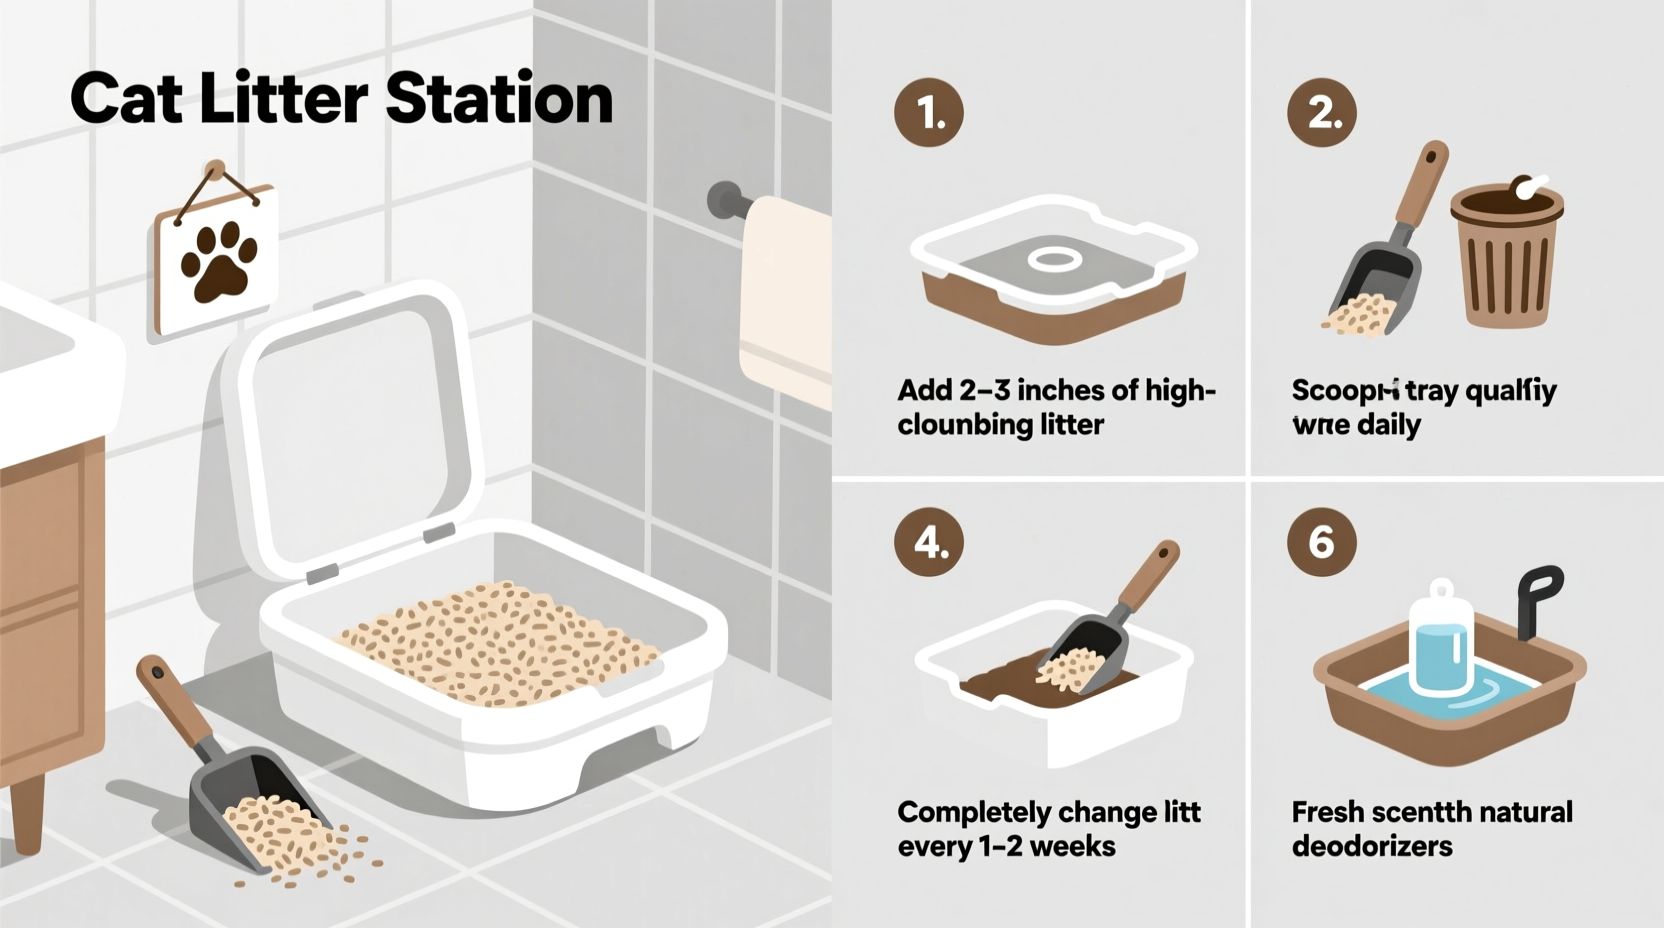
Step-by-Step Setup Guide
Proper setup ensures your cat accepts the tray immediately and uses it consistently. Follow this timeline when introducing a new litter system.
- Choose a quiet, accessible location: Away from loud appliances and food bowls. Cats value privacy during elimination.
- Place the empty tray: Let your cat investigate it first. Familiarize them with the space without pressure.
- Add 2–3 inches of litter: Use unscented, clumping clay or natural alternatives like paper or wood pellets. Avoid strong fragrances that may repel your cat.
- Introduce your cat gently: Place them in the tray after meals or naps. Do not force them, but encourage with calm words.
- Monitor initial usage: Watch for signs of hesitation, scratching outside the box, or vocalization, which may indicate discomfort.
If your cat avoids the tray, consider whether the litter texture, depth, or location feels unnatural. Some cats prefer soft, fine-grained litter, while others dislike deep layers that feel unstable.
Daily Maintenance Routine
A neglected litter tray is the top reason cats begin eliminating elsewhere. Daily care prevents odor buildup, reduces bacteria, and keeps your cat happy.
| Task | Frequency | Notes |
|---|---|---|
| Scoop solid waste and clumps | Daily (twice if possible) | Use a slotted scoop for efficiency |
| Check litter level | Daily | Top off to maintain 2–3 inches |
| Wipe down edges | Every few days | Prevent residue buildup |
| Full litter change & wash tray | Monthly (or every 4–6 weeks) | Use mild soap and water—no bleach or ammonia |
Common Mistakes and How to Avoid Them
Even well-meaning owners make errors that lead to litter aversion or hygiene issues. Recognizing these pitfalls early can prevent behavioral setbacks.
- Using scented litter: Artificial perfumes can irritate a cat’s sensitive respiratory system and deter use.
- Infrequent scooping: Waste buildup causes odor stress and increases risk of urinary tract infections.
- Wrong placement: Putting the tray next to noisy machines or in high-traffic areas makes cats feel vulnerable.
- Sharing trays across multi-cat households: One tray for multiple cats leads to territorial disputes and avoidance.
- Deep cleaning with harsh chemicals: Ammonia-based cleaners mimic urine scent and may encourage re-soiling.
“Cats are fastidious groomers and expect the same cleanliness from their litter box. A dirty tray isn’t just unpleasant—it’s a behavioral red flag.” — Dr. Lena Reyes, Feline Behavior Specialist
Real-Life Scenario: Solving Litter Box Avoidance
Sarah adopted a two-year-old rescue cat named Milo. Within a week, he began urinating beside the litter tray. She assumed he was marking territory until she reviewed her setup. The tray was tucked behind the washing machine—a loud, enclosed space. She also used a covered box with scented litter.
Following veterinary advice, Sarah moved the tray to a quiet hallway closet with the door propped open. She switched to an open-top tray with unscented clumping litter. She added a second tray per the n+1 rule, even though she had only one cat, to rule out anxiety.
Within three days, Milo used the tray consistently. His stress-related behaviors faded. The issue wasn’t defiance—it was discomfort.
Odor Control and Long-Term Hygiene Tips
Controlling smell isn’t just about freshness—it supports your cat’s respiratory health and keeps your home livable.
- Ventilate the area with a small fan or air purifier.
- Place baking soda under the litter liner to absorb moisture and odor.
- Use litter mats to trap tracked particles outside the tray.
- Replace carbon filters in self-cleaning models monthly.
- Wash reusable liners every 2–3 weeks with gentle detergent.
Frequently Asked Questions
How often should I completely change the litter?
Completely replace the litter and wash the tray every 4 to 6 weeks, depending on usage. High-traffic trays in multi-cat homes may need changing every month. Between full changes, top off with fresh litter as needed.
My cat scratches the wall after using the tray. Is that normal?
Yes. This behavior mimics burying waste in nature. If scratching becomes destructive, provide a nearby scratching post or pad to redirect the instinct.
Can I flush cat litter?
No. Most clumping litters are made from sodium bentonite, which expands and clogs pipes. Even “flushable” litters can harm septic systems or local waterways due to pathogens like Toxoplasma gondii. Dispose of waste in sealed bags in the trash.
Final Checklist for Success
- Provide one litter tray per cat, plus one extra.
- Place trays in quiet, accessible, low-traffic areas.
- Use unscented, clumping litter at a depth of 2–3 inches.
- Scoop waste at least once daily.
- Wash the tray monthly with mild soap and water.
- Avoid ammonia-based cleaners.
- Monitor your cat’s habits for sudden changes in usage.
- Address accidents calmly—never punish. Investigate medical or environmental causes.
Conclusion
A well-managed litter tray is the cornerstone of harmonious indoor cat living. It reflects respect for your cat’s instincts and contributes directly to their physical and emotional well-being. By setting up the right environment, maintaining consistent hygiene, and responding thoughtfully to behavioral cues, you create a space where your cat feels safe and understood.


 浙公网安备
33010002000092号
浙公网安备
33010002000092号 浙B2-20120091-4
Comments
No comments yet. Why don't you start the discussion?