
In an era where minimalist design meets bold personal expression, even the most overlooked household items can become focal points of creativity. The humble tissue box—long relegated to side tables and bathroom corners—is undergoing a stylish renaissance. Far from being just functional, tissue boxes can now be transformed into eye-catching decor pieces that reflect personality, complement interior themes, and add charm to any room. With a little imagination and some simple materials, you can turn this everyday object into a statement piece that elevates your space.
Why Rethink the Tissue Box?
The tissue box is often hidden or disguised because it doesn’t naturally align with curated aesthetics. However, its rectangular shape, consistent size, and central placement in living rooms, bedrooms, and guest bathrooms make it a perfect candidate for upcycling. Instead of concealing it, why not celebrate it? When creatively redesigned, a tissue dispenser becomes more than a utility—it becomes art, conversation starter, and design anchor.
Interior designers increasingly emphasize cohesion between function and form. As sustainability gains traction, repurposing common items like tissue boxes aligns with eco-conscious values while reducing waste. According to home stylist Mariana Vega, “Small interventions create big impact. A single modified tissue box can unify color schemes, introduce texture, or bring whimsy into a neutral space.”
“Design isn’t about replacing everything—it’s about reimagining what’s already there.” — Mariana Vega, Interior Stylist & Author of *Everyday Elegance*
Creative Ways to Transform Your Tissue Box
From fabric wraps to 3D sculptures, the possibilities are limited only by imagination. Below are five standout approaches to reinvent your tissue box.
1. Fabric-Wrapped Elegance
Covering a tissue box with patterned fabric instantly upgrades its look. Choose cotton, linen, or velvet based on your room’s vibe—florals for a cottage feel, geometric prints for modern spaces, or textured weaves for cozy bedrooms. Use double-sided tape or mod podge to adhere the fabric smoothly.
2. Decoupage with Purpose
Use vintage book pages, sheet music, maps, or magazine cutouts to create a thematic tissue box. Ideal for studies, nurseries, or reading nooks, decoupaged boxes add narrative depth. Seal with clear varnish for durability and wipe-clean surfaces.
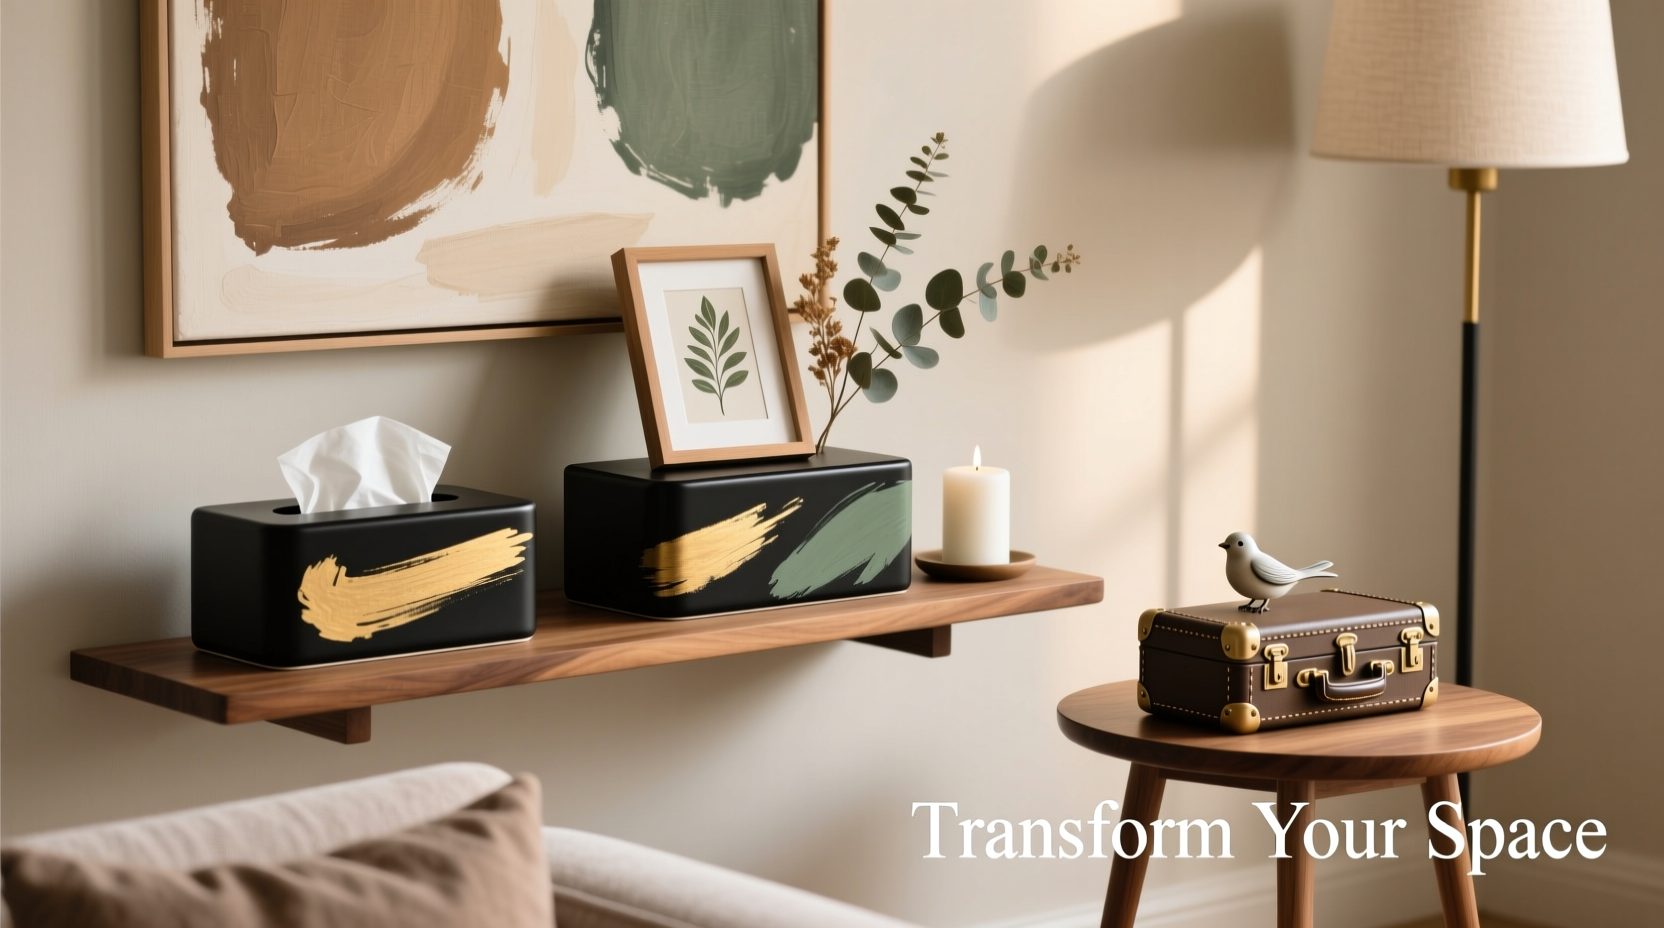
3. Painted Mini Art Gallery
Treat the box as a canvas. Hand-paint motifs such as botanical illustrations, abstract shapes, or cultural patterns. Metallic paints add glamour; matte finishes keep things subtle. This method works especially well in monochrome rooms needing a pop of detail.
4. Themed Boxes for Special Spaces
Create seasonal or event-specific designs. Think pastel bunnies for Easter, snowflakes in winter, or mini chalkboard labels for rotating messages in kids’ rooms. These dynamic updates keep decor fresh without costly overhauls.
5. Structural Reinvention
Go beyond surface changes. Replace the standard box with a custom holder made from wood, ceramic, or woven rattan. Alternatively, cut a decorative hole in the top of a shoebox-style container and insert a refillable tissue pouch. This approach blends craft with carpentry for high-impact results.
Step-by-Step Guide: Creating a Fabric-Covered Tissue Box
Follow this timeline to complete a polished fabric-wrapped tissue box in under an hour.
- Prep (10 min): Gather supplies—empty tissue box, fabric (at least 12” x 12”), ruler, scissors, glue stick or mod podge, foam brush.
- Measure & Cut (5 min): Wrap the box with paper to trace each side. Add ½ inch seam allowance and cut fabric accordingly.
- Apply Adhesive (5 min): Lightly coat one side of the box with mod podge using the brush.
- Attach Fabric (15 min): Press fabric onto the glued surface, smoothing out bubbles. Repeat for all sides, mitering corners neatly.
- Finishing Touches (10 min): Let dry for 20 minutes. Optional: add ribbon trim along edges or attach small embellishments like buttons or tassels.
Do’s and Don’ts: Maximizing Aesthetic Impact
| Do’s | Don’ts |
|---|---|
| Match colors to existing room accents (pillows, rugs, wall art) | Use overly bulky materials that obstruct tissue removal |
| Seal porous surfaces to resist moisture and dirt | Forget functionality—ensure easy access to tissues |
| Incorporate textures like lace, burlap, or embroidery | Overcrowd the design with too many patterns or elements |
| Label or theme boxes in shared spaces (e.g., “Guest Bath”) | Use non-durable adhesives that peel over time |
Real-Life Inspiration: The Boho Living Room Makeover
Sophie Tran, a freelance graphic designer in Portland, wanted to refresh her living room without spending much. She had a neutral sofa, beige walls, and minimal accessories. Inspired by bohemian interiors she saw online, she decided to start small—with her tissue box.
She used leftover fabric from a curtain project: a rich indigo ikat pattern. After wrapping the box and adding tassels at each corner, she placed it on a wooden coffee table alongside a stack of art books. The change was immediate. Friends noticed it first. “I love your little art piece!” said one guest. That single box inspired Sophie to coordinate throw pillows and a rug using the same fabric, ultimately transforming the entire space on a $50 budget.
“It wasn’t about the box,” Sophie reflects. “It was about giving myself permission to play with design, even in tiny ways.”
Checklist: Design Your Own Decorative Tissue Box
- ☐ Choose a theme or color scheme that matches your room
- ☐ Select a base material (cardboard, wood, or recycled container)
- ☐ Pick your covering method (fabric, paint, paper, etc.)
- ☐ Gather tools: scissors, adhesive, brushes, ruler
- ☐ Test tissue dispensing after decoration to ensure usability
- ☐ Add finishing touches: trim, labels, or small decorations
- ☐ Style it intentionally—place where it complements other elements
Frequently Asked Questions
Can I reuse the same tissue box cover when refilling?
Absolutely. If you use a rigid outer shell (like a decorated cardboard box or wooden frame), simply slide out the empty inner pack and insert a new one. Avoid gluing the inner tissue pack directly to the decorative exterior.
Are these projects kid-friendly?
Yes, with supervision. Children can help choose fabrics, apply stickers, or paint simple designs. Use non-toxic glue and washable paints. This makes for a great craft activity that also teaches resourcefulness and design thinking.
What if I live in a humid climate? Will the box warp?
Paper and cardboard can degrade in moisture. To prevent warping, seal all surfaces with waterproof varnish or consider using plastic containers as bases. In bathrooms, place the box away from direct shower steam and sinks.
Conclusion: Small Changes, Big Transformation
Transforming your space doesn’t require a full renovation or expensive furniture. Sometimes, the smallest details carry the most character. A creatively styled tissue box does more than hold essentials—it expresses taste, invites interaction, and completes a visual story. Whether you’re refreshing a bedroom, styling a rental apartment, or crafting with kids, this simple project offers disproportionate returns in joy and cohesion.


 浙公网安备
33010002000092号
浙公网安备
33010002000092号 浙B2-20120091-4
Comments
No comments yet. Why don't you start the discussion?