
For many students, moving into a dorm marks the first taste of independence—and one of the smallest living spaces they’ll ever inhabit. With limited square footage, shared walls, and strict housing rules, it’s easy for a dorm room to feel more like a temporary holding cell than a personal sanctuary. Yet, even in tight quarters, it’s entirely possible to craft a space that feels warm, functional, and uniquely yours. The key lies in smart planning, thoughtful design choices, and intentional personalization.
A well-designed dorm isn’t just about aesthetics; it supports mental well-being, enhances productivity, and fosters a sense of belonging. Whether you’re starting college for the first time or returning for another year, these strategies will help you transform your dorm from a basic sleeping pod into a true home away from home.
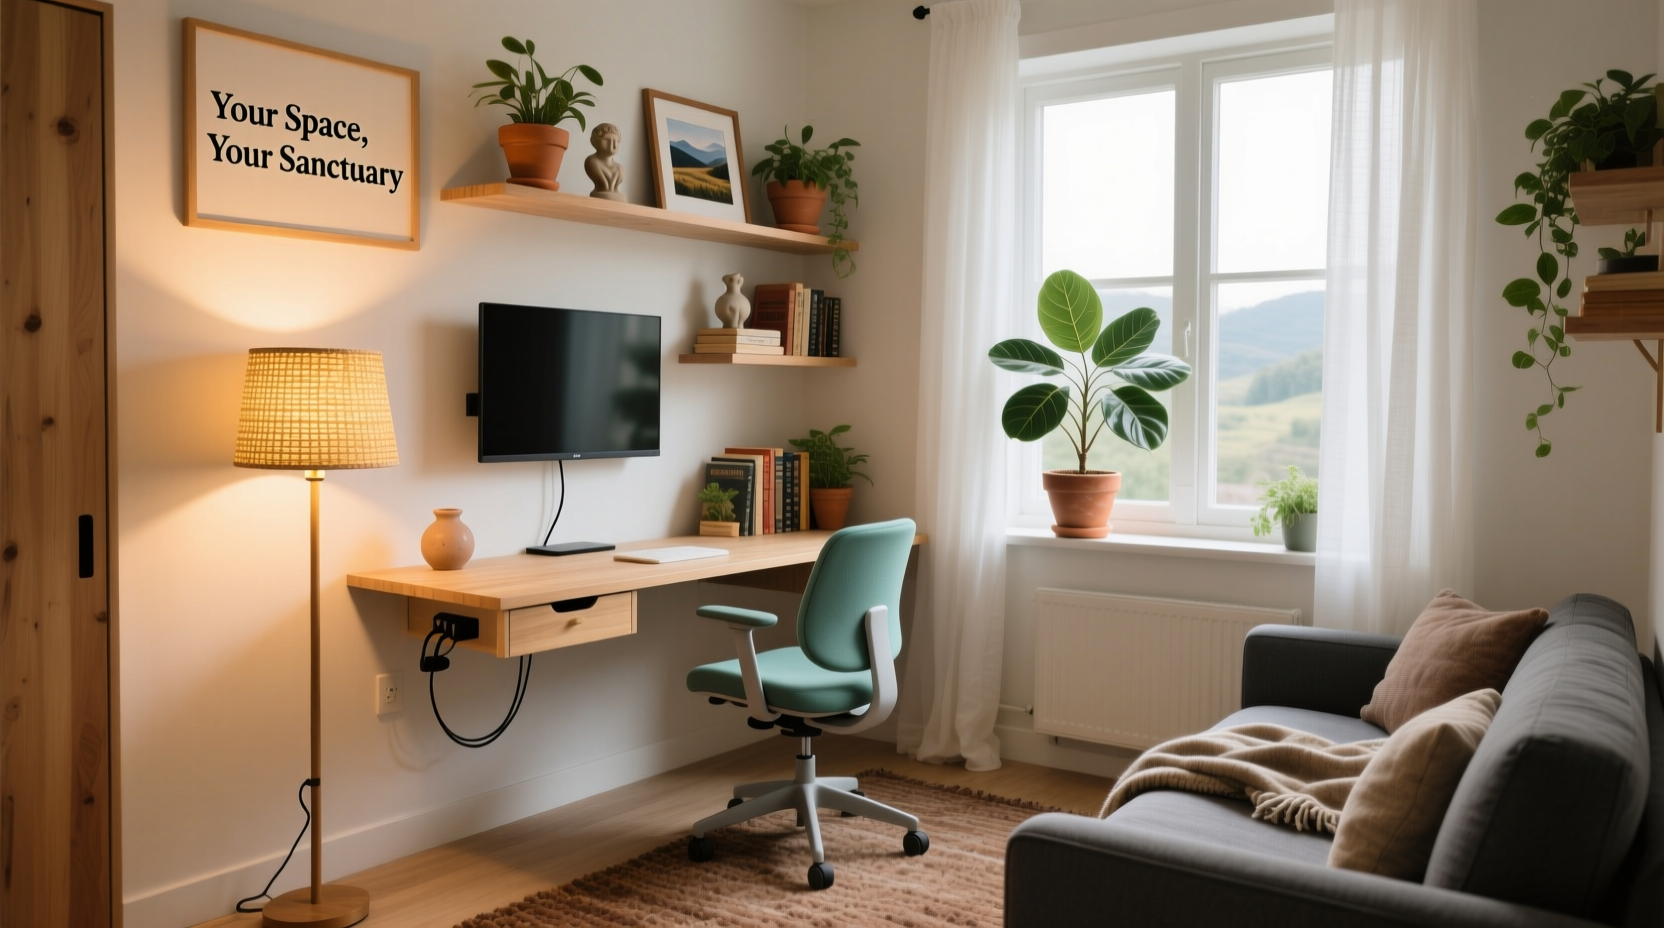
Maximize Space with Smart Furniture and Layouts
Dorm rooms are notorious for their compact size, often forcing students to sleep, study, socialize, and store belongings all within a few hundred square feet. The solution starts with furniture selection and spatial planning.
Begin by measuring your room and sketching a rough floor plan. Identify fixed elements—like windows, doors, and radiators—then position your bed, desk, and closet around them. Most dorms use loftable or bunkable beds, which open up valuable floor space underneath. Use this area wisely: add a small couch, a study nook, or extra storage units.
Folding desks, wall-mounted shelves, and over-the-door organizers help preserve floor space while increasing functionality. Avoid pushing all furniture against the walls—sometimes floating a desk or bookshelf can improve flow and make the room feel larger.
Personalize Without Breaking Rules
Many dormitories restrict certain modifications, such as drilling into walls or using permanent adhesives. But that doesn’t mean you have to live with blank cinderblock walls. Get creative within the guidelines.
Use removable adhesive hooks, tension rods, and fabric hangings to add character without damage. Hang string lights across the ceiling or along a wall for ambient lighting and a cozy vibe. Posters, tapestries, and photo collages mounted with putty or blue tack offer personality while remaining rent-friendly.
Bring in soft textures through bedding, rugs, and throw pillows. Choose a color scheme that reflects your style—whether calming neutrals, bold jewel tones, or retro patterns. Consistency in palette ties the space together and makes it feel intentional rather than cluttered.
“Students who personalize their environment report higher levels of comfort and lower stress during exams.” — Dr. Lena Patel, Campus Mental Health Researcher, University of Michigan
Essential Dorm Room Checklist
Before move-in day, prepare a targeted list of must-have items. This prevents overpacking and ensures you cover both function and comfort.
- Loftable bed risers (check school policy)
- Under-bed storage containers with wheels
- Desk lamp with adjustable brightness
- Mini fan or heater (if allowed)
- Over-the-door organizer for toiletries or snacks
- Non-marking adhesive hooks or strips
- Area rug to define zones and reduce noise
- Command strips-compatible mirror
- Reusable water bottle and coffee mug
- Power strip with surge protection
- Weekly planner or digital calendar setup
- First-aid kit and basic cleaning supplies
Organization Systems That Actually Work
Clutter is the enemy of comfort, especially in small spaces. Implement organizational habits early to maintain order throughout the semester.
Divide your room into functional zones: sleeping, studying, dressing, and relaxing. Assign specific storage solutions to each. For example, keep textbooks and notebooks in labeled bins near your desk, while clothing is folded or hung efficiently in drawers or on racks.
Use drawer dividers for small items like chargers, pens, and makeup. Store off-season clothes in vacuum-sealed bags under the bed. Label everything—even if you think you’ll remember where things go, a busy schedule will test your memory.
| Zone | Recommended Storage | Avoid |
|---|---|---|
| Study Area | Stackable trays, pegboards, desktop organizers | Piling papers directly on the desk |
| Sleeping Area | Under-bed bins, bed riser shelves | Leaving shoes or laundry on the floor |
| Clothing | Hanging organizers, slim hangers, drawer cubes | Overstuffing drawers or closets |
| Personal Items | Decorative boxes, magnetic strips for jewelry | Leaving items scattered on surfaces |
A Real Student Transformation: From Bare Bones to Belonging
Maria, a sophomore at Boston University, arrived at her double dorm last fall feeling overwhelmed. “It looked exactly like every other room—gray walls, twin beds, fluorescent lights. I didn’t know where to start,” she said.
Instead of buying everything at once, Maria focused on incremental upgrades. She started with command-light string lights and a plush rug to soften the space. She used a vertical pegboard above her desk to organize supplies and hung a canvas print of her hometown skyline.
By mid-semester, her room had become a go-to spot for study breaks. “People always stop by because it feels calm and inviting,” she shared. “I realized I didn’t need much—just intentionality. Now when I walk in, I actually want to stay.”
Step-by-Step: Your 7-Day Dorm Makeover Plan
You don’t need weeks to create a livable, enjoyable space. Follow this timeline to build momentum without burnout.
- Day 1: Measure your room and sketch a layout. Check school policies on electronics, décor, and furniture modifications.
- Day 2: Purchase essentials: storage bins, adhesive hooks, lighting, and bedding.
- Day 3: Set up your sleeping and study zones. Loft your bed if possible and install under-bed storage.
- Day 4: Organize clothing and personal items. Use dividers and labels for clarity.
- Day 5: Add personal touches—photos, artwork, plants (real or faux), and textiles.
- Day 6: Install lighting and test outlets. Add a power strip if needed.
- Day 7: Do a walkthrough. Sit at your desk, lie on your bed, and assess comfort and flow. Adjust as needed.
Frequently Asked Questions
Can I paint my dorm walls?
Most colleges prohibit painting due to liability and restoration costs. Instead, use removable wallpaper, fabric panels, or large tapestries to change the wall appearance safely.
How do I deal with limited closet space?
Invest in slim, non-slip hangers to maximize hanging room. Use shelf dividers and stackable bins for folded items. Consider a freestanding clothing rack for outerwear or seasonal pieces.
What if my roommate and I have different decorating styles?
Respect boundaries by defining personal zones. Use room dividers or curtains to separate areas visually. Collaborate on shared elements like lighting or a mini-fridge, but allow individual expression in your own space.
Create a Space That Supports You
Your dorm doesn’t need to be large to be meaningful. With careful planning, smart organization, and a touch of creativity, even the most basic room can become a refuge that reflects who you are and supports how you live. Comfort isn’t about luxury—it’s about intention. When your environment aligns with your needs, it becomes easier to focus, rest, and thrive.
Start small. Pick one area to improve this week. Then another next week. Over time, these changes compound into a space that doesn’t just house you—but welcomes you.


 浙公网安备
33010002000092号
浙公网安备
33010002000092号 浙B2-20120091-4
Comments
No comments yet. Why don't you start the discussion?