
Cooking ribs that are tender, juicy, and packed with flavor is a hallmark of great home barbecue. Yet many home cooks struggle with dry meat, tough membranes, or uneven cooking. The secret isn’t just in the seasoning—it’s in the technique. From selecting the right cut to mastering low-and-slow heat, this guide walks you through every stage of creating restaurant-quality ribs at home. Whether you're using a smoker, oven, or grill, these time-tested methods will deliver consistently excellent results.
Choosing the Right Cut of Ribs
Not all ribs are created equal. The two most common types found in grocery stores are baby back ribs and St. Louis-style spare ribs, each offering different textures and fat content.
- Baby Back Ribs: Taken from the top of the rib cage near the loin, these are leaner, more tender, and cook faster. They’re ideal for beginners due to their consistent size and milder flavor.
- Spare Ribs: Cut from the belly side, they’re meatier and fattier, which means richer flavor but longer cooking times. St. Louis-style ribs are trimmed spare ribs—square-shaped and uniform—for even cooking.
- Beef Ribs: Larger and bolder in taste, beef short ribs or plate ribs require extended cooking but reward with deep, savory juiciness.
The Step-by-Step Process for Tender Ribs
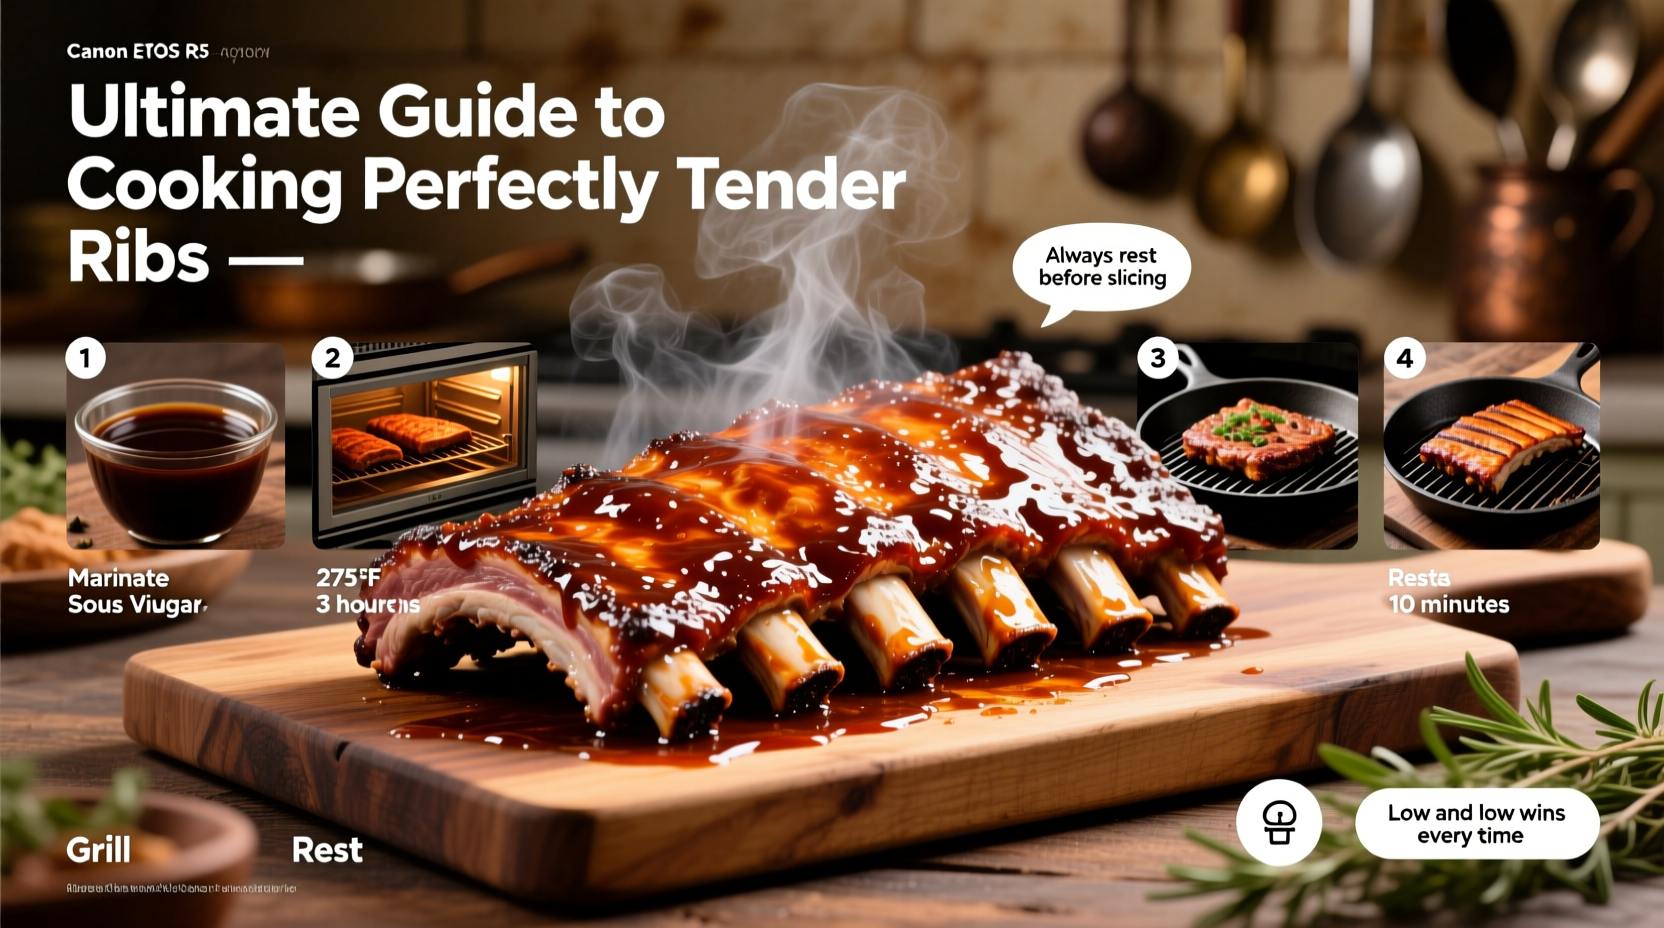
Perfect ribs rely on preparation, patience, and precision. Follow this timeline for foolproof results regardless of your cooking method.
- Remove the membrane: Flip the ribs bone-side up. Slide a butter knife under the thin membrane covering the bones, then grip it with a paper towel and peel it off completely. This allows rubs to penetrate and prevents chewy texture.
- Trim excess fat: While some fat enhances flavor, thick layers won’t render fully and can create flare-ups. Trim large chunks without overdoing it.
- Apply a dry rub: Use a balanced mix of salt, sugar, paprika, garlic powder, onion powder, black pepper, and chili powder. Coat both sides evenly and let sit for at least 30 minutes (or refrigerate overnight).
- Preheat your cooking environment: For smoking or grilling, aim for 225°F–250°F. In the oven, set to 275°F for faster cooking.
- Start cooking: Place ribs meat-side up on the rack. Cook uncovered for 2–3 hours depending on type and thickness.
- Wrap in foil (optional “Texas Crutch”): After 2 hours, wrap ribs tightly in aluminum foil with a splash of apple juice, beer, or vinegar. This traps steam, accelerating tenderness.
- Continue cooking: Return wrapped ribs to heat for another 1.5–2 hours until internal temperature reaches about 195°F–203°F.
- Unwrap and glaze: Remove foil, brush with barbecue sauce, and cook uncovered for 15–30 minutes to caramelize the exterior.
- Rest before slicing: Let ribs rest for 10–15 minutes. This redistributes juices and improves texture.
Temperature and Timing Guide
Timing varies based on equipment and cut. Use this table as a reference for planning your cook.
| Rib Type | Unwrapped Cooking Time | Wrapped Cooking Time | Total Time (Approx.) | Target Internal Temp |
|---|---|---|---|---|
| Baby Back Ribs | 2 hours | 1.5–2 hours | 3.5–4 hours | 195°F–203°F |
| Spare Ribs / St. Louis Style | 2.5 hours | 2–2.5 hours | 4.5–5 hours | 195°F–203°F |
| Beef Short Ribs | 3 hours | 2.5–3 hours | 5.5–6 hours | 200°F–205°F |
Expert Insight: Why Low and Slow Works
The transformation of tough connective tissue into gelatin happens gradually at low temperatures. Collagen breaks down effectively between 160°F and 205°F, which is why rushing the process leads to chewy results.
“Cooking ribs too hot or too fast seals in toughness. True tenderness comes from time, not temperature.” — James Holloway, Competitive BBQ Pitmaster & Judge
Common Mistakes to Avoid
Even seasoned cooks make errors that compromise texture and flavor. Steer clear of these pitfalls:
- Skipping membrane removal: Leads to rubbery underside and poor seasoning penetration.
- Over-saucing early: Sugars in sauce burn easily. Always apply during the final 30 minutes.
- Wrapping too loosely: Steam escapes, reducing the tenderizing effect. Seal foil packets tightly.
- Not resting after cooking: Cutting immediately releases precious juices, leaving meat dry.
- Using high heat to save time: Results in uneven doneness—charred outside, raw inside.
Mini Case Study: From Tough to Tender
Mark, a backyard griller in Kansas City, used to bake his ribs at 375°F for one hour. Every batch came out stiff and dry. After switching to a 275°F oven method with foil wrapping and extending cook time to four hours, he noticed dramatic improvement. The ribs pulled cleanly from the bone, stayed moist, and impressed guests at his next summer cookout. His key takeaway? “Patience beats power. I stopped fighting the clock and started trusting the process.”
Checklist: Perfect Ribs at a Glance
Keep this checklist handy when prepping your next rack:
- ☑ Removed the membrane from the bone side
- ☑ Trimmed excess fat
- ☑ Applied dry rub evenly on both sides
- ☑ Preheated cooker to 225°F–275°F
- ☑ Placed ribs meat-side up, away from direct flame
- ☑ Monitored internal temperature after 2 hours
- ☑ Wrapped in foil with liquid after initial cook
- ☑ Glazed only in the final 15–30 minutes
- ☑ Rested ribs before serving
Frequently Asked Questions
Can I cook ribs in the oven instead of a smoker?
Absolutely. The oven provides stable, controlled heat—ideal for beginners. Set it to 275°F, follow the same prep and wrapping steps, and finish under the broiler briefly for char if desired.
How do I know when ribs are done without a thermometer?
Use the bend test: lift the rack with tongs from one end. If it bends easily and small cracks form on the surface, it’s likely done. Meat should pull back slightly from the bones, exposing about ¼ inch.
Should I boil ribs before grilling?
No. Boiling leaches flavor and can leave meat mushy. The preferred method is slow roasting or smoking—this preserves taste and builds texture naturally.
Mastery Starts on Your Next Rack
Great ribs aren't magic—they're method. With attention to detail, respect for timing, and a few expert-backed techniques, anyone can produce succulent, fall-off-the-bone results. Don’t be discouraged by early missteps; even the best pitmasters had batches that missed the mark. What matters is consistency and learning from each cook. Now that you’ve got the full blueprint, fire up your grill, smoker, or oven and put this guide into action. When your family takes that first bite and pauses mid-chew—you’ll know you’ve nailed it.


 浙公网安备
33010002000092号
浙公网安备
33010002000092号 浙B2-20120091-4
Comments
No comments yet. Why don't you start the discussion?