
Making slime at home is a creative, sensory-rich activity that appeals to kids and adults alike. When done right, it delivers a smooth, stretchy, and satisfying texture that’s both fun to play with and calming to handle. While many recipes exist, white school glue remains the most accessible and reliable base for DIY slime. However, achieving that ideal consistency—neither too sticky nor too stiff—requires more than just mixing ingredients. Understanding the science behind activation, choosing the right ratios, and knowing how to fix common issues are essential to mastering the craft.
This comprehensive guide walks you through every stage of creating perfect white glue slime, from selecting materials to troubleshooting failed batches. Whether you're crafting with children, teaching in a classroom, or indulging in a nostalgic hobby, these techniques will help you produce consistently high-quality slime.
The Science Behind Slime Activation
Slime forms when polymers in white glue link together through a process called cross-linking. The primary ingredient in most white glues—polyvinyl acetate (PVA)—exists as long, tangled chains in liquid form. When an activator like borax, saline solution, or liquid starch is introduced, it creates bridges between these chains, transforming the liquid into a semi-solid gel.
The key to success lies in balance. Too little activator, and the slime stays runny. Too much, and it becomes rubbery or brittle. Temperature, humidity, and even the brand of glue can influence the reaction. For example, some glue formulations contain added thickeners or preservatives that alter how they respond to activators.
“Consistency in slime-making comes from understanding ratios and reacting to texture—not blindly following recipes.” — Dr. Lila Chen, Polymer Chemistry Educator
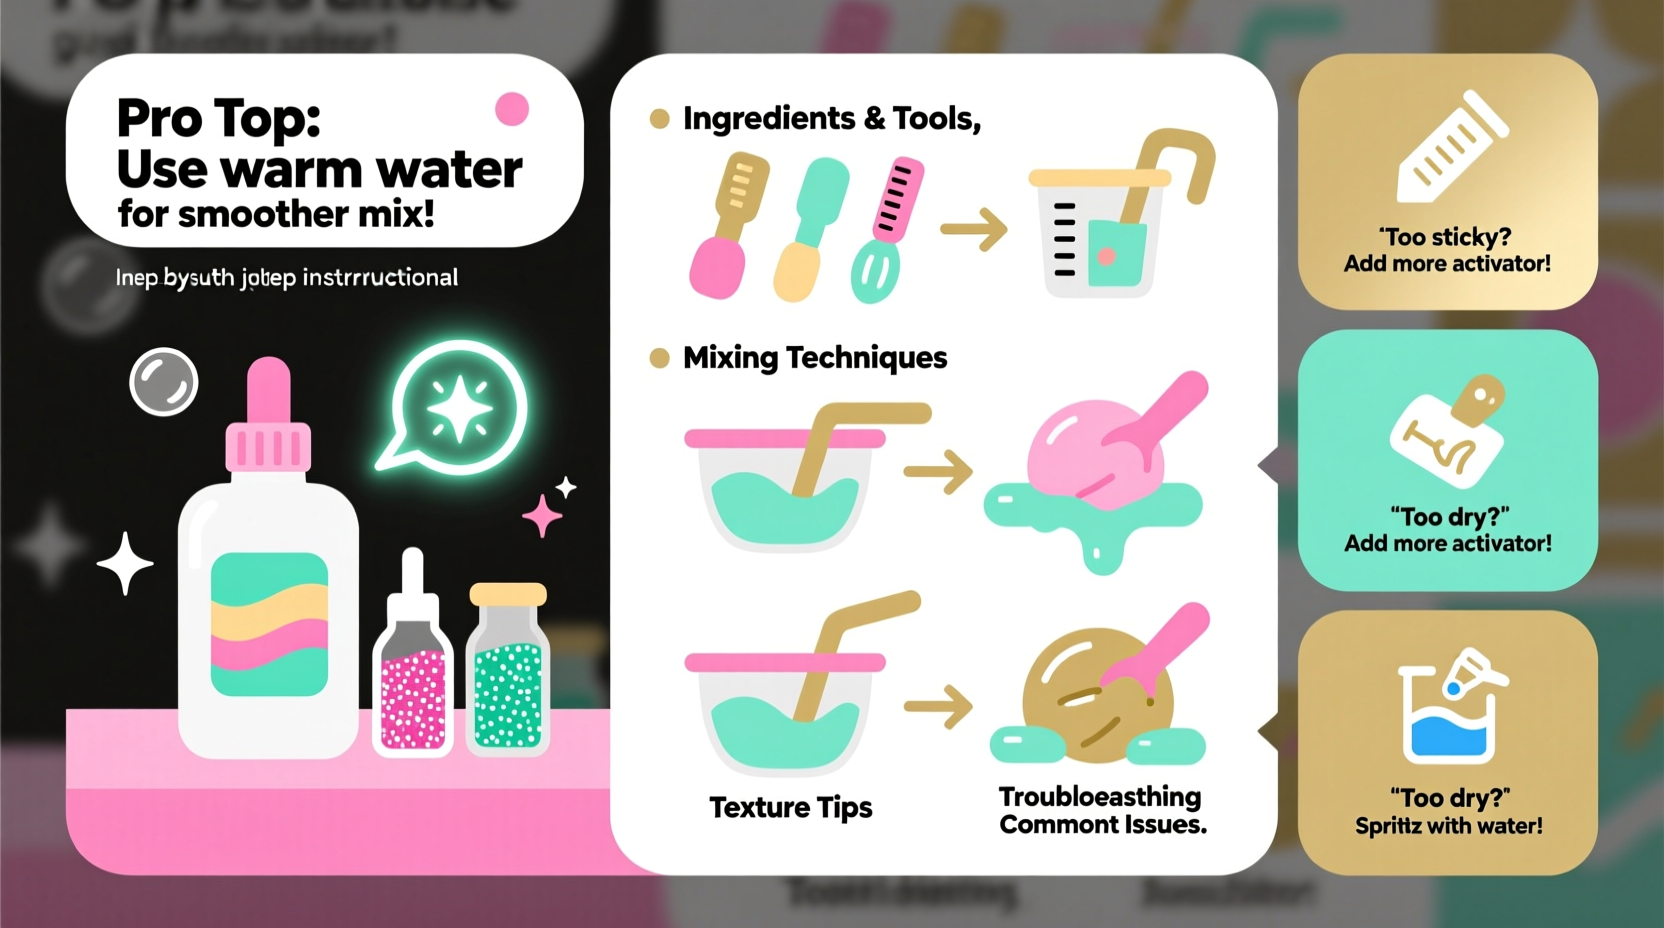
Essential Ingredients and Tools
Before starting, gather all necessary components. Using quality materials improves results and reduces frustration.
- White PVA glue: Elmer’s Glue-All or similar school glue works best. Avoid glitter or specialty glues unless modifying a proven recipe.
- Activator: Choose one based on availability and sensitivity:
- Borax solution (1 tsp borax per 1 cup warm water)
- Contact lens solution (must contain boric acid and sodium borate)
- Liquid laundry starch
- Water: Distilled or filtered is ideal to prevent impurities from interfering.
- Additives (optional): Food coloring, glitter, foam beads, or scents.
- Tools: Mixing bowl, spoon or spatula, measuring spoons, and disposable gloves (especially with borax).
Step-by-Step Guide to Perfect White Glue Slime
- Prepare your workspace. Cover surfaces with wax paper or plastic wrap. Have trash nearby for easy cleanup.
- Pour ½ cup (4 oz) of white glue into a mixing bowl. For thicker slime, use full-strength glue; for softer textures, mix in ¼ cup of water.
- Add color or additives. Mix in food coloring, glitter, or extracts now, before activation.
- Begin adding activator slowly. Start with 1 tablespoon of contact lens solution or borax water. Stir thoroughly.
- Observe texture changes. As the mixture begins to pull away from the bowl, use hands (with gloves if needed) to knead it.
- Add more activator ½ teaspoon at a time if the slime remains sticky. Stop as soon as it detaches cleanly from fingers.
- Knead for 3–5 minutes until smooth and elastic. If too stiff, warm slightly in hands or add a drop of lotion.
- Store in an airtight container when not in use to preserve freshness.
Troubleshooting Common Slime Problems
Even experienced slime-makers encounter issues. The good news? Most problems have simple fixes.
| Problem | Likely Cause | Solution |
|---|---|---|
| Slime is too sticky | Insufficient activator | Add activator in tiny increments while kneading. |
| Slime is too stiff or rubbery | Over-activated | Warm between palms, then add 1–2 drops of lotion or oil and knead. |
| Slime won’t come together | Low-quality glue or incorrect activator | Ensure glue is PVA-based and activator contains boric acid. |
| Slime dries out quickly | Exposed to air or low-humidity environment | Store in sealed container; revive with a few drops of water. |
| Separation or clumping | Too much activator added too fast | Knead vigorously; if irreversible, restart with less activator. |
Advanced Tips and Creative Variations
Once you’ve mastered the basics, experiment with textures and effects. Here are proven upgrades:
- Fluffy slime: Add ¼ cup of shaving cream before activation for a cloud-like, lightweight feel.
- Butter slime: Mix in 2–3 tablespoons of model magic or soft clay after initial kneading for a moldable, creamy texture.
- Glow-in-the-dark: Use phosphorescent powder or glow paint instead of regular dye.
- Crunchy slime: Incorporate small packing peanuts, foam beads, or plastic pellets for auditory satisfaction.
For sensory therapy or stress relief, consider adding lavender essential oil or using pastel colors for a calming effect. Keep in mind that any additive increases stickiness, so adjust activator accordingly.
Real Example: Recovering a Failed Batch
Jamie, a middle school teacher, prepared a slime activity for her class using a new brand of glue. After adding the usual amount of saline solution, the mixture remained soupy. Instead of discarding it, she let the students observe the state and hypothesize why it failed. They realized the glue lacked sufficient PVA concentration. Jamie added another ¼ cup of standard white glue, remixed, and slowly reintroduced activator. Within minutes, the slime formed perfectly. The mishap turned into a hands-on lesson about material composition and scientific adjustment.
Slime Care and Storage Checklist
To extend the life of your slime and maintain hygiene, follow this checklist:
- ✅ Wash hands before and after playing to prevent contamination.
- ✅ Store in an airtight container when not in use.
- ✅ Keep away from fabric and carpets to avoid stains.
- ✅ Discard if mold appears, texture degrades, or odor develops.
- ✅ Limit exposure to dust and pet hair by covering containers.
- ✅ Revive dry slime with a few drops of water or glycerin and thorough kneading.
Frequently Asked Questions
Can I make slime without borax or contact solution?
Yes. Liquid laundry starch is a safe, effective alternative. Mix equal parts white glue and starch, stir, and knead until desired consistency forms. It produces a slightly stiffer slime but works well for basic projects.
Is homemade slime safe for young children?
With supervision, yes—but avoid ingestion. Borax-based slime should not be used by children under 5 or those prone to mouthing objects. Opt for saline solution or starch activators in such cases. Always wash hands afterward.
Why does my slime smell bad after a few days?
Organic additives (like food coloring or lotion) or contaminated tools can cause bacterial growth. Always use clean utensils and store slime properly. Adding a drop of mild preservative like vitamin E oil may help prolong shelf life.
Final Thoughts
Perfect slime isn’t about following a single recipe—it’s about learning how ingredients interact and adapting in real time. With white glue as your foundation, you have a versatile canvas for endless creativity. By mastering activation, recognizing texture cues, and applying smart fixes, you’ll turn every batch into a satisfying success.


 浙公网安备
33010002000092号
浙公网安备
33010002000092号 浙B2-20120091-4
Comments
No comments yet. Why don't you start the discussion?