
Pothos (Epipremnum aureum) is one of the most popular houseplants for good reason: it's resilient, fast-growing, and thrives on minimal care. But beyond its reputation as a low-maintenance green companion, pothos offers something even more rewarding—effortless propagation. Whether you're expanding your indoor jungle or sharing cuttings with friends, understanding how to propagate pothos effectively in water versus soil can make all the difference in success rate, root development speed, and long-term plant health.
This comprehensive guide walks through every stage of pothos propagation, comparing both methods in depth, offering practical timelines, and delivering science-backed advice that ensures strong, healthy new plants. From selecting the right stem cutting to transplanting rooted cuttings into permanent homes, this resource equips you with everything needed to grow lush pothos vines using either method confidently.
Why Propagate Pothos?
Propagation isn’t just about multiplying plants—it’s an act of nurturing life from a simple snip. Pothos responds exceptionally well to vegetative propagation because of its nodes, which are growth points along the stem where roots and leaves emerge. With proper technique, a single vine can yield multiple thriving plants over time.
Beyond aesthetics, propagating your own pothos promotes sustainability by reducing reliance on commercial nurseries. It also allows you to rejuvenate leggy or overgrown specimens by taking cuttings and encouraging bushier regrowth on the parent plant.
Step-by-Step Guide to Taking the Right Cutting
The foundation of successful propagation lies in the initial cutting. No matter whether you choose water or soil, starting with a high-quality cutting dramatically increases your chances of success.
- Choose a Healthy Vine: Select a mature, vibrant stem free of yellowing leaves, pests, or signs of stress.
- Locate Nodes: Look for small brownish bumps along the stem—these are nodes, the essential sites for root formation. Each cutting must include at least one node.
- Cut Just Below a Node: Use sterilized pruning shears or scissors to make a clean 45-degree cut about half an inch below a node.
- Include Leaves: Retain 2–4 leaves per cutting to support photosynthesis during early root development.
- Remove Lower Leaves: Strip off any leaves that would sit beneath the waterline or inside the soil to prevent rot.
A typical cutting should be 4–6 inches long, with one or two nodes and several healthy upper leaves. Avoid excessively long stems, as they may struggle to sustain themselves without established roots.
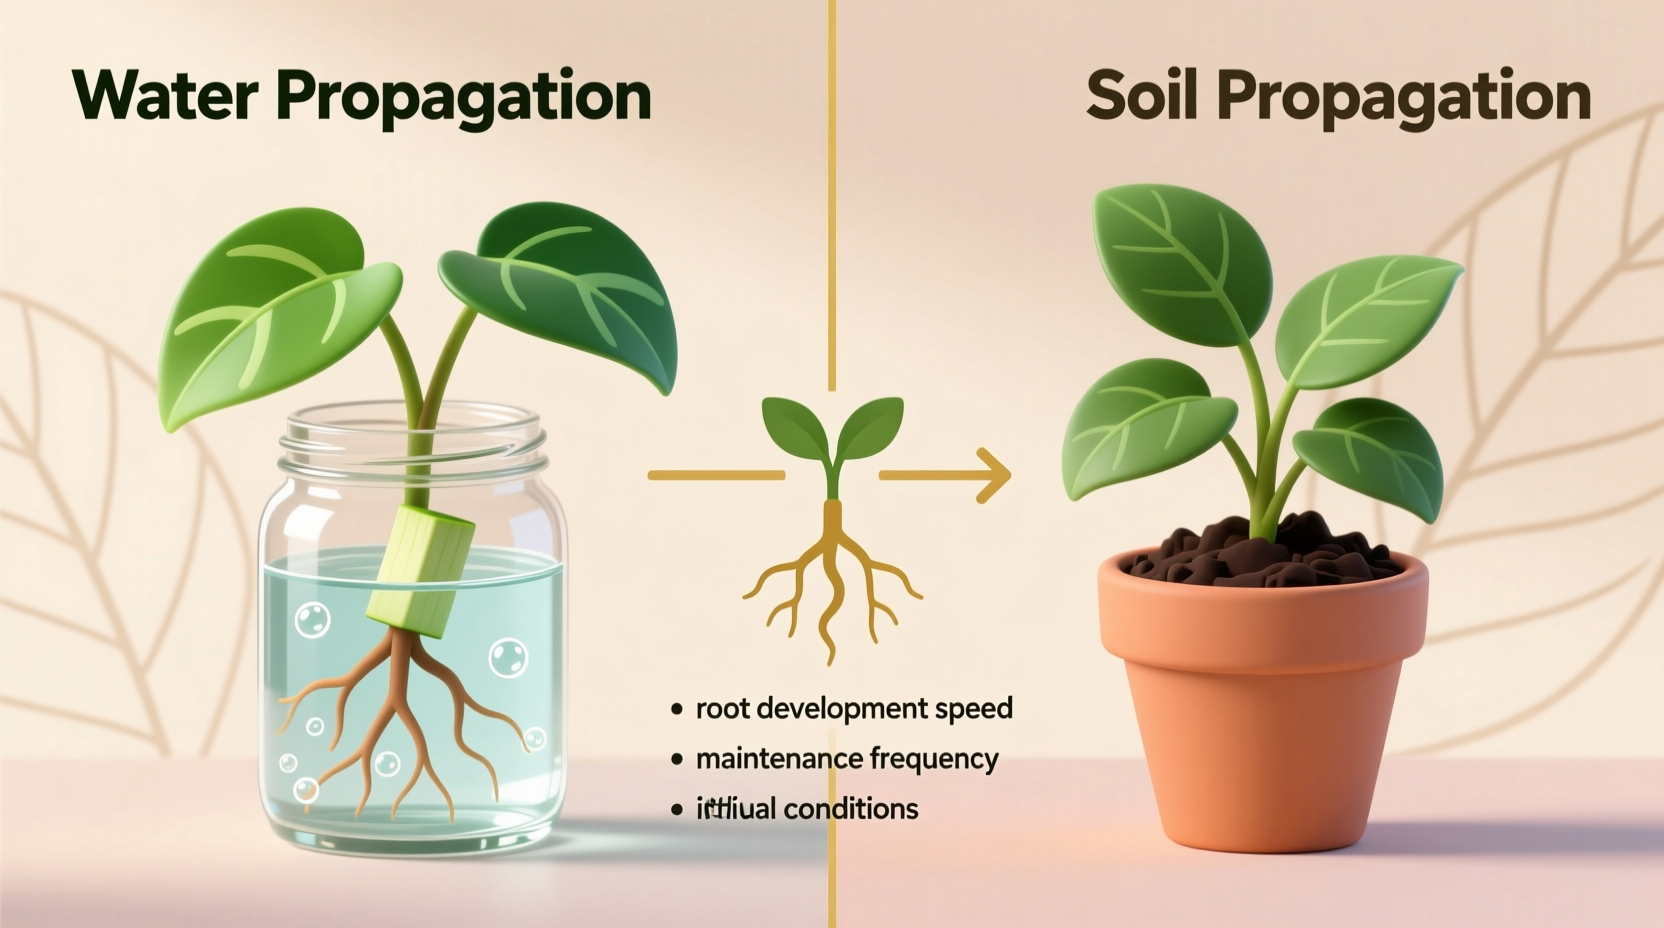
Water Propagation: Speed, Visibility, and Simplicity
Water propagation remains the most widely used method among home gardeners—and for good reasons. It provides clear visibility into root development, requires minimal materials, and typically produces visible roots within 7–10 days under optimal conditions.
To propagate pothos in water:
- Place the cutting in a clean glass or jar filled with room-temperature tap water.
- Ensure at least one node is submerged; leaves should remain above the waterline.
- Position the container in bright, indirect light—avoid direct sun, which can overheat the water and damage developing tissue.
- Change the water weekly to prevent stagnation and bacterial growth.
Roots usually begin forming within a week. Within 3–4 weeks, you’ll likely see a network of white, healthy roots ready for transfer to soil—or you can continue growing the plant indefinitely in water with regular nutrient supplementation.
“Water propagation gives growers immediate feedback. Seeing roots form builds confidence and helps diagnose issues like rot before they spread.” — Dr. Lena Reyes, Urban Horticulturist & Plant Physiology Researcher
Soil Propagation: Strength, Stability, and Direct Transition
While slower to show results, soil propagation fosters stronger root systems adapted to terrestrial environments from day one. This method eliminates the need for later transplant shock when moving from water to soil—a common issue with water-rooted cuttings.
To propagate pothos directly in soil:
- Fill a small pot (4–6 inches) with well-draining mix—perlite, coco coir, or a standard indoor potting blend works well.
- Moisten the soil lightly before planting; it should feel damp but not soggy.
- Insert the node-end of the cutting about 1–2 inches deep into the soil.
- Press the soil gently around the base to ensure contact.
- Cover the pot with a plastic bag or humidity dome to retain moisture, removing it daily for airflow.
Keep the setup in warm, bright, indirect light. Check soil moisture every few days—maintain slight dampness without waterlogging. Roots typically establish in 3–5 weeks, though outward growth may take longer to appear.
One advantage of soil propagation is that roots develop thicker and more fibrous structures designed to extract nutrients from substrate, giving these plants a head start in long-term resilience.
Water vs Soil: A Detailed Comparison
| Factor | Water Propagation | Soil Propagation |
|---|---|---|
| Root Development Speed | Faster (visible in 7–10 days) | Slower (3–5 weeks) |
| Root Structure | Thin, delicate, adapted to water | Thicker, fibrous, soil-adapted |
| Maintenance Level | Low (weekly water changes) | Moderate (moisture monitoring, humidity control) |
| Risk of Rot | Moderate (if water isn't changed) | Lower (with proper drainage) |
| Transplant Shock | Higher (when moving to soil) | None (already in growing medium) |
| Beginner Friendliness | High (visual progress motivates) | Medium (requires patience) |
Mini Case Study: Two Methods, One Apartment
Sophia, a plant enthusiast in Seattle, decided to test both propagation methods side by side using cuttings from her golden pothos. She placed five cuttings in glass bottles filled with filtered water near her kitchen window and planted five others in small terracotta pots with a peat-perlite mix.
Within ten days, the water-propagated cuttings showed fine white roots up to 2 inches long. By contrast, the soil cuttings showed no visible changes. However, after four weeks, when Sophia transplanted the water-grown plants into soil, three of them wilted slightly—exhibiting mild transplant shock. The soil-propagated group, though slower to start, began producing new leaves steadily without setbacks.
Her conclusion? Water propagation is ideal for quick wins and educational purposes, while soil propagation yields sturdier, more adaptable plants over time.
Expert Tips for Maximizing Success
- Use Room-Temperature Water: Cold water shocks delicate tissues and slows root initiation.
- Avoid Direct Sunlight: Intense light heats water and damages emerging roots.
- Don’t Seal Cuttings Airtight in Soil: If using a plastic cover, open it daily to prevent mold.
- Be Patient with Soil: Lack of visible progress doesn’t mean failure—roots are forming underground.
- Label Your Setups: Especially useful when testing multiple varieties or methods simultaneously.
Common Mistakes to Avoid
Even experienced plant keepers sometimes misstep during propagation. Here are frequent errors and how to avoid them:
- No Node Included: Without a node, no roots will form—always double-check before placing cuttings.
- Leaves Submerged: In water, submerged leaves decay and promote bacterial growth.
- Overwatering Soil Cuttings: Soggy soil leads to stem rot. Let top inch dry slightly between waterings.
- Impatience: Some cuttings take longer depending on temperature, light, and genetics.
- Using Dirty Vessels: Algae and pathogens thrive in unclean jars—rinse thoroughly between uses.
When and How to Transplant Water-Rooted Cuttings to Soil
Once roots reach 1–2 inches in length, water-propagated pothos are ready for soil transition. To minimize shock:
- Prepare a pot with drainage holes and fresh, well-aerated potting mix.
- Gently rinse the roots to remove slime buildup from prolonged water exposure.
- Dig a small hole and place the cutting so the node and roots are fully covered.
- Water lightly and keep the plant in similar lighting conditions initially.
- Maintain higher humidity for 7–10 days post-transplant using a misting bottle or nearby humidifier.
Expect slight drooping in the first few days—this is normal. New growth indicates successful adaptation.
FAQ
Can I leave my pothos in water forever?
Yes, many people grow pothos indefinitely in water. For sustained health, change the water weekly and add a diluted liquid fertilizer monthly to replace lost nutrients.
Why are my cuttings turning brown or mushy?
Browning or soft stems indicate rot, often caused by stagnant water, submerged leaves, or bacterial infection. Remove affected parts immediately and refresh the environment.
Do variegated pothos propagate differently?
The process is identical, but variegated types (like Marble Queen or Neon) may root slightly slower due to lower chlorophyll content. Ensure they receive ample bright, indirect light to support energy production.
Final Checklist: Propagation Success in 7 Steps
- ✔ Choose a healthy stem with visible nodes
- ✔ Make a clean cut just below a node <3>✔ Remove lower leaves that could rot
- ✔ Place in water (submerging node) or moist soil (inserting node)
- ✔ Provide bright, indirect light and stable temperatures (65–80°F)
- ✔ Monitor weekly: change water, check soil moisture, look for root emergence
- ✔ Transplant to larger soil containers once roots are 1–2 inches long
Conclusion
Propagating pothos successfully comes down to attention to detail, consistency, and understanding the strengths of each method. Water propagation offers transparency and speed, perfect for beginners and educators. Soil propagation builds robust, self-sufficient plants ideal for long-term growth. You don’t have to choose one—you can leverage both based on your goals.
With the right tools, timing, and care, you can turn a single trailing vine into an entire indoor oasis. Start your next propagation project today—snip a stem, watch life unfold, and share the green joy with others.


 浙公网安备
33010002000092号
浙公网安备
33010002000092号 浙B2-20120091-4
Comments
No comments yet. Why don't you start the discussion?