
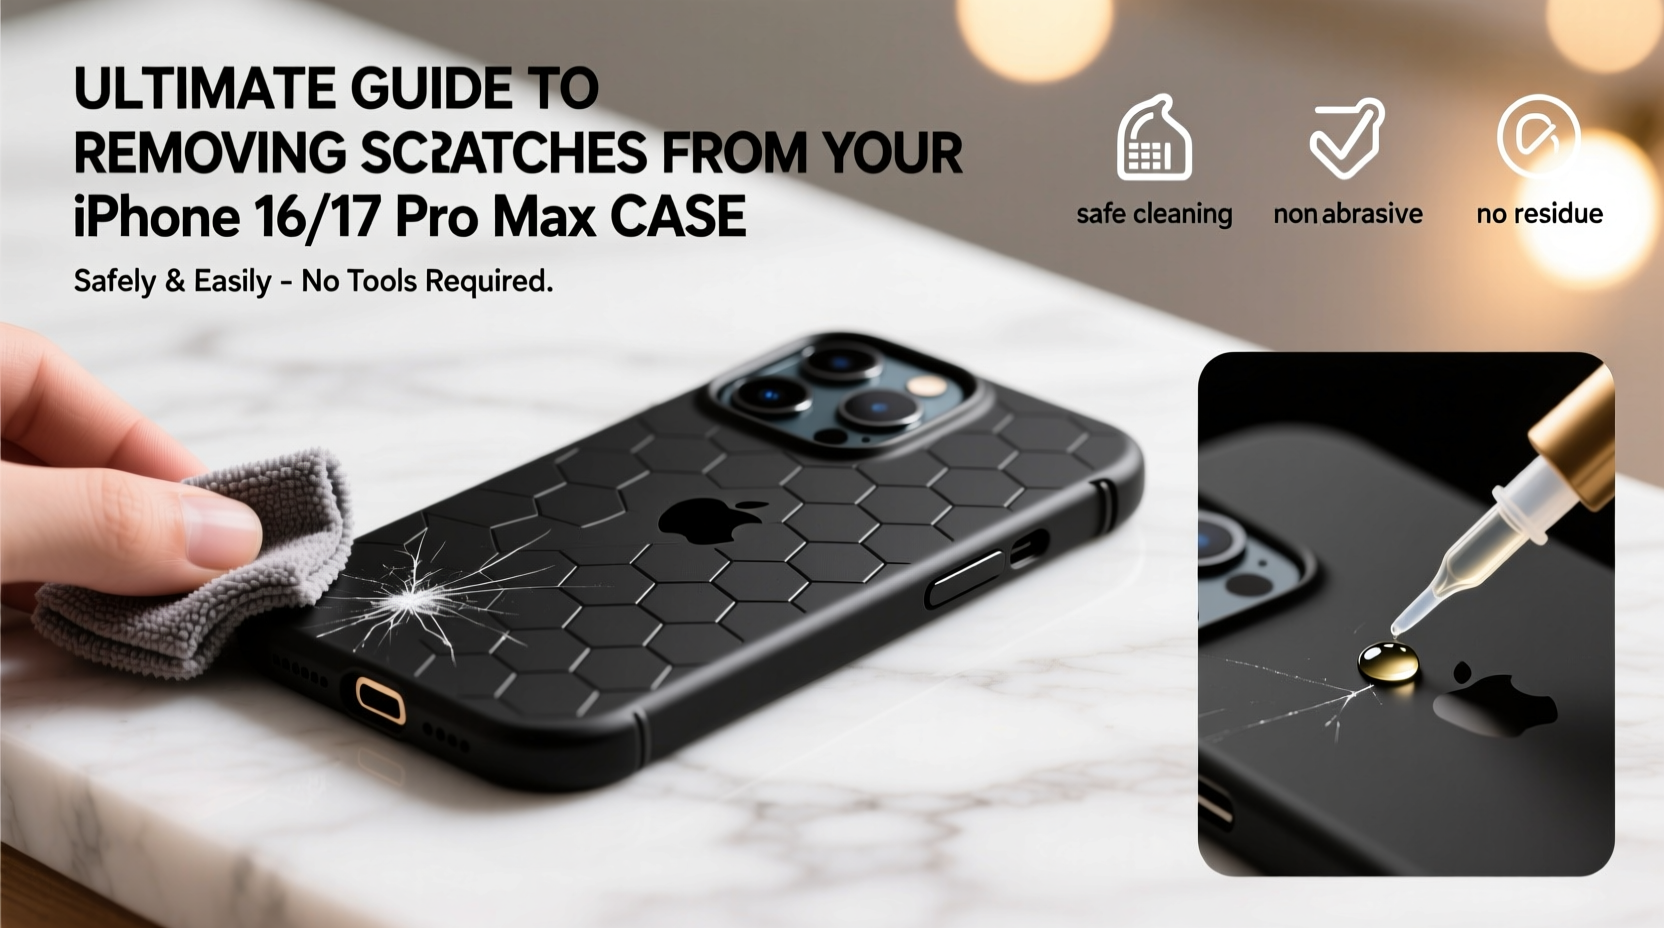
Scratches on your iPhone 16 or 17 Pro Max case are more than just cosmetic flaws—they can detract from the premium look of one of the most advanced smartphones on the market. Whether you’ve dropped your phone on pavement, stored it alongside keys, or simply worn down the finish over time, surface marks accumulate faster than expected. The good news is that most minor to moderate scratches can be effectively reduced or removed without damaging the case’s integrity. This guide delivers practical, tested solutions tailored specifically for modern iPhone cases—especially those made from polycarbonate, silicone, and hybrid materials commonly used in Pro Max models.
Understanding Your Case Material
Before attempting any scratch removal method, identify the material of your iPhone case. The approach varies significantly depending on whether you're dealing with hard plastic, soft silicone, leather, or a composite blend. Most official Apple cases and high-end third-party options fall into one of three categories:
- Polycarbonate (hard plastic): Common in clear cases; prone to fine swirls and deep scratches but responsive to polishing.
- Silicone: Flexible and grippy, but can develop surface scuffs that aren’t true scratches.
- Hybrid (TPU + polycarbonate): Combines shock absorption with rigidity; requires gentle handling during treatment.
Mistaking surface grime for actual scratches is common. Wipe the case thoroughly with a microfiber cloth first. If marks remain embedded beneath the surface layer, they’re likely genuine abrasions requiring intervention.
Step-by-Step Guide to Removing Scratches Safely
Follow this structured process to restore your case’s appearance without risking further damage. These steps work best on non-leather cases with visible but shallow-to-moderate scratches.
- Remove and clean the case: Take it off your iPhone and wash it with lukewarm water and mild dish soap. Use a soft toothbrush to reach edges. Dry completely with a lint-free cloth.
- Assess scratch depth: Run your fingernail across the mark. If it catches, the scratch is deeper and may require abrasive correction. If smooth, it’s likely superficial and easier to treat.
- Select your repair method: Choose based on material and scratch severity (see next section).
- Apply treatment evenly: Work in small sections using circular motions for uniform results.
- Rinse and dry: After treatment, clean off residue and allow air drying for at least 30 minutes.
- Evaluate and repeat if necessary: Some deep marks may need multiple applications.
- Protect the surface: Apply a UV-resistant clear coat or use a screen protector-style film for future prevention.
Effective Methods by Case Type
| Case Material | Recommended Method | Avoid |
|---|---|---|
| Clear Polycarbonate | Toothpaste (non-gel), Novus Plastic Polish, Meguiar's PlastX | Bleach, ammonia-based cleaners, steel wool |
| Silicone | Magic Eraser (lightly), soapy water soak | Alcohol wipes (dries out material), sanding |
| Leather | Leather conditioner, color restorer pen | Water immersion, abrasive pastes |
| Hybrid (TPU+PC) | Fine automotive polish, microfiber buffing | Heat tools, harsh solvents |
Using Toothpaste for Light Scratches
Yes, ordinary white toothpaste (not gel) works surprisingly well on clear plastic cases. It contains mild silica abrasives that gently level microscopic imperfections.
“Non-gel toothpaste acts like a DIY polishing compound—it won’t fix deep gouges, but it smooths light scratches effectively.” — David Lin, Mobile Accessory Technician
To apply: Squeeze a pea-sized amount onto a cotton swab or microfiber pad. Rub in small circles over the scratch for 30–60 seconds. Wipe clean with a damp cloth and inspect. Repeat once if needed.
For Deeper Damage: Plastic Polishing Kits
When household remedies fail, upgrade to a dedicated plastic restoration kit. Products like Novus No. 2 or Meguiar’s Scratch Remover are formulated for optical clarity and safety on electronics enclosures.
Apply with a clean cloth, following product instructions precisely. Buff with a separate microfiber towel until shine returns. These kits often include multiple grades of polish—start coarse, finish fine—for layered correction.
Mini Case Study: Recovering a Dropped Clear Case
Jamal, an architect in Seattle, uses his iPhone 17 Pro Max daily on construction sites. After dropping it multiple times, his otherwise pristine clear case developed a network of fine scratches along the corners. He tried wiping it down weekly but saw no improvement. Following the toothpaste method outlined above, he spent five minutes one evening treating each affected area. After two rounds and a final rinse, over 80% of the visible webbing disappeared. A week later, he applied a thin layer of UV-resistant clear nail polish to seal the surface—a temporary shield against new abrasions. Six weeks post-treatment, the case still looks nearly new despite continued heavy use.
Checklist: Scratch Removal Preparation & Execution
Use this checklist before starting any repair attempt:
- ✅ Remove case from iPhone
- ✅ Wash with mild soap and dry thoroughly
- ✅ Identify material type
- ✅ Determine scratch depth (fingernail test)
- ✅ Gather supplies: toothpaste/polish, microfiber cloths, cotton swabs
- ✅ Work in a dust-free environment
- ✅ Patch test on hidden area
- ✅ Apply treatment in circular motions
- ✅ Clean residue and dry completely
- ✅ Reassess and reapply if necessary
Prevention Tips to Minimize Future Scratches
Once your case looks restored, take proactive steps to preserve its condition:
- Store your phone away from keys, coins, and other hard objects in pockets or bags.
- Use a screen protector to prevent glass-on-case contact when placing face-down.
- Consider a case with raised bezels to protect edges during drops.
- Clean your case weekly with a dry microfiber cloth to prevent grit buildup.
- Rotate between two cases to reduce wear on a single unit.
FAQ
Can I use baking soda to remove scratches?
While baking soda is mildly abrasive, it’s coarser than toothpaste and can leave behind haze or micro-scratches on polished surfaces. It’s not recommended for clear cases where clarity matters. Stick to finer polishing agents instead.
Will these methods work on yellowed cases?
Scratch removal focuses on surface texture, not discoloration. Yellowing is typically caused by UV exposure or oxidation, especially in clear plastics. While polishing may improve overall appearance slightly, addressing yellowing requires hydrogen peroxide soaking or specialized UV bleaching—methods beyond basic scratch repair.
Is it safe to use car wax on my iPhone case?
Some automotive waxes contain solvents that can cloud or degrade plastic over time. However, synthetic polymer sealants designed for clear coats (like chemical guys’ ceramic sprays) are generally safe in moderation. Avoid waxes with petroleum distillates or strong fragrances.
Conclusion
Removing scratches from your iPhone 16 or 17 Pro Max case doesn’t require expensive tools or technical expertise. With the right knowledge and careful execution, even noticeable blemishes can be minimized or erased entirely. The key lies in matching the solution to the material, working patiently, and protecting your investment afterward. A well-maintained case not only enhances aesthetics but also reflects pride in ownership of a high-end device. Don’t let scratches dull your phone’s premium presence—restore it today and keep it looking flawless tomorrow.


 浙公网安备
33010002000092号
浙公网安备
33010002000092号 浙B2-20120091-4
Comments
No comments yet. Why don't you start the discussion?