
Nail art has evolved from a simple trend into a full-fledged form of self-expression. Among the most striking embellishments available today are nail art diamonds—tiny, reflective gems that add instant glamour and dimension to any manicure. But not all diamonds suit every look. The right shape can elevate a design, while the wrong one can disrupt balance or feel out of place. Understanding which diamond shapes work best for different styles, nail forms, and occasions is key to achieving polished, professional results.
Understanding Nail Art Diamond Shapes and Their Visual Impact
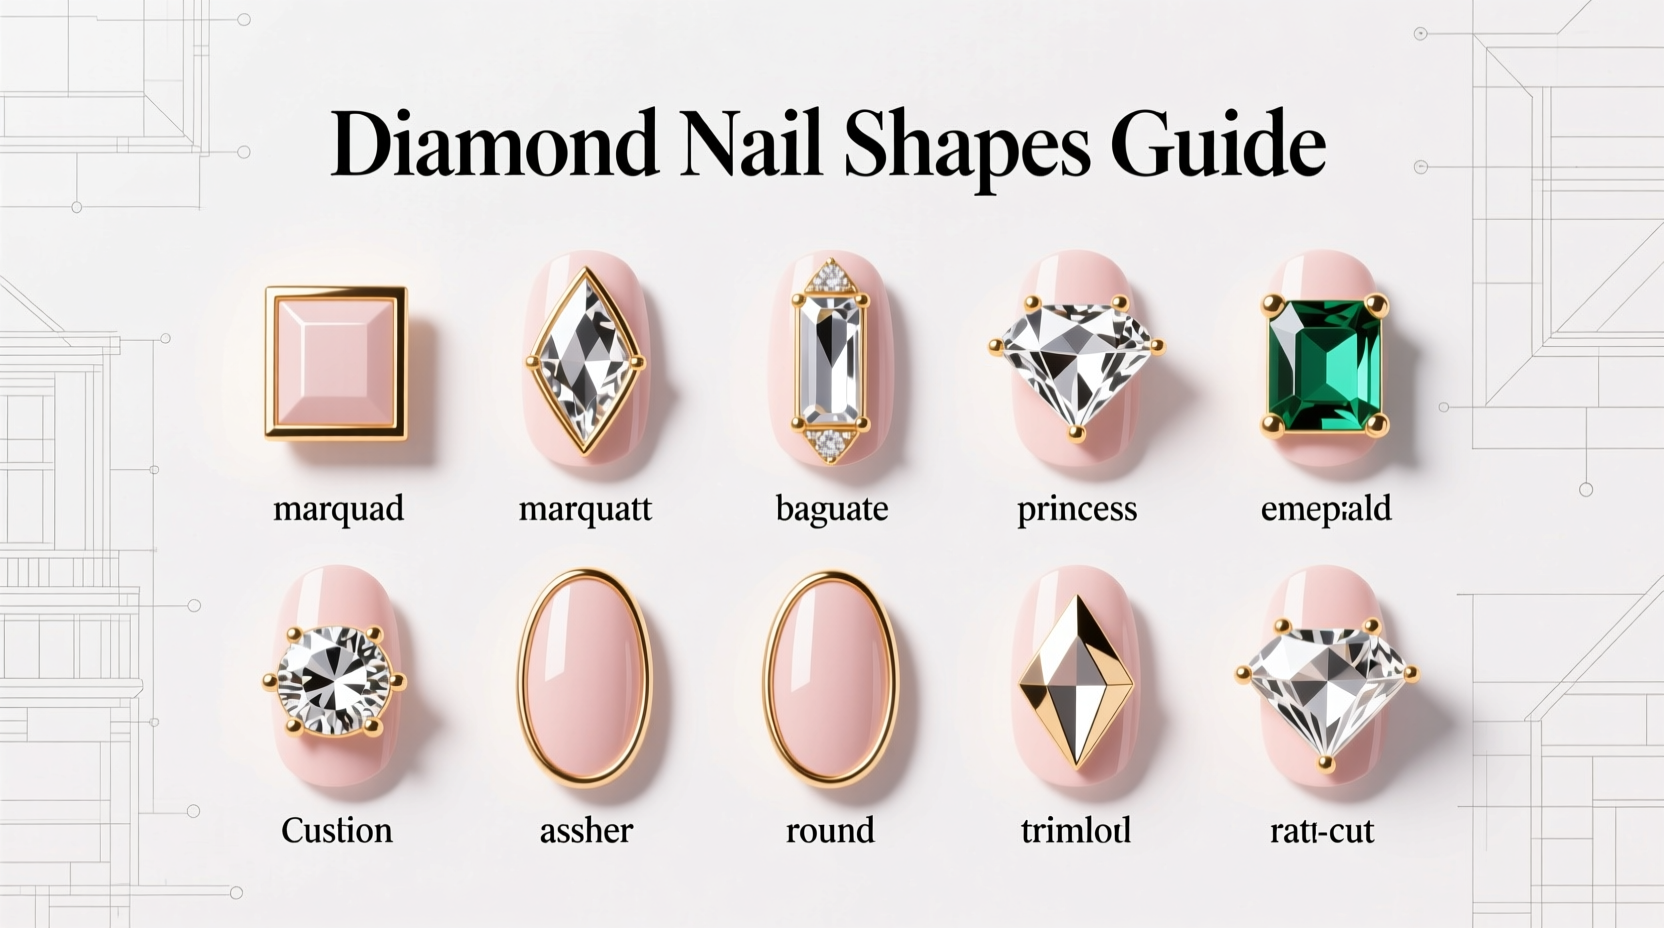
Diamonds in nail art come in various geometric forms, each contributing a unique aesthetic effect. Unlike standard rhinestones, these are precision-cut to catch light and create depth. The shape determines how light reflects off the surface, how much space it occupies on the nail, and how it interacts with surrounding elements.
- Rounds: Classic and versatile, round diamonds provide even light reflection and blend seamlessly into any design.
- Squares: Offer sharp definition and modern appeal; ideal for structured patterns like geometrics or French tips.
- Triangles: Dynamic and directional, they draw the eye and work well in accent placements or chevron designs.
- Ovals: Elongate the nail visually and complement longer nail beds without overpowering them.
- Marquise (Almond-shaped): Elegant and elongating, these mimic the natural curve of almond nails and enhance length perception.
- Cushion Cut: Blends round and square features for a vintage-inspired sparkle with soft edges.
The visual weight of each shape varies. Larger or angular cuts demand attention, making them better suited for accent nails or bold themes. Smaller, subtler shapes like micro-rounds allow for delicate detailing across entire sets.
Matching Diamond Shapes to Nail Shape and Length
Your natural or artificial nail shape should guide your choice of diamond geometry. A mismatch can distort proportions or make nails appear shorter or wider than intended.
| Nail Shape | Best Diamond Shapes | Why It Works |
|---|---|---|
| Short Square | Micro-rounds, small squares | Prevents overcrowding; maintains clean lines without adding bulk. |
| Almond | Marquise, ovals, vertical triangles | Follows the nail’s natural taper, enhancing length and elegance. |
| Coffin | Squares, rectangles, horizontal lines of triangles | Complements flat tip; creates strong graphic contrast. |
| Stiletto | Vertical marquise, tiny rounds at apex | Emphasizes point without disrupting flow; adds drama at the tip. |
| Oval | Small ovals, cushion cuts, scattered rounds | Enhances softness; avoids harsh angles that clash with organic curves. |
For shorter nails, avoid large or angular stones near the cuticle—they can overwhelm the surface. Instead, cluster smaller rounds toward the free edge to create a twinkling effect without sacrificing wearability.
“Shape harmony is everything in high-end nail design. A marquise diamond on an almond nail isn’t just decorative—it’s optical refinement.” — Lena Torres, Master Nail Artist & Educator
Choosing Diamonds Based on Occasion and Style Theme
The event dictates both tone and technique. From minimalist daywear to red-carpet extravagance, your diamond selection should align with context and intent.
Daily Wear & Office-Friendly Looks
Subtlety wins. Use micro-rounds or tiny squares along the smile line or as discreet accents. Clear or pale-colored diamonds offer shine without flashiness. These maintain professionalism while still showcasing craftsmanship.
Evening Events & Glamorous Outings
Go bold. Layer marquise and oval stones in sunburst patterns or use square-cut diamonds in symmetrical grids. Combine sizes for texture—large centerpieces surrounded by micro-diamond halos create focal points.
Weddings & Bridal Manicures
Opt for soft, luminous arrangements. Ovals and cushion cuts arranged in floral motifs or cascading down the side evoke romance. Pair with pearl bases or sheer pinks for timeless elegance.
Festivals & Creative Expression
This is where experimentation thrives. Mix triangle clusters for edgy spikes, or alternate square and round stones in mosaic patterns. Colored AB-finish diamonds amplify vibrancy under lights.
Step-by-Step Guide: Applying Diamonds with Precision
Even the best-selected diamonds fall short if applied poorly. Follow this methodical approach for flawless placement:
- Prepare the base: Finish your polish or gel application and cure if needed. Ensure the surface is smooth and dust-free.
- Select tools: Use a wax pencil or silicone-tipped stylus for accurate picking and placing.
- Map the layout: Dry-place diamonds without adhesive to test spacing and alignment.
- Apply adhesive sparingly: Use dotting tools to place tiny amounts exactly where needed—excess glue causes clouding.
- Place with pressure: Gently press each diamond into position using even force to secure bonding.
- Seal the edges: After all stones are set, apply a thin layer of clear top coat around the perimeter to lock them in.
- Cure and inspect: If using gel, cure under UV/LED. Check for loose edges and reinforce if necessary.
Patience at each stage prevents mistakes that compromise durability and finish.
Common Mistakes and How to Avoid Them
- Overloading the nail: Too many large diamonds create visual chaos. Stick to a focal point per nail.
- Mismatched scale: Tiny nails with oversized stones look disproportionate. Keep size relative to nail bed.
- Poor spacing: Crowded stones chip faster and obscure individual brilliance. Leave breathing room.
- Ignoring nail health: Frequent heavy embellishment without breaks stresses the nail plate. Schedule recovery periods.
Checklist: Selecting the Right Diamond Shape
- ☐ Assess your nail shape and length before choosing stones
- ☐ Determine the occasion—casual, formal, creative?
- ☐ Pick 1–2 dominant shapes to maintain cohesion
- ☐ Test layout dry before committing with adhesive
- ☐ Balance sparkle with negative space for visual rest
- ☐ Seal all stones properly for extended wear
Real Example: Transforming a Basic Manicure for a Gala Event
Maya had a classic nude gel manicure but wanted something special for a charity gala. Her nails were medium-length ovals. Rather than redesign entirely, she added marquise-cut clear diamonds vertically along the sides of her ring fingers—one per side, pointing toward the center. She placed a single cushion-cut diamond at the apex of each thumbnail in a minimalist snowflake pattern. The result was understated yet radiant—catching light with movement but never distracting. Guests complimented the \"effortless sparkle,\" unaware it took less than ten minutes to apply.
Frequently Asked Questions
Can I mix different diamond shapes in one design?
Yes, but do so intentionally. Combine complementary forms—like pairing ovals with rounds—to create rhythm. Avoid clashing angles unless going for avant-garde effects.
How do I remove nail diamonds safely?
Soak a cotton pad in acetone, place it over the nail, and wrap in foil for 10–15 minutes. Once softened, gently nudge stones off with a wooden stick. Never peel or force them.
Are certain diamond shapes more durable on nails?
Round and oval shapes tend to stay bonded longer because they lack sharp corners that lift easily. However, all diamonds last longer when sealed properly with top coat.
Final Thoughts: Elevate Your Nail Game with Intention
Selecting the perfect nail art diamond shape isn’t just about sparkle—it’s about synergy. When shape, nail form, and occasion align, the result is more than decoration; it becomes design. Whether you're crafting a daily look or preparing for a milestone moment, thoughtful choices in diamond geometry will set your manicure apart. Don’t reach for the shiniest stone first—reach for the one that belongs.


 浙公网安备
33010002000092号
浙公网安备
33010002000092号 浙B2-20120091-4
Comments
No comments yet. Why don't you start the discussion?