
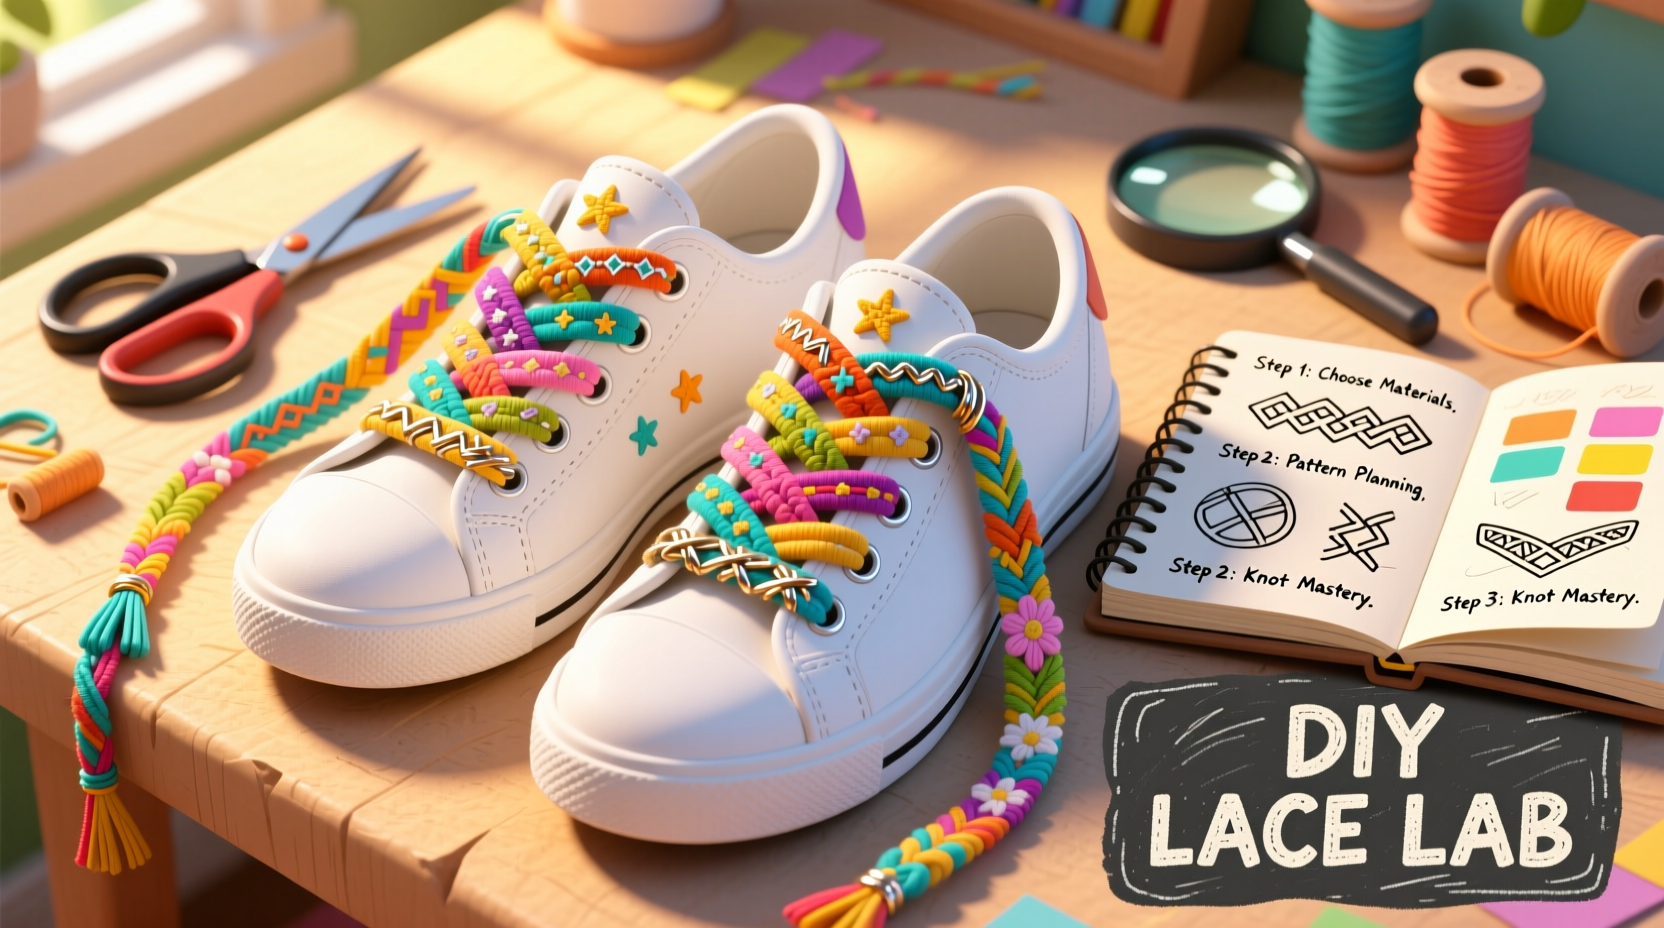
Shoe laces are more than just functional—they’re a canvas for self-expression. While most people overlook them as simple accessories, custom-designed laces can transform an ordinary pair of sneakers into a personal fashion statement. With a few basic materials and some creative vision, you can design one-of-a-kind laces right at home. This guide walks you through the entire process: from choosing materials and colors to weaving intricate patterns and finishing with durable details. Whether you're revamping old shoes or preparing a gift, handmade laces offer a tactile way to stand out.
Why Design Your Own Shoe Laces?
Mass-produced laces come in predictable lengths, colors, and textures. Custom laces break that mold. They allow you to match your footwear precisely to your outfit, mood, or even a seasonal theme. Beyond aesthetics, creating your own laces fosters a deeper connection with your wardrobe. You control every aspect—length, thickness, flexibility, and visual impact.
Designing laces at home is also sustainable. Instead of discarding worn-out laces, you can replace them with handcrafted versions using eco-friendly materials. Plus, it’s cost-effective. A spool of waxed cord or recycled fabric tape lasts for multiple pairs and opens the door to endless variations.
Materials and Tools You’ll Need
The beauty of lace-making lies in its accessibility. Most required items are either household staples or easy to source online. Below is a list of essential and optional supplies based on your chosen method.
| Material/Tool | Purpose | Alternatives |
|---|---|---|
| Waxed cotton cord (3–5mm) | Durable base for braided or twisted laces | Paracord, embroidery floss, yarn |
| Ribbon or grosgrain tape | Flat, colorful laces with polished finish | Fabric bias tape, scrap ribbon |
| Scissors | Cutting material cleanly | Rotary cutter, fabric shears |
| Lighter or fray check | Sealing ends to prevent unraveling | Nail polish, clear glue |
| Measuring tape | Ensuring proper length | Ruler, string + ruler |
| Clothespins or clips | Holding strands during braiding | Tape, binder clips |
| Dye (fabric or acrylic) | Custom coloring | Markers, paint pens |
For advanced designs, consider adding beads, metallic threads, or reflective tape for nighttime visibility. The key is starting simple and gradually experimenting with combinations.
Step-by-Step Guide to Creating Custom Laces
Follow this timeline to craft your first set of personalized laces. Each phase builds on the last, ensuring both functionality and flair.
- Measure and Cut: Remove your current laces and measure their length. Add 12 inches for knotting and trimming. Cut two pieces of your chosen material to this length.
- Select a Technique: Choose between flat braiding, round knotting, twisting, or using pre-cut ribbons. For beginners, a 4-strand braid offers stability and visual interest.
- Secure One End: Tape or clip the top ends together and anchor them to a table edge or clipboard to keep tension while working.
- Braid or Twist: Begin weaving your strands in a consistent pattern. For a 4-strand braid: cross the outer left strand over the second, then the outer right over the second on that side, alternating until complete.
- Add Color Accents: Introduce contrasting threads mid-braid by tying them in discreetly and continuing the weave. Avoid bulky knots by trimming excess close to the braid.
- Finish the Ends: Once complete, cut the free end evenly. Melt the tip of synthetic cords lightly with a flame (hold briefly) or coat natural fibers with clear nail polish to prevent fraying.
- Test Fit: Thread the laces into your shoes. Adjust length if needed and reseal the ends after trimming.
Inspiration from Real Creators
Take inspiration from Maya Torres, a Brooklyn-based sneaker enthusiast who began making laces after her favorite limited-edition sneakers arrived with plain white cords. “I wanted something that matched the graffiti-inspired artwork on the heel,” she recalls. Using navy-blue waxed cord and electric yellow embroidery thread, she created a spiral-twist lace that caught attention at a local streetwear pop-up.
Her design went viral on social media, leading to commission requests. What started as a personal upgrade became a small creative business. “People don’t realize how much personality a six-foot string can carry,” she says. Her advice? “Start with a theme—music, nature, culture—and let that guide your color choices.”
“Handmade laces turn footwear into wearable art. It’s not about perfection—it’s about intention.” — Diego Mendez, Footwear Designer & Craft Educator
Design Variations to Explore
Once you’ve mastered the basics, expand your repertoire with these techniques:
- Ombre Dyeing: Dip one end of a white lace into fabric dye, let it gradient fade upward, then repeat with a second color for a blended effect.
- Striped Ribbons: Sew narrow strips of contrasting fabric edge-to-edge to form a long, patchwork-style lace.
- Knotted Lanyard Style: Use square knots in sequence to create a thick, rope-like lace ideal for boots.
- Reflective Weave: Incorporate reflective thread or tape into your braid for safety and style in low light.
- Beaded Accents: Slide small beads onto strands before braiding to create subtle highlights at intervals.
Consider thematic sets: holiday colors for winter, neon for summer festivals, or school spirit hues for game days. Rotate laces seasonally to refresh your look without buying new shoes.
Common Pitfalls and How to Avoid Them
Even experienced crafters encounter issues. Here’s a checklist to ensure success:
- Skipping end sealing → leads to fraying within days
- Uneven tension in braids → causes curling or kinking
- Using overly thick materials → won’t fit through eyelets
- Ignoring shoe type → hiking boots need stronger cords than canvas shoes
- Overcomplicating early designs → start simple, then layer complexity
Always test your lace strength by tugging firmly before installation. If it stretches or slips apart, reinforce with tighter braiding or a sturdier core.
Frequently Asked Questions
Can I wash shoes with handmade laces?
Yes, but remove the laces first if they contain non-colorfast dyes or glued elements. Hand wash in cold water and air dry to preserve integrity.
How long should my laces be?
Standard lengths range from 36” (for low-top sneakers) to 72” (for boots). Measure your current laces or consult a shoe lace size chart based on eyelet count.
Are braided laces more durable than flat ones?
Braided laces generally offer better tensile strength and resistance to abrasion, especially when made with waxed or synthetic fibers. Flat ribbons work well for casual wear but may fray faster under friction.
Bring Your Vision to Life
Designing unique shoe laces at home blends practicality with creativity. It invites mindfulness into everyday objects and empowers you to redefine what fashion means on your terms. With minimal investment and a willingness to experiment, you can craft laces that reflect your journey, interests, and aesthetic instincts.
Every twist, color choice, and texture tells a story. Whether you’re enhancing a daily driver pair of sneakers or preparing a personalized gift, handmade laces prove that detail matters. Start small, learn through doing, and soon you’ll have a collection of laces as distinct as your fingerprint.


 浙公网安备
33010002000092号
浙公网安备
33010002000092号 浙B2-20120091-4
Comments
No comments yet. Why don't you start the discussion?