
A leaking water heater is more than just a nuisance—it can lead to water damage, mold growth, and even electrical hazards if not addressed promptly. Whether the drip is minor or a steady stream, understanding the root cause is essential for effective repair or replacement. This guide breaks down the most frequent reasons behind water heater leaks, provides actionable troubleshooting steps, and helps you decide when to call a professional.
Common Causes of Water Heater Leaks
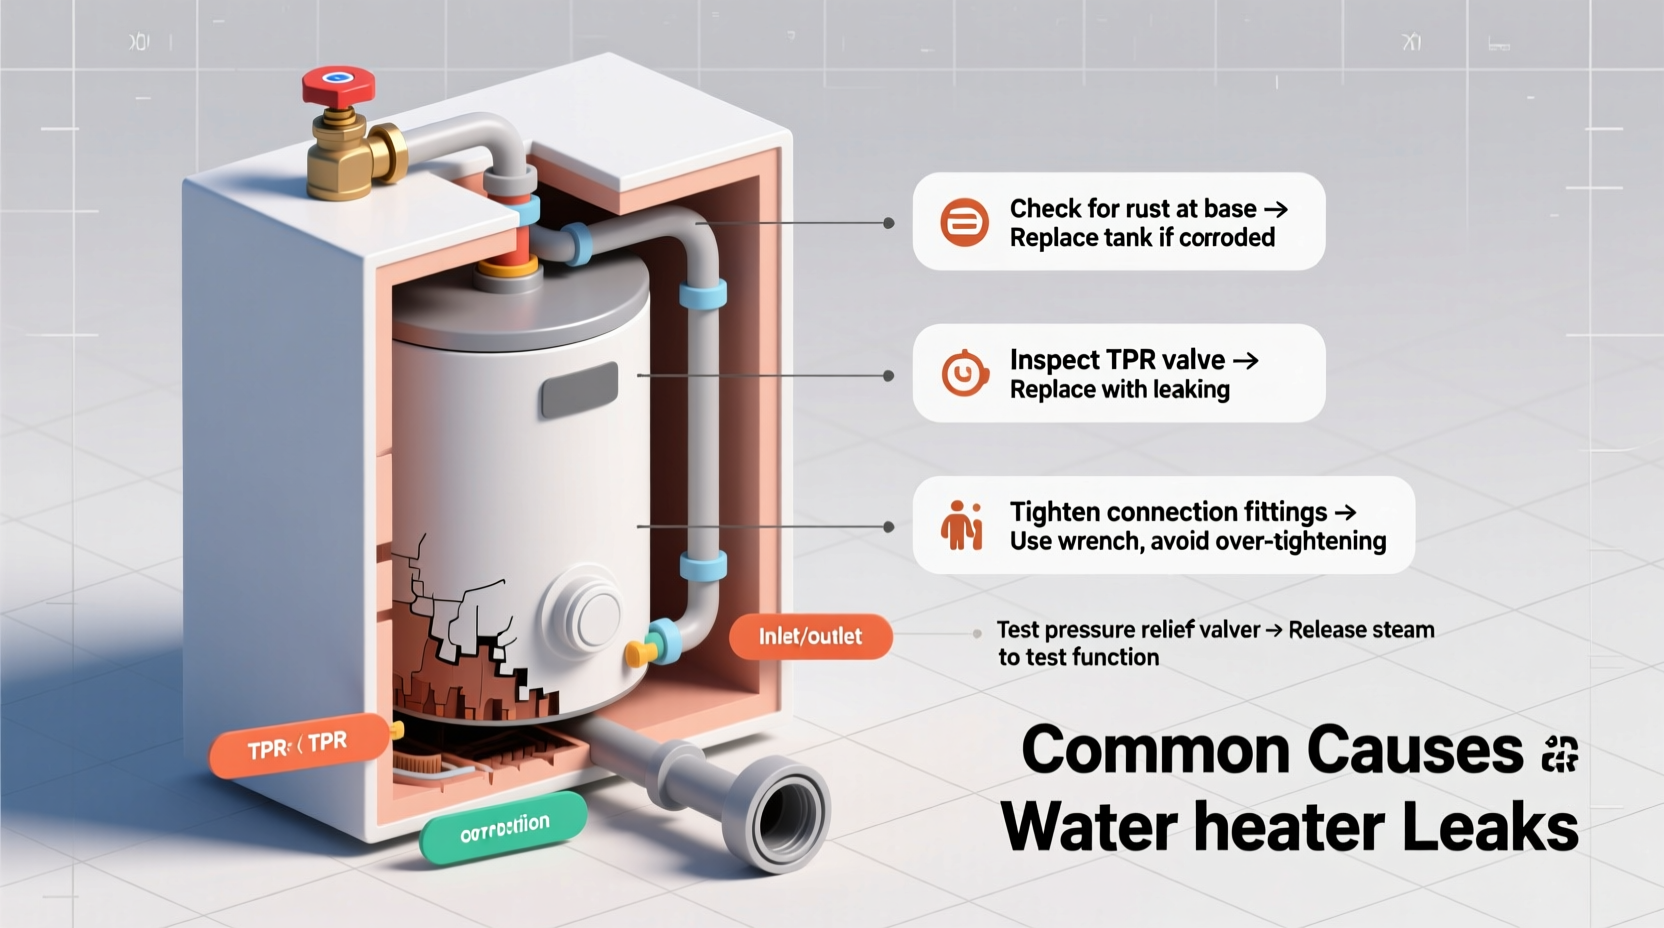
Leaks don’t always mean your water heater needs replacing. Many issues stem from simple, fixable problems. Identifying the source begins with knowing where the leak originates: the top, bottom, sides, or base of the unit.
- Tank corrosion: Over time, sediment buildup accelerates rust inside the tank, leading to pinhole leaks.
- Loose pipe fittings: Vibration or thermal expansion can loosen connections at the cold water inlet or hot water outlet.
- Faulty temperature and pressure relief (T&P) valve: A safety valve that discharges excess pressure may drip due to high water pressure or internal wear.
- Leaking drain valve: The valve at the bottom used for flushing can crack or fail after years of use.
- Condensation: In high-humidity environments, condensation on cold tanks may mimic a leak—especially in gas models during startup.
- Failed heating element seals (electric models): Loose or corroded elements can allow water to seep out around their mounting points.
Step-by-Step Troubleshooting Guide
Follow this logical sequence to diagnose and address the issue safely and efficiently.
- Turn off power and water supply: For electric heaters, switch off the circuit breaker. For gas units, turn the gas control knob to “Pilot.” Shut the cold water supply valve located at the top.
- Inspect for visible leaks: Check all connections, valves, and the tank surface. Use a flashlight to examine hard-to-see areas.
- Determine the leak location:
- Top of unit: Likely loose plumbing connections or T&P valve.
- Sides: Could indicate internal tank corrosion.
- Bottom: Often a failed drain valve or rusted base.
- Test the T&P valve: Lift the lever briefly to release pressure. If it continues to drip afterward, replace it.
- Check water pressure: Use a pressure gauge on an outdoor spigot. Readings above 80 psi can stress the system and cause leaks.
- Flush the tank (if applicable): Sediment buildup increases pressure and corrosion risk. Draining annually reduces long-term damage.
Do’s and Don’ts When Handling a Leaking Water Heater
| Action | Do | Don't |
|---|---|---|
| Responding to a leak | Shut off water and power immediately | Ignore the leak hoping it stops |
| Dealing with electrical units | Cut power at the breaker | Touch wet components without disconnecting power |
| Testing the T&P valve | Use a bucket to catch discharge water | Force the lever if it’s stuck |
| Draining the tank | Attach a hose to the drain valve and direct flow outside or into a floor drain | Open the drain valve without relieving pressure first |
| After repair | Monitor for recurring drips over 24–48 hours | Assume the problem is permanently fixed without observation |
Real-World Example: A Preventable Failure
In suburban Denver, homeowner Maria noticed a small puddle near her eight-year-old gas water heater. She initially dismissed it as condensation. Two weeks later, the leak worsened, damaging the basement flooring. A plumber diagnosed the issue: a corroded tank caused by neglected annual flushing. The sediment had settled at the bottom, overheating the steel and creating a hairline fracture. Replacement cost: $1,200. Had she performed routine maintenance, the unit might have lasted another three to five years.
“Most water heater failures aren’t sudden—they’re the result of ignored warning signs like minor dripping, rumbling noises, or discolored water.” — James Rutherford, Master Plumber & HVAC Technician
When to Repair vs. Replace
Age and condition determine whether repair is viable. Consider these factors:
- Unit age: Most water heaters last 8–12 years. If yours is older, replacement is often more cost-effective.
- Location of leak: Top or side leaks are usually repairable; bottom leaks typically mean tank failure.
- Cost comparison: Replacing a T&P valve costs $20–$50 plus labor. A full replacement ranges from $800–$1,500 depending on type and efficiency.
- Energy efficiency: Newer models can be up to 20% more efficient, offering long-term savings.
Essential Maintenance Checklist
Prevent future leaks with regular care. Perform these tasks on a schedule:
- ✅ Flush the tank every 6–12 months to remove sediment.
- ✅ Test the T&P valve monthly during warm months, quarterly in winter.
- ✅ Inspect all visible connections for dampness or mineral deposits.
- ✅ Check anode rod condition every 2–3 years; replace if heavily corroded.
- ✅ Monitor water pressure; install a pressure-reducing valve if above 80 psi.
- ✅ Keep the area around the unit dry and well-ventilated.
Frequently Asked Questions
Is a dripping T&P valve dangerous?
Yes. While designed to release excess pressure, persistent dripping suggests either excessive water pressure, a failing valve, or overheating. Left unchecked, it can lead to scalding risks or tank rupture.
Can I replace a leaky drain valve myself?
If you’re comfortable with basic plumbing, yes. Drain the tank completely, use a wrench to remove the old valve, apply Teflon tape to the threads of the new one, and reinstall tightly. However, if the tank threads are stripped or corroded, replacement may not hold.
Why does my water heater leak only when I use hot water?
This usually indicates a problem with the hot water outlet connection or internal dip tube. Increased pressure during use exposes weak joints. Turn off the system and inspect the fittings. If tightening doesn’t stop the leak, consider professional re-soldering or compression fitting repair.
Conclusion: Act Now to Prevent Costly Damage
A leaking water heater shouldn’t be ignored, even if the drip seems minor. Early detection and proper response can save hundreds in water damage and replacement costs. By understanding common failure points, performing routine checks, and knowing when to call a licensed technician, you protect both your home and your investment. Take action today—inspect your unit, flush the tank if overdue, and verify all safety mechanisms are functioning. Your future self will thank you when your water heater reaches its full lifespan without incident.


 浙公网安备
33010002000092号
浙公网安备
33010002000092号 浙B2-20120091-4
Comments
No comments yet. Why don't you start the discussion?