
Freezing apples for pies is one of the smartest kitchen habits a home baker can adopt. Whether you're stocking up during peak harvest season or salvaging surplus fruit from a generous tree, freezing apples properly ensures you’ll have perfectly textured, flavorful filling ready whenever pie cravings strike. The key isn’t just in freezing them—but in how you prepare, protect, and store them to prevent browning, mushiness, and freezer burn. This guide walks through every essential step, backed by practical experience and expert insights, so your frozen apples perform as beautifully as fresh ones when it’s time to bake.
Why Freeze Apples for Pies?
Apples are at their peak in late summer and fall, but delicious apple pie shouldn’t be limited to autumn. Freezing allows you to lock in that seasonal quality—crisp texture, bright acidity, and natural sweetness—so you can enjoy homemade pies year-round. Unlike canned fillings, frozen apples retain more of their original character and don’t come packed with excess syrup or preservatives. When done right, frozen apples require no thawing before baking and deliver results nearly indistinguishable from fresh.
Additionally, freezing reduces food waste. Instead of letting bruised or overripe apples go bad, slice and freeze them for future use. One study by the USDA estimates that up to 30% of fresh fruit is discarded annually in American households—freezing helps reverse that trend.
Step-by-Step: How to Freeze Apples for Pies (The Right Way)
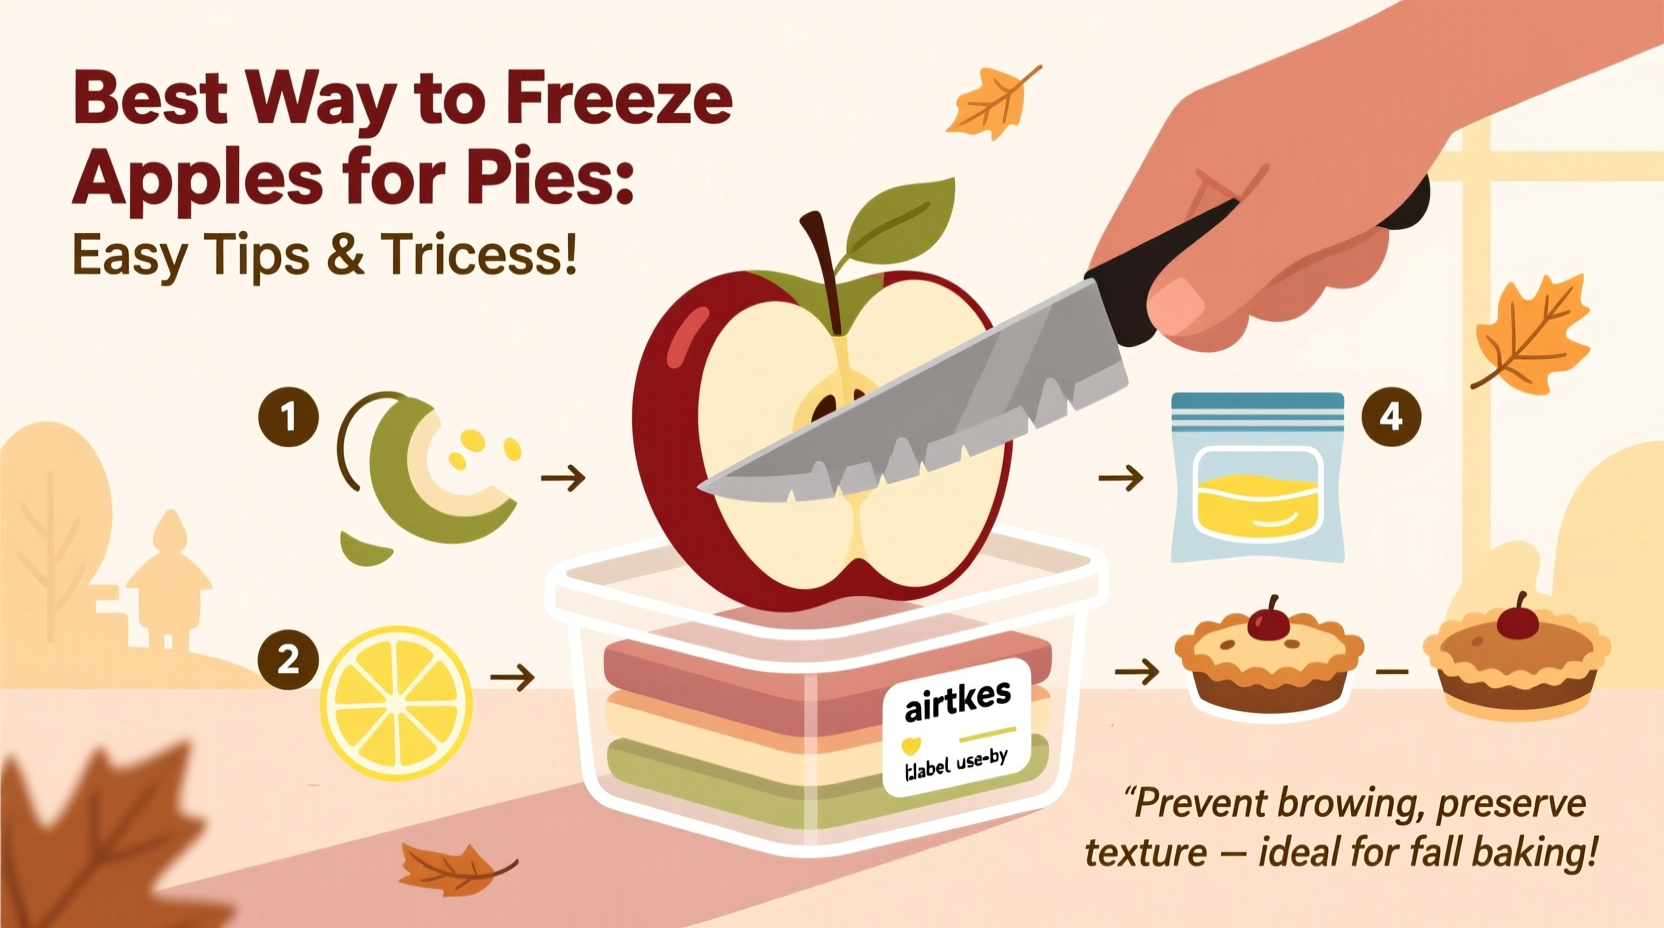
The success of frozen apple pie filling hinges on preparation. Skipping even one step—like failing to treat slices against oxidation—can result in unappetizing grayish chunks. Follow this tested method for optimal results:
- Select the right variety: Choose firm, tart apples such as Granny Smith, Honeycrisp, Braeburn, or Jonagold. These hold their shape well during freezing and baking.
- Wash and peel (optional): While peeling is traditional for pies, many bakers now leave skins on for added fiber and color. If keeping skin, scrub thoroughly.
- Core and slice uniformly: Cut apples into ¼-inch thick slices for even freezing and cooking. Use a sharp knife or apple corer/slicer for speed and consistency.
- Prevent browning immediately: As soon as apples are cut, submerge them in a lemon juice bath—1 tablespoon of lemon juice per 1 cup of water—or use a commercial anti-darkening product like Fruit-Fresh®.
- Blanch (optional but recommended): For firmer texture after freezing, briefly blanch slices in boiling water for 60–90 seconds, then plunge into ice water. This deactivates enzymes that degrade texture over time.
- Dry thoroughly: Pat slices dry with clean towels or use a salad spinner. Excess moisture leads to clumping and ice crystals.
- Flash freeze: Arrange slices in a single layer on a parchment-lined baking sheet. Freeze for 4–6 hours or until solid. This prevents sticking when stored together.
- Pack for long-term storage: Transfer frozen slices to labeled quart- or gallon-sized freezer bags or airtight containers. Remove as much air as possible to prevent freezer burn.
- Label and date: Include apple type and freeze date. Use within 10–12 months for best quality.
Do’s and Don’ts of Freezing Apples for Pies
| Do | Don’t |
|---|---|
| Use firm, baking-friendly apple varieties | Use soft apples like Red Delicious or Gala (they turn mushy) |
| Treat cut apples with acidulated water | Leave slices exposed to air without treatment |
| Flash freeze before storing | Freeze large batches in clumps |
| Remove air from storage bags | Use thin plastic bags not designed for freezing |
| Label with contents and date | Assume all frozen apples are interchangeable later |
Real Example: A Homesteader’s Apple Strategy
Sarah Thompson, a homesteader from western Michigan, processes over 200 pounds of apples each fall. With two orchard trees and local farm donations, she relies on freezing to supply pies, crisps, and sauces throughout the year. Her routine starts the day apples are picked. “I process in batches,” she explains. “While one batch soaks in lemon water, I’m peeling the next. After flash freezing, I portion them into three-cup bags—the exact amount my double-crust pie recipe needs.” She adds cinnamon-sugar mix directly into some bags for convenience. “By December, when the kids ask for pie, I grab a bag, dump it into the crust, and bake. No prep, no fuss.” Her system saves her an average of 45 minutes per pie compared to using fresh apples.
Expert Insight: What Food Scientists Recommend
“Enzymatic browning begins within minutes of cutting. Treating apples with citric acid or ascorbic acid not only preserves color but also maintains vitamin C levels during storage.” — Dr. Lena Park, Postharvest Physiologist, Cornell University Cooperative Extension
This insight underscores why skipping the lemon bath is never worth the risk. Even if browning seems cosmetic, it signals chemical changes that affect flavor and texture over time.
Make-Ahead Spiced Pie Filling: A Time-Saving Hack
Take freezing a step further by preparing complete pie filling ahead of time. Combine 6 cups of prepared apple slices with:
- ¾ cup sugar (adjust based on apple sweetness)
- 1½ teaspoons ground cinnamon
- ¼ teaspoon ground nutmeg
- 1 tablespoon cornstarch or tapioca flour (helps absorb juices during baking)
- Pinch of salt
Mix gently, then flash freeze on a tray before transferring to a labeled freezer bag. When ready to bake, place the frozen filling directly into the bottom crust, cover with top crust, vent, and bake 15–20 minutes longer than usual to account for cold filling.
Frequently Asked Questions
Can I skip peeling apples before freezing?
Yes. Unpeeled apples freeze well and retain more nutrients. The skin softens during baking and becomes barely noticeable in pies. Just ensure they’re washed thoroughly, especially if not organic.
Do I need to thaw frozen apples before making a pie?
No. Baking with frozen apples is actually preferred. Thawed apples release more liquid and can become soggy. Using them straight from the freezer helps maintain structure and controls moisture distribution in the crust.
How long do frozen apples last?
When stored at 0°F (-18°C) in airtight packaging, frozen apples retain peak quality for 10–12 months. Beyond that, they remain safe to eat but may develop off-flavors or texture loss due to freezer burn.
Checklist: Freeze Apples for Pies Like a Pro
- ☐ Choose firm, tart apple varieties suitable for baking
- ☐ Wash, peel (optional), core, and slice evenly
- ☐ Soak slices in lemon juice solution (1 tbsp per cup of water)
- ☐ Blanch briefly (optional, for improved texture retention)
- ☐ Dry slices completely before freezing
- ☐ Flash freeze on a tray in a single layer
- ☐ Transfer to labeled, airtight freezer bags or containers
- ☐ Remove excess air and store at 0°F or below
- ☐ Use within 12 months for best results
- ☐ Consider pre-mixing with spices for instant pie filling
Final Thoughts: Bake Better Pies All Year Round
Freezing apples for pies isn’t complicated—but doing it right makes all the difference. With minimal effort upfront, you gain convenience, reduce waste, and keep the taste of harvest alive in every bite. Whether you’re a weekend baker or a seasonal preserver, mastering this technique means dessert is always within reach. Start small with one batch, refine your method, and soon you’ll wonder how you ever waited for apple season to make pie.


 浙公网安备
33010002000092号
浙公网安备
33010002000092号 浙B2-20120091-4
Comments
No comments yet. Why don't you start the discussion?