
A radar detector can be a driver’s best defense against unexpected speeding tickets, but its effectiveness hinges on more than just the model you choose. Even the most advanced device will underperform if mounted incorrectly. Proper placement ensures maximum range, minimal interference, and unobstructed detection of police radar signals. Whether you're a daily commuter or a long-haul trucker, understanding where and how to mount your radar detector is essential for reliable performance.
Why Mounting Location Matters
The position of your radar detector directly affects its ability to detect radar and laser signals early enough to react. Radar waves travel in straight lines and can be blocked or reflected by materials like tinted windshields, metalized films, and even dashboard contours. Mounting too low, behind obstructions, or near electronic devices can severely limit sensitivity.
Modern vehicles often feature windshields with UV or infrared blocking layers, particularly near the top around the rearview mirror. These coatings can interfere with radar signal penetration. Placing your detector behind such areas may result in delayed or missed alerts.
“Mounting height and line-of-sight are critical. A few inches can mean the difference between catching a radar gun at 1.5 miles versus half a mile.” — Mark Reynolds, Automotive Electronics Specialist
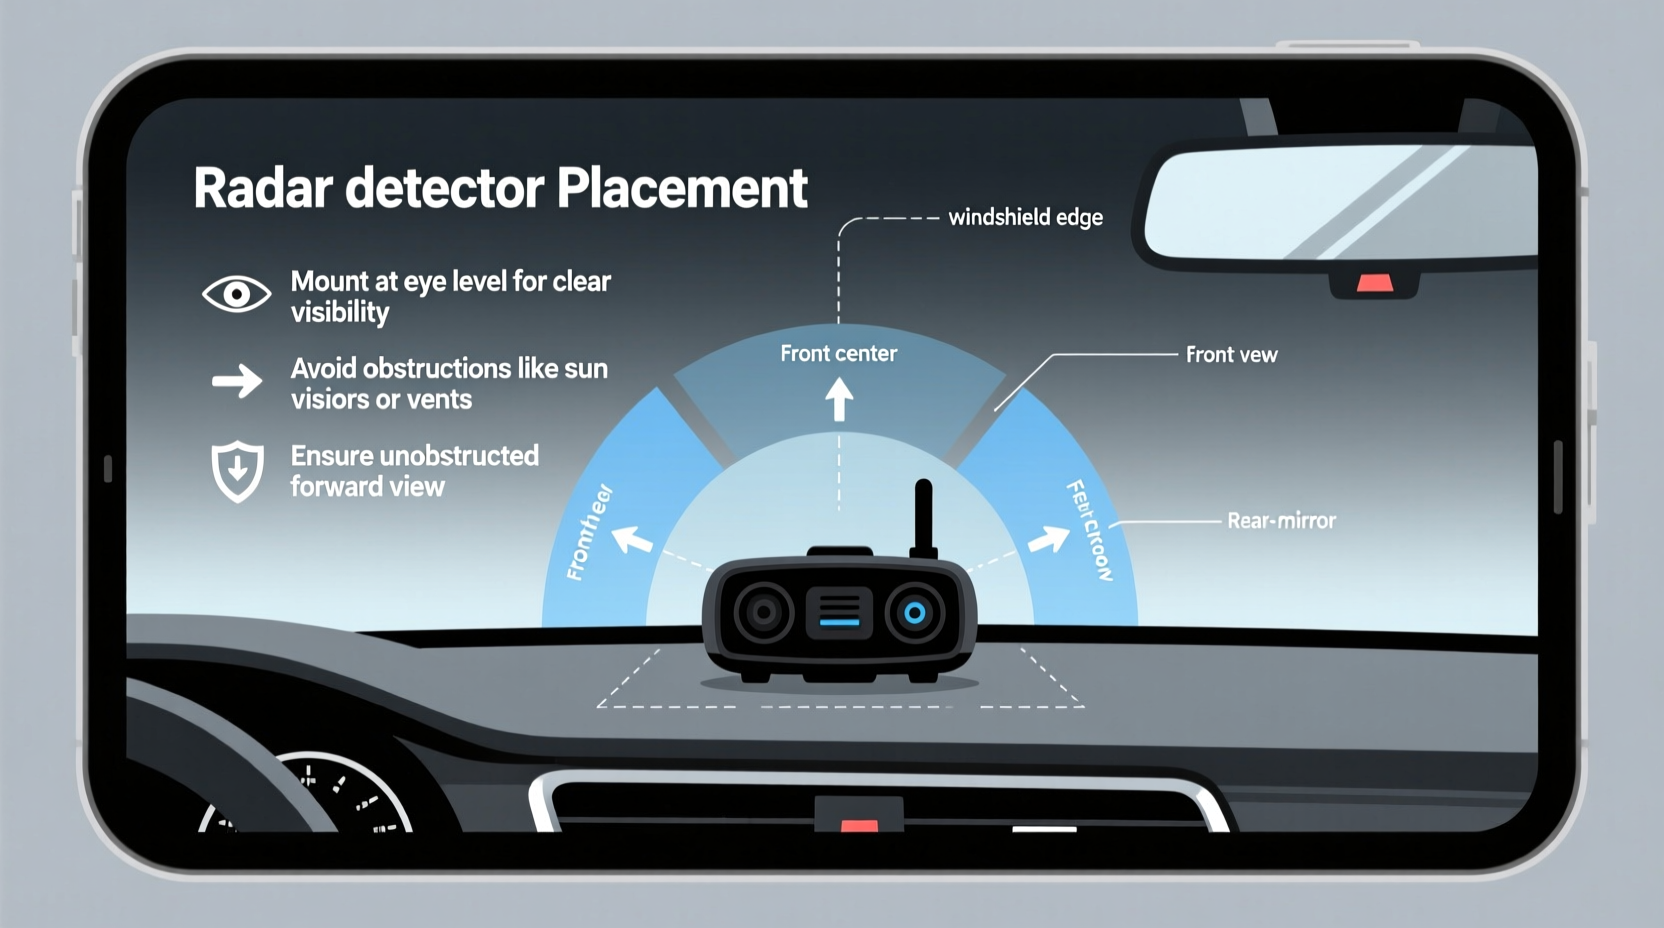
Optimal Mounting Zones: Where to Place Your Detector
The ideal location maximizes forward visibility, minimizes obstruction, and keeps the device within legal and practical limits. Here are the top recommended zones:
- Near the top center of the windshield – Just below the rearview mirror. This spot typically avoids tinted strips, offers a clear view of the road ahead, and is discreet.
- Behind the rearview mirror housing – If local laws restrict visibility, this area allows concealment while maintaining functionality, provided no metallic tint film is present.
- Centered above the dashboard – Ensures an unobstructed horizontal plane, especially useful in vehicles with heavily tinted upper windshields.
Avoid These Common Placement Mistakes
Certain locations may seem convenient but compromise detection capability:
- Low on the windshield near the dash – Reduces forward range and increases blind spots.
- Behind tinted strips or solar shields – Metalized films block K and Ka band signals.
- Near GPS units, phone chargers, or Bluetooth devices – Electronic interference causes false alerts.
- On the passenger side – Asymmetric placement reduces detection angle and response time from oncoming traffic.
Step-by-Step Guide to Installing Your Radar Detector
Follow this sequence to ensure professional-grade installation and peak performance:
- Check local laws – Some states and countries restrict windshield-mounted electronics. Confirm legality before permanent installation.
- Inspect your windshield – Use a flashlight to check for reflective coatings or dots (frit matrix) along the top edge. Avoid placing the unit behind these areas.
- Test temporary placement – Use suction cups to temporarily mount the detector in different positions while driving. Note signal acquisition distance and false alerts.
- Select the highest unobstructed point – Prioritize central alignment with the driver’s line of sight.
- Secure the mount – Ensure the bracket adheres firmly. Wobbling reduces stability and may obstruct vision over time.
- Route the power cable neatly – Tuck the cord along the headliner, down the A-pillar, and under the carpet to the power source (USB or 12V port).
- Finalize positioning – Lock the detector into place, ensuring the front sensor faces forward without tilting downward.
Do’s and Don’ts of Radar Detector Placement
| Do’s | Don’ts |
|---|---|
| Mount high and centered for maximum line-of-sight | Place behind tinted or metallized windshield areas |
| Align the detector parallel to the road surface | Tilt the unit downward—this reduces long-range detection |
| Keep away from other electronics to reduce interference | Run cables loosely across the dashboard |
| Use OEM or high-quality mounts for stability | Install on sun visors or non-windshield surfaces |
| Regularly clean the windshield and detector lens | Ignore firmware updates that improve signal filtering |
Real-World Example: The Highway Commuter’s Upgrade
Jason, a sales representative who logs over 1,200 miles weekly, used to mount his radar detector low on the passenger side of his SUV’s windshield. He frequently received last-second alerts, often too late to adjust speed. After consulting a forum and testing placements, he moved the unit just below the rearview mirror, centered and level. On his next trip, he detected a stationary patrol car 2.3 miles ahead—nearly double the previous range. The higher vantage point eliminated dashboard blockage and improved signal clarity, transforming his daily drives from reactive to proactive.
Interior vs. External Mounting: What Works Best?
Most drivers use interior mounting due to convenience and protection from weather. However, external options exist for enthusiasts seeking maximum performance.
- Interior Mounting – Standard for most users. Offers ease of access, theft deterrence, and quick removal. Performance depends heavily on windshield composition.
- External Mounting (Grille or Bumper) – Rare and typically used in dedicated tracking or law enforcement evasion setups. Provides unobstructed signal path but exposes the unit to moisture, debris, and theft.
For the vast majority of drivers, interior mounting in the upper windshield remains the best balance of performance and practicality.
FAQ: Common Questions About Radar Detector Mounting
Can I mount my radar detector behind the rearview mirror?
Yes, as long as there is no metallic tint film in that area. Most factory-tinted mirrors use a ceramic or carbon-based dot matrix that doesn’t block radar signals. Use a radio or signal meter to test transmission through the glass before committing.
Will a windshield with rain-sensing wipers affect my detector?
Potentially. The sensors for automatic wipers are usually embedded in the same upper windshield zone. While they don’t emit interfering frequencies, the surrounding circuitry or conductive adhesives might. Test performance thoroughly if mounting near such systems.
Is it better to hardwire or use the cigarette lighter port?
Hardwiring offers a cleaner look and allows the detector to draw power consistently, enabling features like stealth mode and continuous monitoring. However, improper installation can drain the battery. For most users, a high-quality hardwire kit installed correctly is the superior choice.
Final Checklist Before You Mount
- ✅ Verify local laws on windshield obstructions
- Ensure compliance with state or provincial regulations.
- ✅ Inspect windshield for coatings or frits
- Use a flashlight or consult manufacturer specs to identify signal-blocking layers.
- ✅ Test multiple positions temporarily
- Evaluate real-world detection range and false alert frequency.
- ✅ Choose a secure, vibration-free mount
- Flimsy brackets lead to misalignment and reduced reliability.
- ✅ Route cables safely and neatly
- Prevent tripping hazards and maintain a clean interior.
- ✅ Update firmware and calibrate settings
- Ensure optimal filtering and band selection based on your region.
Conclusion: Maximize Protection with Smart Placement
Your radar detector is only as good as its placement. A well-chosen mounting position enhances early warning capabilities, reduces false alarms, and integrates seamlessly into your driving experience. From selecting the right height to avoiding electronic interference, every detail contributes to performance. Take the time to test, adjust, and optimize—because in high-speed situations, those extra seconds of detection could make all the difference.


 浙公网安备
33010002000092号
浙公网安备
33010002000092号 浙B2-20120091-4
Comments
No comments yet. Why don't you start the discussion?