
Sourdough baking is as much about patience as it is about precision. When your once-thriving sourdough starter suddenly stops bubbling, it can feel like a small culinary tragedy. The lively fermentation that once doubled your starter within hours now barely stirs. But before you pour it down the drain in frustration, understand this: a dormant starter isn’t dead—it’s likely just stressed or misunderstood.
Sourdough starters are living cultures of wild yeast and lactic acid bacteria. They thrive on consistency—regular feedings, stable temperatures, and quality flour. Disruptions in any of these elements can cause fermentation to slow or halt altogether. The good news is that most sluggish or inactive starters can be revived with the right approach. This guide will walk you through the science behind starter inactivity, practical revival strategies, and long-term maintenance tips to keep your culture strong and bubbly.
Understanding Why Your Starter Stopped Bubbling
A sourdough starter relies on a delicate balance of microorganisms. When conditions aren’t ideal, those microbes go dormant or become overwhelmed by undesirable bacteria or mold. Common causes for a lack of bubbles include:
- Inconsistent feeding schedule: Skipping or delaying feedings starves the yeast and bacteria.
- Cool kitchen temperatures: Below 68°F (20°C), fermentation slows dramatically.
- Poor flour quality: Bleached or low-protein flours lack the nutrients microbes need.
- Chlorinated water: Tap water with chlorine can inhibit microbial growth.
- Over-maturation: Leaving the starter too long between feeds leads to acid buildup, which suppresses activity.
- Contamination: Foreign microbes from dirty utensils or containers can disrupt the culture.
Bubbles are visual evidence of carbon dioxide production—the result of yeast consuming sugars in flour. No bubbles don’t always mean no life. Sometimes, fermentation is happening slowly beneath the surface. Other times, the culture needs intervention.
Step-by-Step Guide to Reviving a Dormant Sourdough Starter
Revival requires consistency, time, and attention to detail. Follow this structured timeline to give your starter the best chance of recovery.
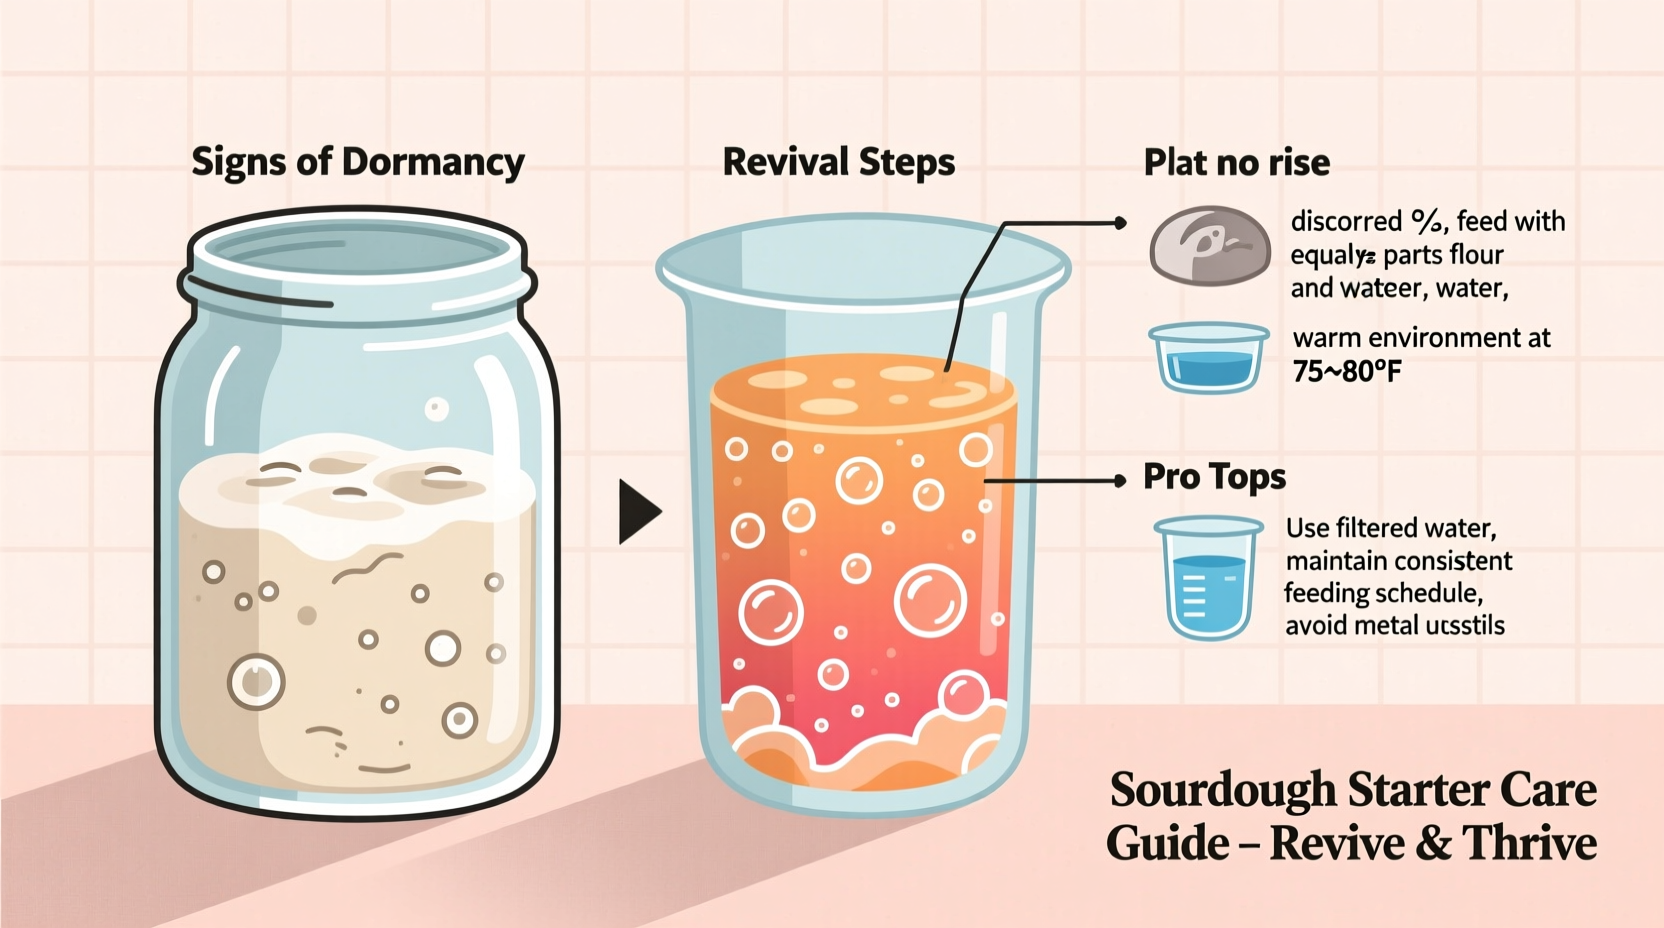
- Assess the current state: Check for signs of mold (fuzzy patches, pink or orange spots). If present, discard immediately. If only hooch (a dark liquid) is visible, it’s a sign of hunger—not death.
- Discard all but 25g: Remove most of the starter, leaving behind a small portion to rebuild.
- Switch to filtered or bottled water: Eliminate chlorine exposure by using non-chlorinated water.
- Use high-quality flour: Whole grain rye or whole wheat flour provides more nutrients than all-purpose.
- Feed 1:1:1 ratio: Mix 25g starter with 25g flour and 25g water. Stir well, cover loosely, and place in a warm spot (75–80°F / 24–27°C).
- Feed every 12 hours: Consistency matters more than volume. Stick to the schedule for at least 3–5 days.
- Monitor for signs of life: Look for small bubbles, slight rise, and a tangy aroma. Even faint activity means progress.
- Transition back to regular flour: Once active, gradually switch back to all-purpose if desired, over 2–3 feedings.
Patience is essential. Some starters take up to a week to fully recover, especially if they’ve been neglected for months.
Troubleshooting Common Issues During Revival
Even with proper care, revival doesn’t always go smoothly. Here’s how to interpret common symptoms and respond effectively.
| Symptom | Likely Cause | Solution |
|---|---|---|
| No bubbles after 48 hours | Low temperature, poor flour, or deep dormancy | Move to warmer location (use oven with light on), switch to rye flour, feed twice daily |
| Hooch forms quickly | Starter is hungry; feeding intervals too long | Reduce time between feedings to 8–10 hours temporarily |
| Starter rises then collapses | Peaked too early; structure lacks strength | Feed when starter is at peak, not after collapse; increase protein with bread flour |
| Foul or alcoholic smell | Excess acidity from infrequent feeding | Discard more at each feeding to reduce acid load; increase feeding frequency |
| Mold on surface | Contamination or prolonged neglect | Discard entire batch; sterilize container and begin anew |
When to Consider Starting Over
If, after seven days of consistent feeding with no signs of life—no bubbles, no rise, no pleasant sourness—it may be time to start fresh. While disappointing, some starters degrade beyond recovery due to environmental stress or contamination. A new starter from scratch often takes only 5–7 days to become reliable.
“Many bakers panic when their starter slows, but microbial cultures are resilient. With consistent feeding and warmth, 90% of ‘dead’ starters can be brought back.” — Dr. Laura Chen, Microbiologist & Fermentation Scientist
Optimizing Conditions for Long-Term Starter Health
Prevention is the best form of revival. Once your starter is active again, maintain its vitality with smart practices.
Temperature Matters
Yeast and bacteria thrive between 75–80°F (24–27°C). In colder kitchens, create a proofing environment:
- Place the jar in an oven with only the light on.
- Use a seedling heat mat set to low.
- Keep near a radiator or appliance that emits gentle warmth.
Flour Selection Strategy
Different flours impact microbial diversity and fermentation speed:
- Rye flour: Highly fermentable; excellent for kickstarting sluggish starters.
- Whole wheat: Rich in nutrients; promotes strong bacterial activity.
- All-purpose: Milder food source; best for maintenance once stable.
- Bread flour: High gluten; supports better rise and structure.
Consider rotating flours or blending them during revival phases for optimal results.
Real Example: Reviving a 3-Month Neglected Starter
Sarah, a home baker in Portland, returned from a long trip to find her starter covered in gray hooch and smelling sharply acidic. She’d left it on the counter with no feedings. Initially discouraged, she decided to try revival.
She poured off the hooch, discarded all but 25g of the thick paste, and fed it with equal parts rye flour and filtered water. She placed it on top of her refrigerator—her warmest spot—and fed it every 12 hours. By day three, small bubbles appeared. By day five, it was doubling in size within 6 hours. On day six, she baked a loaf of sourdough bread. Though not her best rise, the crumb was open, and the flavor rich. Her starter was back.
Her key insight? “I thought it was dead because it wasn’t bubbling. But once I warmed it up and gave it rye flour, it woke up fast. I learned that silence doesn’t mean death.”
Essential Checklist for Starter Revival Success
Follow this actionable checklist to maximize your chances of bringing your starter back to life:
- ✅ Discard moldy or foul-smelling starters immediately
- ✅ Save only 25g of healthy-looking starter
- ✅ Use filtered or boiled-and-cooled water
- ✅ Feed with whole grain flour (rye or whole wheat)
- ✅ Maintain a warm environment (75–80°F / 24–27°C)
- ✅ Feed every 12 hours without skipping
- ✅ Use clean, non-metal utensils and containers
- ✅ Monitor for bubbles, rise, and aroma daily
- ✅ Transition back to regular flour once stable
- ✅ Label and date your container for tracking
Frequently Asked Questions
Can a sourdough starter come back after weeks of neglect?
Yes, many starters survive weeks—even months—without feeding. As long as there’s no mold and the smell is sour rather than rotten, revival is usually possible with consistent feeding and warmth.
Should I throw away the hooch or stir it in?
You can stir it in if it’s clear or brown and the starter smells normal. Hooch is alcohol produced by hungry yeast. However, if it’s dark and the starter smells overly alcoholic, pouring it off reduces acidity and gives microbes a cleaner slate.
How do I know my starter is truly active and ready to bake with?
An active starter should double in size within 4–8 hours of feeding, have a network of bubbles throughout, and pass the float test: drop a teaspoon into a glass of water—if it floats, it’s producing enough gas to leaven bread.
Conclusion: Bring Your Starter Back to Life—and Keep It Thriving
A sourdough starter that has stopped bubbling isn’t necessarily lost. More often than not, it’s simply asking for better care. By understanding the microbial ecosystem you’re nurturing, adjusting feeding routines, optimizing temperature, and choosing the right flour, you can revive even the most dormant cultures.
The journey of sourdough is one of resilience—both yours and your starter’s. Each revival strengthens your intuition and deepens your connection to the craft. Don’t let a quiet jar discourage you. With patience and practice, you’ll soon hear the gentle pop of bubbles rising again, signaling that life, fermentation, and flavor are back in full swing.


 浙公网安备
33010002000092号
浙公网安备
33010002000092号 浙B2-20120091-4
Comments
No comments yet. Why don't you start the discussion?