
Every holiday season, millions of homes light up with festive cheer—yet for many, that glow comes with an unwelcome side effect: flickering strands. If you’ve ever stood in the cold untangling a mess of blinking lights, only to find half the strand out or pulsing like a disco ball, you’re not alone. The culprit? Often, it’s inexpensive Christmas lights built with cost-cutting materials and outdated technology. But before you resign yourself to replacing every string or giving up on outdoor displays altogether, there’s good news: you can fix flickering issues and even upgrade your lighting system without starting from scratch.
The Science Behind Flickering: Why Cheap Lights Fail
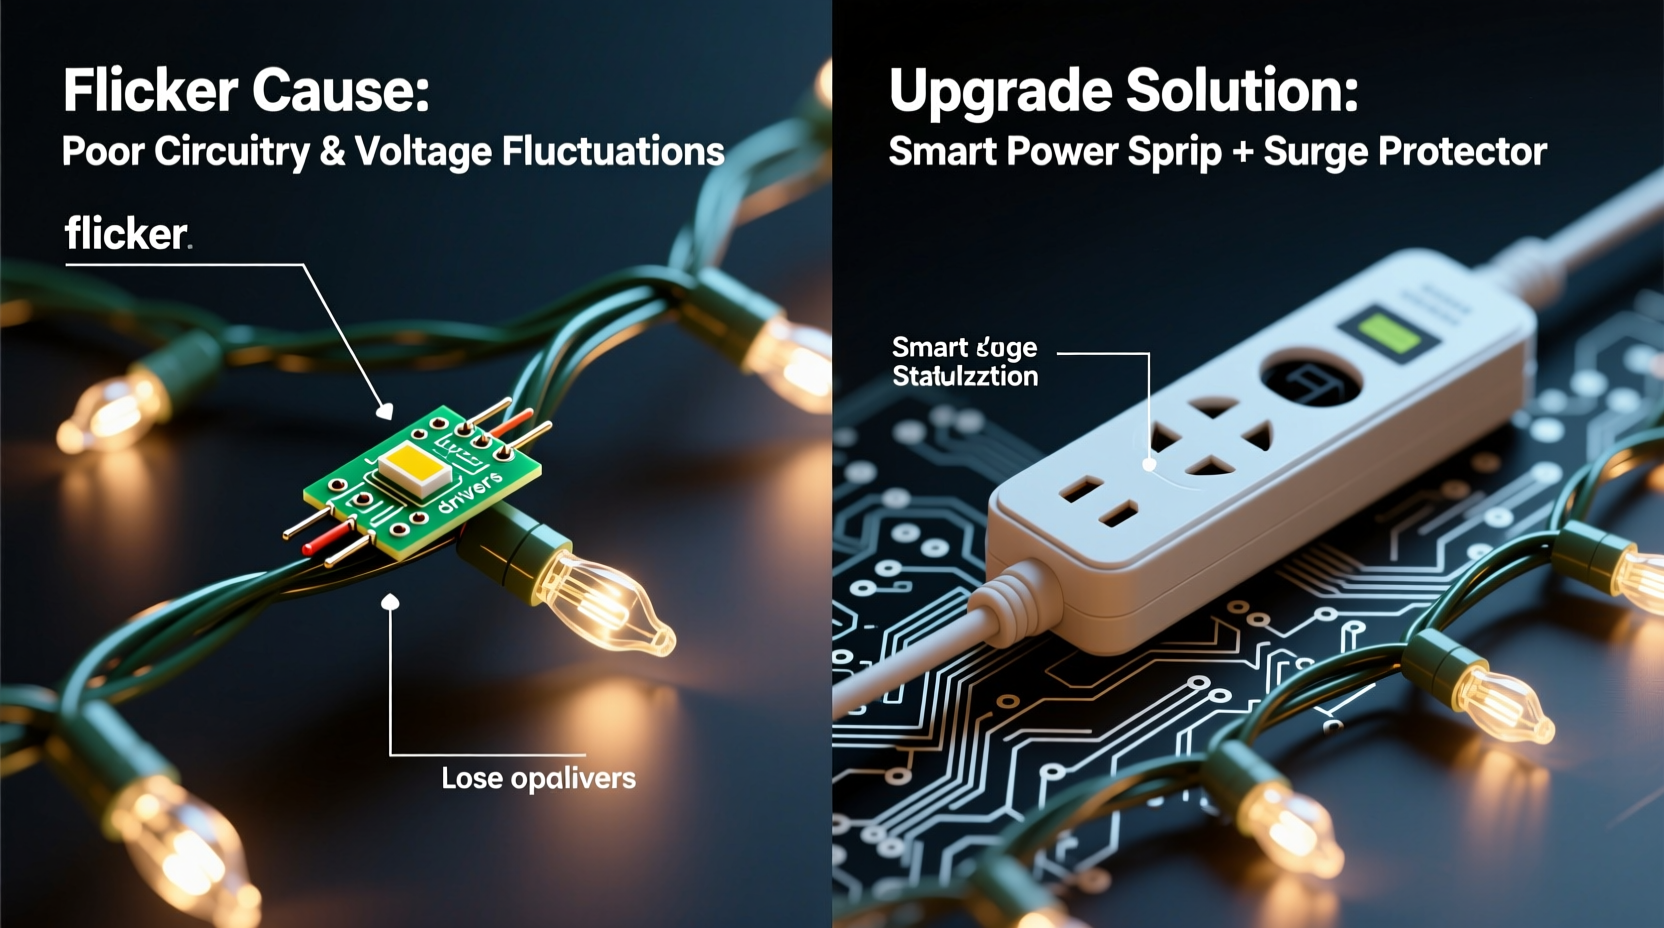
Flickering isn’t just annoying—it’s a symptom of deeper electrical and design flaws common in budget-friendly Christmas lights. Most inexpensive strings use incandescent bulbs powered by alternating current (AC), which naturally cycles on and off 50–60 times per second. In higher-quality fixtures, this cycling is imperceptible. But in cheaper models, poor voltage regulation, inconsistent filament tension, and weak bulb-to-socket contact amplify the flicker into something visible and distracting.
One major issue lies in series-wired circuits. Many low-cost light sets are wired in series, meaning all bulbs share the same electrical path. If one bulb burns out or becomes loose, the entire circuit breaks—or worse, causes erratic behavior in the remaining bulbs. This “one bad apple” scenario is why removing or jostling a single bulb can make the whole strand dim, blink, or die completely.
Add to that thin copper wiring, plastic sockets prone to cracking in cold weather, and lack of surge protection, and it’s no surprise these lights struggle under real-world conditions. As temperatures drop and moisture seeps in, resistance increases and connections weaken, making flickering more frequent and unpredictable.
“Fifty years ago, Christmas lights were simpler but more robust. Today’s ultra-cheap versions cut corners on wire gauge, insulation, and bulb quality—leading to premature failure and visual noise.” — Dr. Alan Reeves, Electrical Systems Engineer, University of Michigan Energy Lab
How to Diagnose the Real Cause of Flickering
Not all flickering is created equal. Before attempting upgrades, identify what’s actually causing the problem. Here’s a practical diagnostic checklist:
- Check for loose bulbs: Gently press each bulb into its socket. A wobbly bulb often interrupts the circuit.
- Inspect for darkened or blackened bulbs: These indicate burnout or internal arcing—a common cause of intermittent flicker.
- Test continuity: Use a multimeter to check if current flows through the strand. No continuity means a broken wire or open circuit.
- Look for damaged insulation: Frayed or cracked wires, especially near plugs or connectors, can cause shorts.
- Observe timing: Does the flicker follow a pattern? Rapid blinking may point to a shunt failure; random flickering suggests loose connections.
Another overlooked factor is outlet quality. Outdoor outlets exposed to weather can develop internal corrosion, leading to unstable power delivery. Plug your lights into a known-stable indoor outlet as a test. If the flickering stops, the problem isn’t the lights—it’s the power source.
Smart Upgrades That Don’t Require Rewiring
You don’t need to throw out every old strand to get a reliable, professional-looking display. With strategic upgrades, you can improve performance, reduce energy use, and eliminate flicker—without redoing your entire setup.
1. Retrofit with LED Replacement Bulbs
If your existing string uses standard E12 or C7/C9 screw-in bases, consider retrofitting with LED replacement bulbs. These draw up to 90% less power, generate minimal heat, and last 25,000+ hours. More importantly, LEDs don’t rely on filaments, eliminating one of the main sources of flicker.
Simply unscrew the old incandescent bulbs and replace them with shunted or non-shunted LED equivalents (ensure base compatibility). Even if only half the strand gets upgraded, the reduced load can stabilize voltage across the circuit.
2. Use Flicker-Free Power Adapters
For strings that remain problematic, introduce a DC power converter or flicker-free transformer. These devices convert AC household current to smooth DC output, eliminating the 60Hz oscillation that causes perceptible flicker.
While most common in commercial displays, compact versions are now available for residential use. Plug your light strand into the adapter, then plug the adapter into the wall. This adds a layer of voltage regulation and can dramatically reduce or eliminate blinking.
3. Add Parallel Bypass Clips
In series-wired strands, a single dead bulb kills the circuit. Bypass clips solve this by creating a parallel connection around failed bulbs. These small metal clips slide over the base of a dead bulb, restoring continuity without needing immediate replacement.
Though temporary, they’re invaluable during the holiday season when perfect reliability matters. Install them proactively on older strands to prevent mid-season failures.
4. Integrate Smart Plugs with Surge Protection
Plug your existing light strings into a smart outlet with built-in surge suppression. Not only does this protect against voltage spikes (common during winter storms), but it also allows scheduling, remote control, and monitoring via smartphone.
Many users report reduced flicker after switching to smart plugs because they provide cleaner power delivery and eliminate manual on/off stress on delicate filaments.
Comparison: Cheap vs. Upgraded Lighting Performance
| Feature | Cheap Incandescent Lights | Upgraded System (Retrofitted) |
|---|---|---|
| Flicker Level | High (visible strobing) | Low to none |
| Power Consumption | 60–100W per 100 bulbs | 6–10W per 100 bulbs |
| Lifespan | 1–3 seasons | 5+ years |
| Circuit Sensitivity | One bulb failure breaks circuit | Tolerates partial failures |
| Cold Weather Performance | Poor (cracking, increased flicker) | Excellent (LEDs thrive in cold) |
Real Example: How One Homeowner Fixed 1,200 Feet of Flickering Lights
Mark T., a homeowner in Denver, Colorado, had been using the same set of C9 Christmas lights for his roofline and trees for seven years. Each November, he’d spend hours troubleshooting flickering sections, replacing bulbs, and rehanging strands. By year five, nearly 40% of his display would fail mid-season.
Instead of buying new LED strings—which would have cost over $400—he invested $80 in LED retrofit bulbs compatible with his existing C9 sockets. He also added two heavy-duty smart plugs with surge protection and installed bypass clips on older sections.
The result? His entire 1,200-foot display lit evenly, consumed less than 15% of its former electricity, and survived three harsh winters without a single full-strand failure. “I kept the structure I already had,” Mark said. “Just upgraded the guts. It was smarter, cheaper, and looked ten times better.”
Step-by-Step: Upgrade Your Lights Without Starting Over
Follow this sequence to modernize your display efficiently and affordably:
- Inventory your current strands: Note length, bulb type (C7, C9, mini), and condition. Separate functional from damaged.
- Test each strand: Plug in and observe behavior. Label those with consistent flicker, partial outages, or no power.
- Retrofit with LED bulbs: For screw-base strings, purchase matching LED replacements. Prioritize high-use areas first.
- Install bypass clips: On older series-wired strands, place clips on any known dead sockets to maintain continuity.
- Use regulated power sources: Connect upgraded strands to smart plugs or DC converters. Avoid daisy-chaining beyond manufacturer limits.
- Seal outdoor connections: Wrap plug junctions with waterproof electrical tape or use UL-rated outlet covers to prevent moisture ingress.
- Schedule and monitor: Set timers via smart apps to avoid leaving lights on during daylight or storms.
FAQ: Common Questions About Fixing Flickering Lights
Can I mix LED and incandescent bulbs on the same strand?
No. Mixing bulb types on a single circuit creates uneven resistance and can cause overheating, flickering, or premature failure. Always fully convert a strand or keep technologies separate.
Why do my lights flicker only at night?
This often occurs due to voltage drops when neighborhood demand peaks (e.g., everyone turning on lights and heaters). Using a voltage stabilizer or dedicated circuit can resolve this.
Are flickering lights a fire hazard?
Persistent flickering caused by loose connections, frayed wires, or overloaded circuits can generate heat and pose a fire risk. Address damaged cords immediately and avoid running too many strands on one outlet.
Final Checklist: Upgrade Ready?
- ✅ Identified all light types and their conditions
- ✅ Tested each strand for continuity and flicker patterns
- ✅ Purchased compatible LED retrofit bulbs
- ✅ Acquired bypass clips for series-wired strings
- ✅ Installed surge-protected smart plugs or transformers
- ✅ Sealed outdoor connections against moisture
- ✅ Set automated on/off schedule for efficiency
Conclusion: Shine Brighter Without Starting From Scratch
Flickering Christmas lights don’t mean it’s time to start over. With a clear understanding of why cheap lights fail—and the right upgrade strategy—you can transform an unreliable, energy-hungry display into a smooth, efficient, and enduring holiday feature. The key is working with what you have: retrofitting, regulating power, and reinforcing weak points rather than discarding entire systems.
Modern lighting technology doesn’t require you to abandon tradition or break the bank. By making smart, incremental improvements, you preserve your effort, reduce waste, and enjoy a display that’s not just brighter—but better. This season, skip the frustration. Upgrade wisely, light confidently, and let your home shine the way it should.


 浙公网安备
33010002000092号
浙公网安备
33010002000092号 浙B2-20120091-4
Comments
No comments yet. Why don't you start the discussion?