
Every year, millions of households string up festive lights only to discover—mid-decorating—that half the strand is dark. The culprit is rarely faulty bulbs or broken wires. More often than not, it’s a tiny, overlooked component: the fuse. While modern LED strings increasingly use electronic current-limiting circuits, the vast majority of incandescent mini-light sets sold in North America still rely on two small, glass-tube fuses housed in the plug. Understanding why they exist—and how to replace them properly—isn’t just about restoring twinkle; it’s about preventing overheating, reducing fire risk, and extending the life of your lights. This isn’t a “nice-to-know” detail—it’s fundamental electrical safety wrapped in holiday tradition.
The Safety Logic Behind Fuses in Christmas Light Plugs
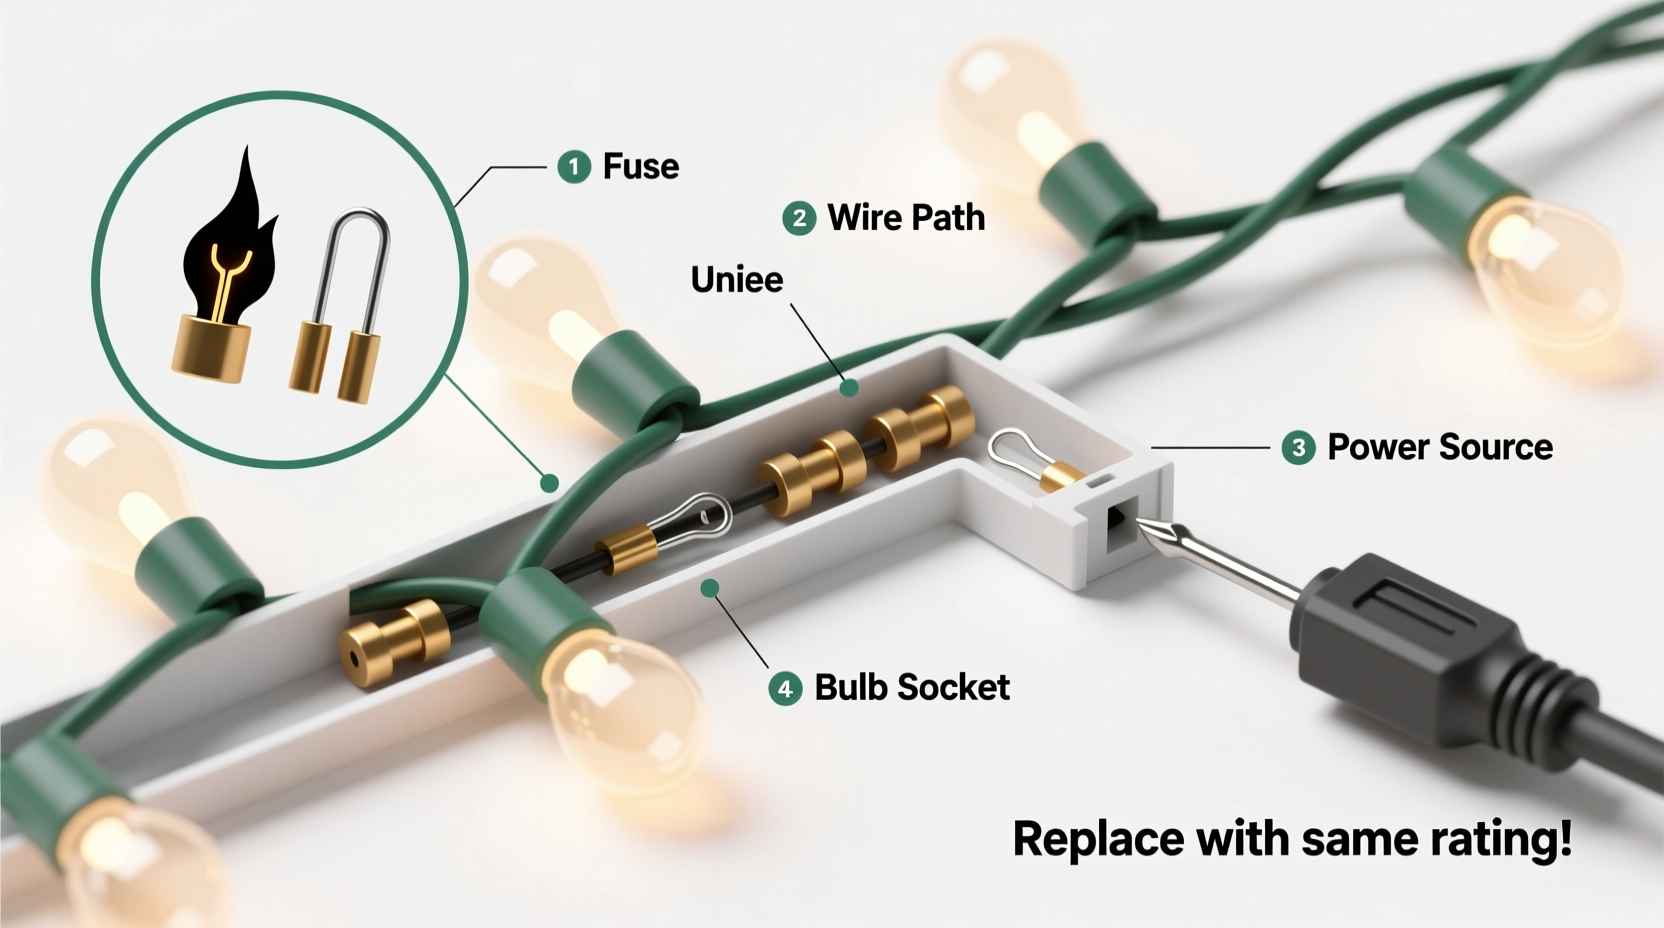
Fuses in Christmas light cords serve as deliberate weak links—engineered fail-safes designed to interrupt electrical flow before dangerous conditions arise. Incandescent mini-lights operate on a series circuit: electricity flows through each bulb in sequence. If one bulb burns out with its filament breaking cleanly, the circuit opens and all lights go dark—a feature that helps users locate faults. But if a bulb fails catastrophically—say, its filament melts and bridges the contacts—the result is a short circuit. Current surges, wire temperatures climb rapidly, and insulation can degrade or ignite.
This is where the fuse intervenes. Rated at 3 amps or 5 amps (most common for standard 100-bulb incandescent sets), the fuse contains a thin metal strip calibrated to melt precisely when current exceeds its safe threshold. When that happens, the circuit breaks instantly—stopping power before the cord overheats or poses a shock hazard. It’s not an afterthought; it’s mandated by Underwriters Laboratories (UL) Standard 588, which requires all seasonal decorative lighting sold in the U.S. to include overcurrent protection. As UL Senior Engineer Dr. Lena Torres explains:
“Fuses in light plugs are the first and most critical line of defense against thermal runaway. They don’t prevent bulb failures—but they do prevent those failures from becoming fire hazards. Removing or bypassing them voids UL listing and compromises the entire safety certification.” — Dr. Lena Torres, UL Standards Engineer, Holiday Lighting Division
Without this protection, a single shorted bulb could raise conductor temperature by over 70°C in under 90 seconds—well above the melting point of PVC insulation. That’s why every UL-listed plug has two identical fuses: one for the “hot” leg and one for the “neutral,” ensuring complete circuit interruption regardless of wiring orientation.
How to Identify a Blown Fuse (Before You Start Replacing)
Not all dark strands mean a blown fuse—but many do. Start with this diagnostic sequence:
- Check power source: Plug the strand into a working outlet and verify the circuit breaker hasn’t tripped.
- Inspect bulbs: Look for blackened glass, separated filaments, or loose bases. Gently wiggle each bulb while the strand is powered—if flickering occurs, that bulb is likely the issue.
- Test continuity: If the strand remains fully dark and bulbs appear intact, examine the plug. Most standard mini-light plugs have a small sliding or hinged door on the back—usually marked with a fuse icon or “FUSE.” Open it carefully.
- Visual inspection: Hold each glass fuse up to bright light. A good fuse shows an unbroken, silvery metal strand running end-to-end. A blown fuse reveals a visibly severed, vaporized, or discolored (often gray or brown) filament—and sometimes a faint white powdery residue inside the tube.
If one fuse is blown but the other appears intact, replace both. Fuses age under load and rarely fail in isolation; the surviving fuse may be thermally stressed and prone to failure within days.
Step-by-Step: Safely Replacing Fuses in Christmas Light Plugs
Replacing fuses takes under two minutes—but precision matters. Follow this verified procedure:
- Unplug the strand completely. Never work on live wiring—even low-voltage decorative lights carry enough current to cause minor shocks or ignite flammable debris.
- Locate the fuse compartment. On most standard plugs (e.g., NOMA, GE, Light-O-Rama), it’s a rectangular slide cover on the underside of the plug body. Use a fingernail or plastic spudger—not metal—to gently pry it open. Avoid forcing it; some covers snap into place.
- Remove the old fuses. Most compartments hold two fuses side-by-side in spring-loaded clips. Gently lift each fuse straight up and out. Note their orientation: the metal caps must make full contact with the brass terminals.
- Select correct replacements. Match the exact amperage (e.g., “3A”) and physical size (typically 1/4\" × 1-1/4\" or AGC-type). Using mismatched fuses risks poor contact, arcing, or inadequate protection. Check packaging—many replacement packs include both 3A and 5A fuses; confirm your strand’s rating (often printed near the plug or on the packaging label).
- Insert new fuses firmly. Place each fuse into its clip with the metal ends fully seated against the terminals. You should feel slight resistance—this ensures low-resistance contact. Do not bend or twist fuses during insertion.
- Reattach the cover securely. Slide or snap the compartment door back until it’s flush and cannot be easily dislodged. A loose cover exposes live terminals and invites dust/moisture ingress.
- Test before re-hanging. Plug the strand into an outlet away from flammable materials. Let it run for 60 seconds. Watch for unusual warmth at the plug, buzzing sounds, or flickering—all signs of poor contact or residual damage.
If the lights still don’t illuminate after fuse replacement, the issue lies elsewhere: a broken wire, internal socket corrosion, or a failed shunt (the tiny wire inside each bulb that should bypass an open filament). In that case, move to systematic bulb testing—or retire older strands showing multiple failures.
Fuse Replacement Do’s and Don’ts
Missteps during fuse replacement are common—and potentially hazardous. This table summarizes field-tested best practices:
| Action | Do | Don’t |
|---|---|---|
| Fuse Selection | Use only UL-listed fuses matching the exact amperage and physical dimensions stamped on the original. | Substitute with automotive fuses, soldered wires, foil strips, or “homemade” jumpers—these eliminate overcurrent protection entirely. |
| Tool Use | Employ plastic tweezers or non-conductive needle-nose pliers for handling fuses. | Use metal screwdrivers, knives, or scissors to pry open compartments—they can slip and short the terminals. |
| Plug Inspection | Examine the plug housing for cracks, melted plastic, or scorch marks before replacing fuses. If found, discard the strand. | Assume a cracked or discolored plug is “still functional”—heat damage indicates prior overcurrent events and compromised insulation. |
| Post-Replacement | Run the strand for 2–3 minutes on a non-flammable surface before draping it on a tree or near curtains. | Immediately hang repaired lights near dry pine boughs, paper decorations, or upholstered furniture without verifying stable operation. |
Real-World Scenario: The Garage Sale Strand That Saved a Home
In December 2022, Sarah M., a teacher in Portland, Oregon, bought a box of vintage 1990s mini-lights at a garage sale for $3. She cleaned the bulbs, replaced three broken ones with spares, and plugged the strand in. Nothing happened. After checking outlets and bulbs, she opened the plug—both fuses were blackened and shattered. She replaced them with 3A fuses from her hardware store kit and tested the strand. It lit—but after 45 seconds, the plug grew warm and emitted a faint acrid smell. She unplugged it immediately and inspected further: one socket had corroded brass contacts, causing intermittent arcing. She cut out the damaged section and spliced in a new socket. The strand now works reliably—and more importantly, she avoided what inspectors later confirmed would have been a high-risk scenario: the original corrosion had already degraded insulation near the plug by 40%, creating a potential ignition point. Her attention to fuse replacement—and willingness to investigate beyond it—prevented a probable fire. “I thought I was just fixing lights,” she told local fire officials. “Turns out, I was checking a safety system.”
FAQ: Your Top Fuse Questions Answered
Can I replace fuses while the lights are plugged in?
No—never. Even with the switch off, the plug’s internal terminals remain energized when inserted into an outlet. Always unplug before accessing the fuse compartment. One accidental slip with a metal tool can cause a short, spark, or shock.
Why do some newer LED light sets not have fuses?
Most UL-listed LED strings use solid-state current regulation instead of fuses—integrated ICs monitor voltage and current in real time, shutting down power within microseconds of detecting overload. However, many budget LED sets skip this protection to cut costs. Always check for UL/ETL certification and look for a “protected” or “fused” marking on the packaging. If absent, treat them as higher-risk.
How often should I test fuses on stored light strands?
Before each season. Store fuses separately in labeled, static-free bags—not taped to the cord. Heat, humidity, and vibration during storage degrade fuse integrity. Testing annually ensures reliability when you need it most.
Conclusion: Respect the Fuse—It’s Your First Line of Defense
The humble fuse in your Christmas light plug is not obsolete engineering—it’s quietly vigilant safety infrastructure. It represents decades of lessons learned from holiday fires, insurance claims, and laboratory testing. Replacing it correctly takes less time than untangling a string of lights, yet it restores a critical layer of protection that stands between seasonal joy and preventable danger. Don’t treat fuse replacement as a chore; treat it as ritual maintenance—like checking smoke detector batteries or inspecting extension cords. Test every strand before decorating. Keep matched spares on hand. Discard any plug showing heat damage. And when you flip that switch and see the steady, even glow return, remember: you didn’t just restore light. You honored the quiet physics of prevention.


 浙公网安备
33010002000092号
浙公网安备
33010002000092号 浙B2-20120091-4
Comments
No comments yet. Why don't you start the discussion?