
It’s a common scenario: you leave the nail salon feeling confident with your fresh set of acrylics or gels, only to wake up the next morning with an unexpected throbbing sensation in one or more fingers. The pain can range from mild discomfort to sharp, pulsing pressure—especially when typing, holding a phone, or pressing down on a surface. While some soreness might seem normal after nail enhancements, persistent or acute pain isn’t something to ignore. The root cause often lies in improperly managed pressure points during application.
Understanding why this happens involves more than just acknowledging tight fittings or long nails. It’s about biomechanics, nail bed sensitivity, and the precision of the technician’s work. This article breaks down the science behind post-application pain, identifies key causes, and provides actionable solutions to prevent discomfort—and potential damage—before it starts.
How Pressure Points Form During Fake Nail Application
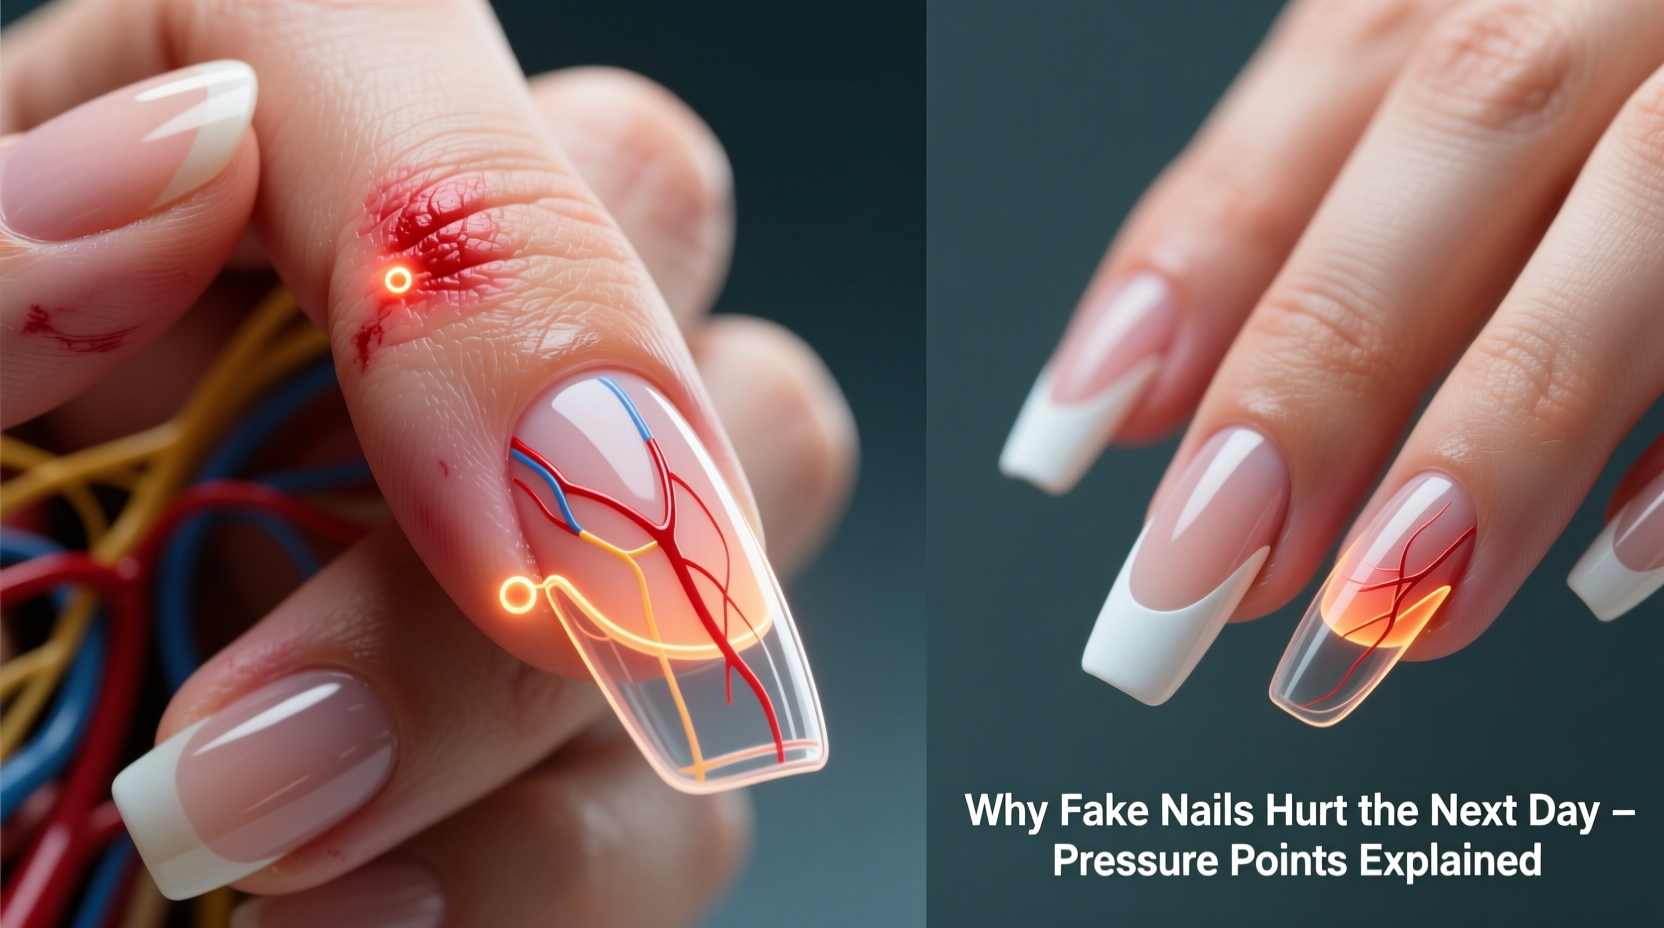
Fake nails, whether acrylic, gel, or dip powder, are applied by building material over the natural nail plate, often using forms or tips as a base. When done correctly, the enhancement should feel seamless and balanced. However, if the structure doesn’t align with the natural curvature of the nail bed or fingertip, it creates concentrated areas of pressure—commonly referred to as “pressure points.”
These hotspots occur when excess product is placed in specific zones, such as near the cuticle, sides (lateral walls), or underside of the free edge. As the adhesive cures and the material hardens, it locks into place, sometimes pressing against sensitive nerve endings beneath the nail matrix or pushing into soft tissue around the nail fold.
The discomfort may not be immediate. Many clients report no pain during or right after the service because the initial numbness from filing or the adrenaline of excitement masks subtle irritation. But once inflammation begins—typically 12 to 24 hours later—the pain becomes noticeable, especially under touch or temperature changes.
Common Causes of Post-Application Nail Pain
- Improper Fitting Tips or Forms: Using a tip that’s too wide, too narrow, or incorrectly positioned alters weight distribution across the nail bed, leading to uneven stress.
- Over-Filing the Natural Nail: Excessive buffing weakens the nail plate and increases sensitivity, making underlying tissue more prone to pain when pressure is applied.
- Product Packed Under the Free Edge: Acrylic or gel built underneath the tip presses upward on the fingertip pulp, creating a “hammer effect” with every movement.
- Lack of C-Curve or Apex Misplacement: A well-shaped nail has a slight arch (C-curve) that lifts the extension off the fingertip slightly. Without it, the entire length of the nail bears full contact, increasing pressure on the distal phalanx.
- Allergic Reaction or Chemical Sensitivity: Some individuals react to monomers in liquid-and-powder systems or UV-cured gels, causing inflammation that mimics mechanical pain.
The Role of Nail Anatomy in Discomfort
The fingertip houses a dense network of nerves, blood vessels, and connective tissue. The hyponychium—the skin just beneath the free edge—is particularly sensitive. When artificial material encroaches here, even slightly, it triggers localized inflammation. Additionally, the nail matrix, responsible for nail growth, sits at the base and can become irritated if product seeps underneath the cuticle area during application.
Nails aren’t flat; they follow a complex topography including lateral folds, lunula, and stress lines. Ignoring these contours leads to poor ergonomics in the final design, which translates directly into physical discomfort.
“Many clients assume pain is part of the process, but that’s a myth. Properly applied enhancements should never hurt. Pain means there's either structural imbalance or tissue compromise.” — Dr. Lena Torres, Podiatric & Cosmetic Dermatology Consultant
Real-Life Example: Sarah’s Painful First Set
Sarah, a 29-year-old graphic designer, booked her first full-set acrylics at a popular downtown salon. She chose almond-shaped, medium-length nails in a soft pink. Immediately after the appointment, she loved the look—but by bedtime, her ring fingers began to ache. By morning, both were throbbing, especially when she typed.
She returned to the salon, where the technician checked her nails and found excessive product buildup along the sidewalls and under the front edge. The shape also lacked a proper C-curve, so the nail pressed flush against her fingertip pads. After a gentle rebalance—filing down the apex and smoothing the undersides—Sarah reported relief within hours.
This case illustrates how small technical oversights can lead to significant discomfort, particularly for people who use their hands frequently. Had Sarah ignored the pain, she risked developing onycholysis (separation of the nail from the bed) or secondary infection due to microtrauma.
Preventing Pressure Points: A Step-by-Step Guide
Avoiding post-application pain starts with technique, continues through aftercare, and depends heavily on communication between client and technician. Follow this timeline to ensure comfort and longevity:
- Consultation (Before Application): Discuss your lifestyle. If you type daily or play instruments, opt for shorter lengths and rounded or squoval shapes instead of stilettos.
- Nail Prep: Ensure the nail plate is cleaned, dehydrated, and lightly filed—not aggressively buffed. Avoid cutting live tissue around the cuticle.
- Form/Tip Selection: Choose a form that mirrors your natural nail width and follows the smile line. Never stretch the form beyond the hyponychium.
- Product Placement: Build the apex (highest point of the arch) just behind the center of the nail. This creates lift and reduces fingertip contact.
- C-Curve Development: Shape the nail to have a gentle upward curve from side to center, preventing flat-bottomed contact with surfaces.
- Final Filing & Smoothing: Check the underside of the nail. Run a指尖 (finger test)—press gently on the pad—to detect any protrusions or pinch points.
- Aftercare Instructions: Avoid soaking hands excessively for 24 hours. Use gloves when cleaning and avoid using nails as tools.
Do’s and Don’ts of Fake Nail Comfort
| Do’s | Don’ts |
|---|---|
| Choose a reputable technician with portfolio proof | Allow overly long or wide extensions without testing fit |
| Request a C-curve and proper apex placement | Ignore pain thinking it will \"go away\" |
| Keep nails shorter for functional hands-on work | Use your nails to open packages or scratch surfaces |
| Monitor for swelling, heat, or discoloration | Soak infected-looking nails in undiluted essential oils |
| Communicate discomfort immediately | Wait weeks to fix lifting or pressure issues |
When to Remove or Repair Fake Nails
Pain that persists beyond 48 hours, especially if accompanied by redness, warmth, or pus-like discharge, may indicate an infection or embedded material. In such cases, removal is often necessary. Do not attempt to clip or peel off enhancements yourself—this risks tearing the natural nail and exposing raw tissue.
Instead, schedule a professional soak-off. Most salons offer safe removal using acetone wraps or non-acetone alternatives for sensitive clients. Once removed, allow your natural nails to recover for at least one to two weeks before reapplying enhancements.
If pain recurs with every new set, consider switching materials. Some people tolerate gel better than acrylic, or prefer press-ons with less invasive adhesives. Others benefit from hybrid systems like polygel, which offer flexibility and lighter weight.
Frequently Asked Questions
Is it normal for fake nails to hurt the day after?
No, mild tenderness may occur due to filing or prolonged hand positioning during service, but sharp or persistent pain is not normal. It usually indicates improper shaping, excess product, or trauma to the nail bed.
Can pressure points cause permanent damage?
Yes. Chronic pressure can lead to nerve irritation, thinning of the natural nail plate, or fungal entry through micro-tears. Repeated misapplication may result in long-term deformities like ridging or altered growth patterns.
How can I tell if my nails were applied correctly?
A well-applied set feels lightweight, allows easy fingertip contact without digging, and matches your natural nail contour. You shouldn’t need to adjust your grip or typing style. There should be no pinching at the sides or pressure under the tip.
Expert Checklist for Pain-Free Fake Nails
Use this checklist before and after your appointment to ensure optimal results:
- ☑ I discussed my daily activities with the technician
- ☑ My nails were prepped without aggressive drilling
- ☑ The chosen shape and length suit my finger anatomy
- ☑ There’s a visible C-curve reducing fingertip contact
- ☑ The underside of each nail is smooth and even
- ☑ No product extends past my natural nail edge
- ☑ I feel no pinching, throbbing, or heat after 24 hours
Conclusion: Prioritize Comfort Over Aesthetics
Fake nails should enhance your appearance without compromising function or health. Pain the day after application isn’t a rite of passage—it’s a warning sign. By understanding how pressure points develop and what constitutes proper application, you empower yourself to demand better service and protect your natural nails.
Next time you book an appointment, speak up about fit, ask questions about structure, and never leave the salon with discomfort. Your fingertips deserve care as much as your style deserves attention.


 浙公网安备
33010002000092号
浙公网安备
33010002000092号 浙B2-20120091-4
Comments
No comments yet. Why don't you start the discussion?