
Baking cookies that hold their shape and stay delightfully thick is a goal for many home bakers. Yet, no matter how carefully you follow a recipe, your cookies often emerge from the oven as flat, greasy discs—spread far beyond recognition. This common baking frustration stems from subtle but impactful factors in ingredients, technique, and equipment. Understanding the science behind cookie spread empowers you to take control of the outcome and consistently produce soft-centered, slightly crisp-edged cookies with height and structure.
Cookies flatten due to a combination of butter temperature, sugar composition, flour ratios, leavening agents, and oven conditions. Each plays a critical role in how the dough behaves during baking. The good news? With targeted adjustments, you can transform your flat cookies into thick, chewy masterpieces without overhauling your favorite recipes.
The Science Behind Cookie Spread
When a cookie hits the oven, several physical changes occur simultaneously. Butter melts, sugars liquefy, proteins coagulate, and leavening agents release gas. The balance between these reactions determines whether a cookie spreads excessively or maintains its shape.
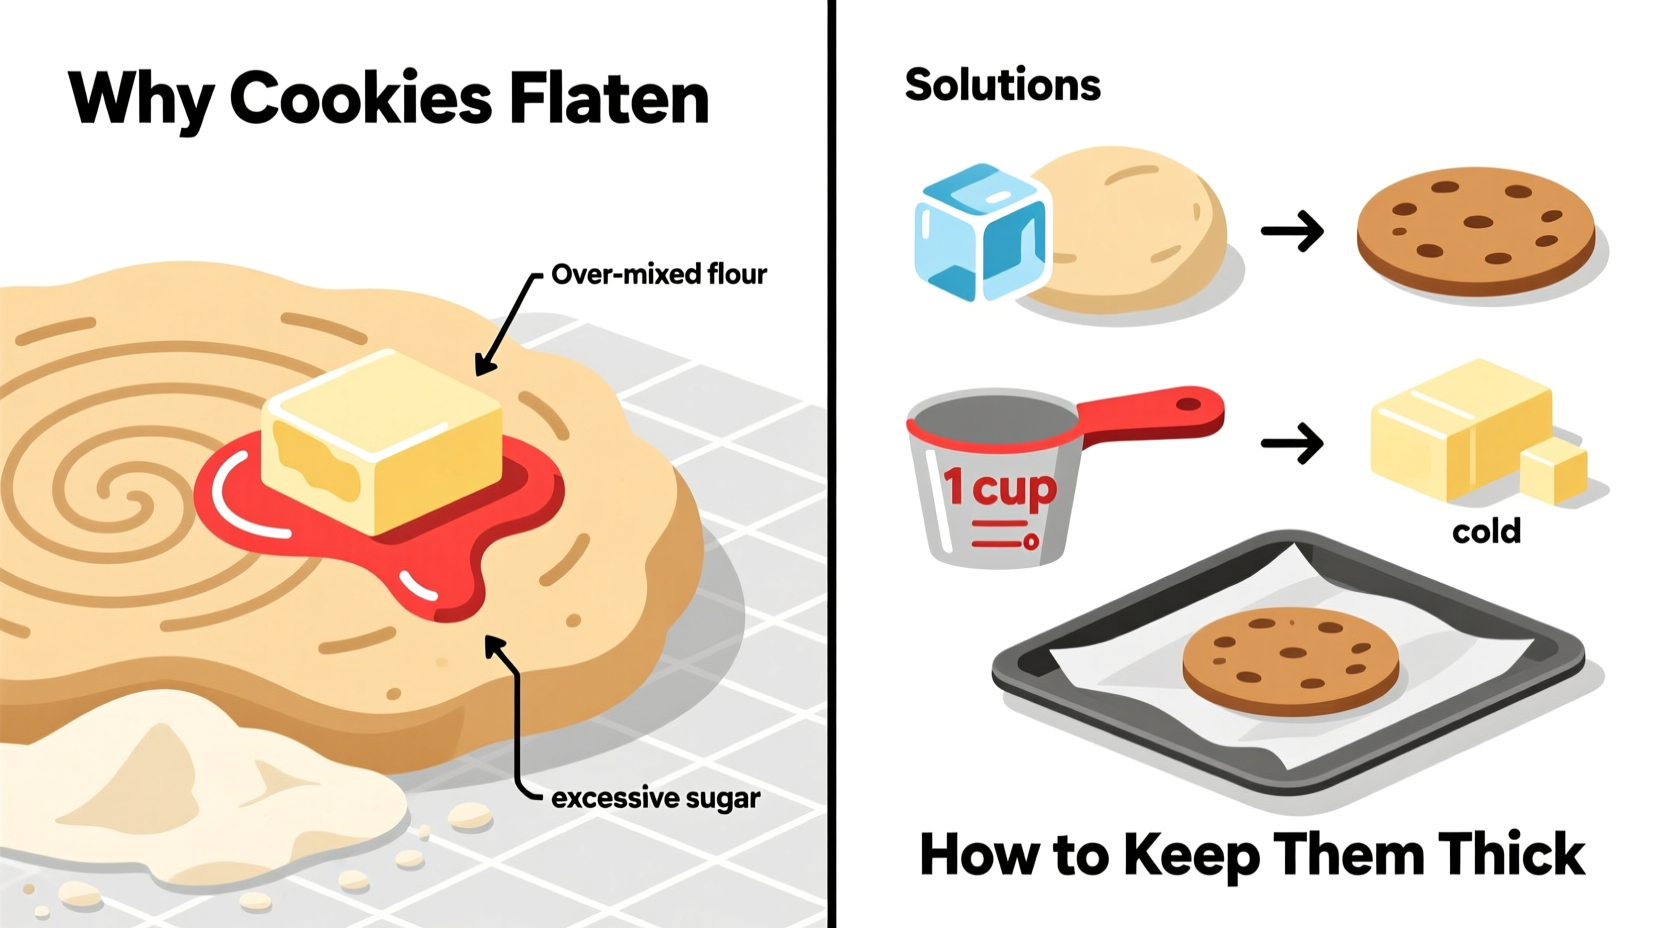
Butter is the primary culprit behind spreading. When butter is too soft or melted before baking, it causes the dough to lose structure early in the baking process. As the fats melt quickly, the dough collapses under its own weight before the flour proteins (gluten) and egg proteins have time to set. This results in wide, thin cookies with minimal rise.
Sugar also contributes to spread. Granulated sugar is hygroscopic—it attracts moisture—and when combined with fat, it creates air pockets during creaming. These pockets expand in the oven, encouraging spread if not counterbalanced by sufficient structure-building ingredients like flour and eggs. Brown sugar adds moisture due to its molasses content, which increases spread slightly but enhances chewiness.
Flour provides structure. All-purpose flour contains gluten-forming proteins that, when hydrated and mixed, create a network that holds the cookie together. Too little flour, or improper measuring (such as scooping directly from the bag), leads to weaker structure and more spread.
“Cookie texture is a delicate equilibrium between fat, sugar, flour, and temperature. Mastering one variable at a time leads to consistent results.” — Dr. Lynn Chen, Food Scientist & Baking Consultant
Key Factors That Cause Cookies to Flatten
Several interrelated factors contribute to excessive cookie spread. Addressing each one systematically improves results.
1. Butter Temperature
Using butter that’s too warm—or worse, melted—is one of the most common reasons cookies flatten. Ideal creaming occurs when butter is at cool room temperature (around 65°F or 18°C). At this stage, it’s soft enough to incorporate air when beaten with sugar but still firm enough to hold that structure.
2. Over-Creaming the Dough
Creaming incorporates air, which helps cookies rise. However, over-creaming introduces too much air, causing rapid expansion followed by collapse. Stick to creaming butter and sugar for 1–2 minutes until light and fluffy, not whipped.
3. Insufficient Flour
Under-measuring flour is easy if you scoop directly from the bag, which compacts it and delivers less than intended. Always spoon flour into the measuring cup and level it off with a knife.
4. Old or Inactive Leavening Agents
Baking soda and baking powder lose potency over time. If they’re expired, cookies won’t rise properly and may spread more due to lack of lift.
5. Hot Baking Sheets
Placing dough on a hot tray from a previous batch causes immediate butter melt. Always use a cool or chilled baking sheet between batches.
6. Oven Temperature Inaccuracy
An oven that runs too cool prolongs the time it takes for proteins and starches to set, allowing more time for spread. Use an oven thermometer to verify accuracy.
How to Keep Cookies Thick: Proven Techniques
Preventing spread isn’t about eliminating it entirely—it’s about managing it. A slight spread is normal, but uncontrolled flattening ruins texture and appearance. The following strategies help maintain thickness while preserving flavor and chew.
Chill the Dough Before Baking
Refrigerating cookie dough for at least 30 minutes—and ideally 24–72 hours—solidifies the butter, delaying melt in the oven. This gives the flour and eggs time to hydrate and form structure before the dough heats up. Chilled dough spreads less and develops deeper flavor through slow fermentation.
Use a Higher Ratio of Brown Sugar to White Sugar
Brown sugar contains molasses, which adds moisture and acidity. The acidity strengthens gluten slightly and reacts with baking soda for better lift. While both sugars promote spread, brown sugar’s moisture content supports chewiness without sacrificing thickness when balanced correctly.
Add an Extra Egg Yolk
Egg yolks are rich in emulsifiers and fat, which enhance richness and structure. Adding an extra yolk (without the white) improves dough cohesion and reduces spread while contributing to a tender, bakery-style texture.
Incorporate Cornstarch
A small amount of cornstarch (1–2 teaspoons per cup of flour) inhibits gluten development and absorbs excess moisture, resulting in softer, thicker cookies. It’s a favorite trick among professional bakers for achieving that pillowy center.
Bake on Parchment Paper or Silicone Mats
These surfaces provide slight grip, preventing dough from sliding and spreading uncontrollably. Avoid greasing baking sheets unless the recipe specifically calls for it—this encourages spread.
Use Cold Baking Sheets and Preheat Fully
Ensure your oven is fully preheated (typically 350°F / 175°C) and use a cool, flat baking sheet. For even better results, chill the shaped dough on the pan for 10 minutes before baking.
Step-by-Step Guide to Thick, Chewy Cookies
Follow this method to significantly reduce spread and achieve bakery-quality thickness:
- Measure flour accurately: Spoon flour into a dry measuring cup and level it off. Never scoop directly from the bag.
- Cream butter and sugar: Use cool room-temperature butter. Beat on medium speed for 1–2 minutes until creamy, not fluffy.
- Add mix-ins gently: Fold in chocolate chips or nuts by hand to avoid over-mixing, which can develop excess gluten.
- Chill the dough: Cover and refrigerate for at least 30 minutes, preferably overnight.
- Preheat oven and prepare pans: Set oven to 350°F (175°C). Line baking sheets with parchment paper or silicone mats.
- Portion with care: Use a cookie scoop for uniform size. Roll into tall mounds rather than balls to encourage upward rise.
- Chill again (optional): Place scooped dough on the baking sheet and chill for 10 minutes before baking.
- Bake one tray at a time: Center rack, middle of oven. Rotate halfway through for even baking.
- Cool properly: Let cookies rest on the baking sheet for 5 minutes before transferring to a wire rack.
Do’s and Don’ts: Cookie Thickness Checklist
| Do | Don't |
|---|---|
| Chill dough for at least 30 minutes | Use melted butter unless recipe specifies |
| Measure flour by spoon-and-level method | Scoop flour directly from the bag |
| Use fresh baking soda and powder | Bake on hot, greased sheets |
| Add 1–2 tsp cornstarch per cup of flour | Over-cream butter and sugar |
| Bake on parchment-lined, cool trays | Open the oven frequently during baking |
| Let cookies rest on sheet post-bake | Use expired leavening agents |
Real Example: From Flat to Fabulous
Sarah, a home baker in Portland, had been struggling with her chocolate chip cookies for years. No matter what she tried, they turned out thin and crispy, lacking the soft interior she loved. She followed a popular online recipe to the letter but still got disappointing results.
After reviewing her process, she realized she was using softened butter straight from the counter on a warm summer day—almost melted. She also scooped flour directly from the bag and baked on hot trays reused from earlier batches.
She revised her method: she began measuring flour correctly, chilling her mixing bowl, and refrigerating the dough for 2 hours. She also started using parchment paper and allowed her baking sheets to cool completely between batches.
The difference was immediate. Her next batch held their shape, rose slightly, and had a soft, chewy center with a golden edge. “I finally understand why temperature and precision matter,” she said. “Now I get compliments every time I bring them to work.”
Frequently Asked Questions
Can I freeze cookie dough to prevent spreading?
Yes. Freezing portioned dough balls before baking is highly effective. Frozen dough melts slowly in the oven, delaying spread and promoting even rise. Bake straight from frozen, adding 1–2 minutes to the baking time.
Why do some recipes call for melted butter if it causes spreading?
Melted butter creates a denser, chewier texture and enhances flavor distribution. Recipes designed for melted butter (like certain brownie-like cookies) compensate with higher flour content or chilling requirements. They’re not flawed—just different in intent.
Does altitude affect cookie spread?
Yes. At high altitudes, lower atmospheric pressure causes liquids to evaporate faster and leavening gases to expand more quickly. This can lead to faster spread and drier cookies. To adjust, reduce sugar slightly, increase flour by 1–2 tablespoons per cup, and chill the dough longer.
Final Tips for Consistently Thick Cookies
- Invest in an oven thermometer to ensure accurate baking temperatures.
- Use a digital scale for precise ingredient measurement—especially flour.
- Try replacing 1–2 tablespoons of flour with cornstarch for extra softness and thickness.
- Avoid overbaking. Remove cookies when edges are set but centers still look slightly underdone—they’ll firm up as they cool.
- Store baked cookies in an airtight container with a slice of bread to retain moisture and softness.
“The secret to thick cookies isn’t mystery—it’s mindfulness. Pay attention to butter temperature, measuring, and timing, and you’ll bake with confidence.” — Marcus Reed, Pastry Chef & Culinary Instructor
Conclusion
Flat cookies don’t mean you’re a bad baker—they mean one or more variables are out of balance. By understanding how ingredients interact and adjusting your technique accordingly, you can reliably produce thick, soft, and flavorful cookies that impress every time. Small changes like chilling the dough, measuring flour correctly, and using cool baking sheets make a dramatic difference. Baking is both art and science, and mastering the details transforms good cookies into exceptional ones.


 浙公网安备
33010002000092号
浙公网安备
33010002000092号 浙B2-20120091-4
Comments
No comments yet. Why don't you start the discussion?