
Baking cookies should be a joyful, predictable process—golden edges, soft centers, and that perfect aroma filling the kitchen. But when you pull out a tray only to find charred bottoms and doughy middles, frustration sets in fast. This common yet perplexing issue affects home bakers across skill levels. The root cause often lies not in your recipe or technique, but in your oven’s accuracy. An improperly calibrated oven can run hotter at the bottom, creating hot spots that scorch baked goods while leaving interiors undercooked. Understanding why this happens—and how to fix it—is essential for consistent, delicious results.
The Science Behind Uneven Baking
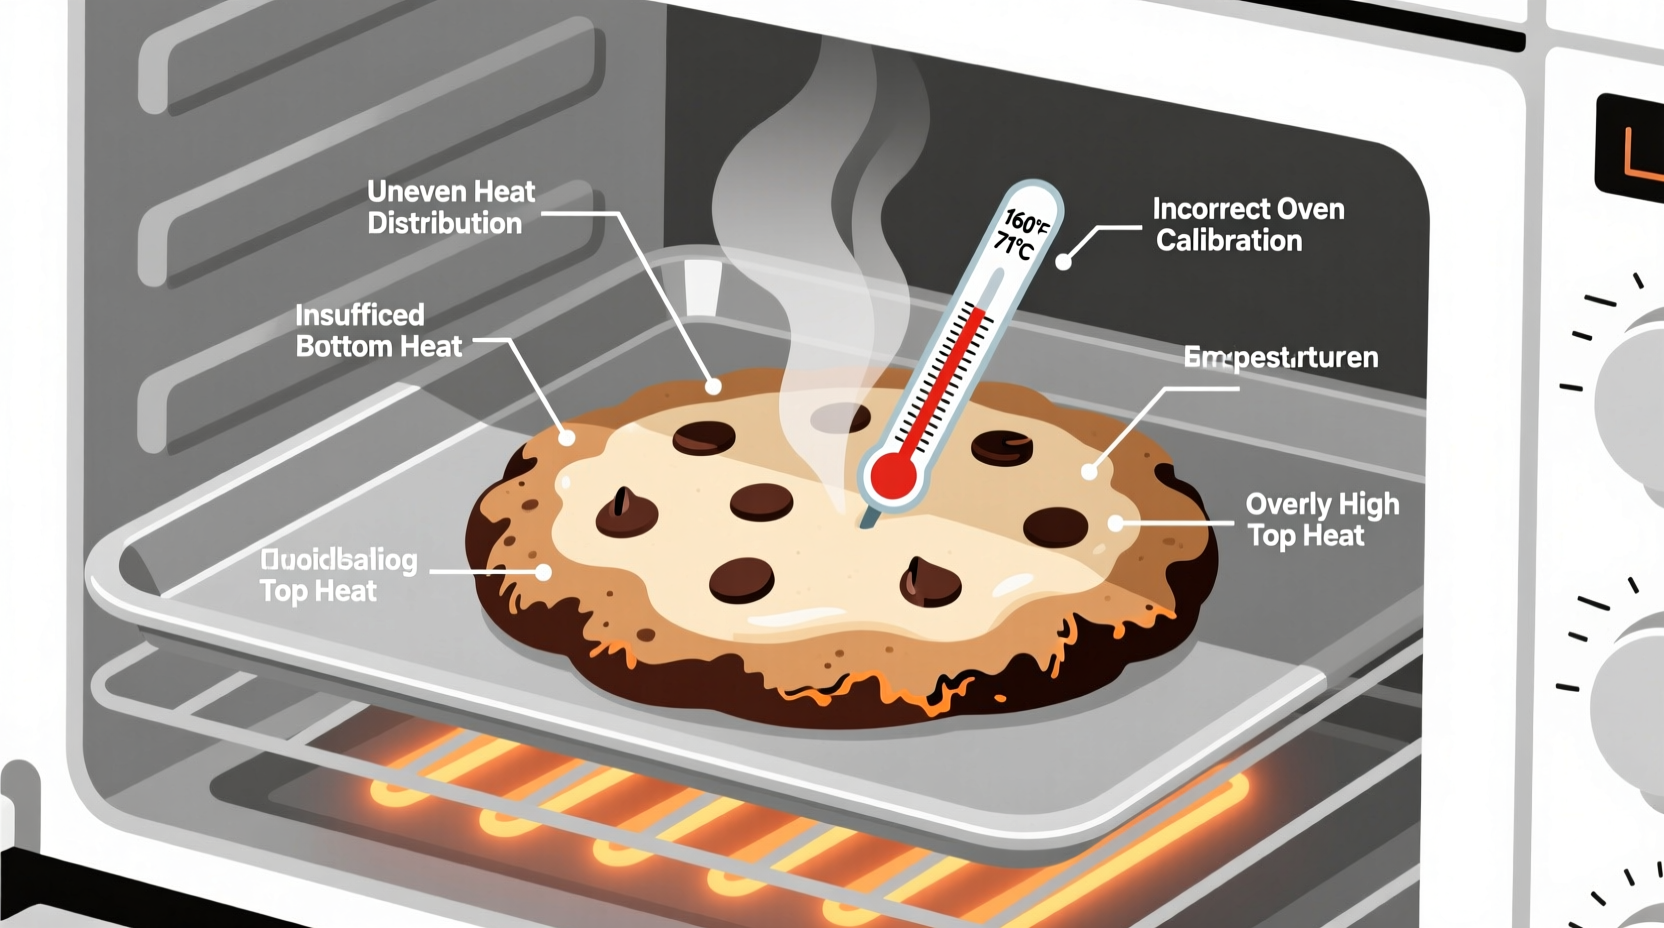
Cookies are especially sensitive to temperature fluctuations because of their small size and high surface-area-to-volume ratio. When heat distribution is uneven, the bottom of the cookie absorbs excessive radiant heat from the oven floor or heating element, while the top and center remain underexposed. This imbalance leads to burnt bases and raw centers—a sign that your oven isn’t maintaining consistent internal temperatures.
Ovens, particularly older models or those used frequently, tend to develop calibration drift over time. That means the thermostat may display 350°F (177°C), but the actual internal temperature could be significantly higher or lower—or vary drastically by location within the cavity. Most standard ovens have a heating element at the bottom, which radiates intense heat upward. If this element cycles too aggressively or if the thermostat fails to regulate properly, the lower rack becomes a hotspot.
Additionally, thermal gradients exist naturally in most ovens. Heat rises, so the upper regions are typically warmer than the middle, and the area near the bottom element can exceed set temperatures by as much as 50°F (28°C). Without proper airflow or convection, these differences go unchecked, compromising delicate baked goods like cookies.
Oven Calibration: Why It Matters
Calibration refers to aligning your oven’s displayed temperature with its actual internal temperature. A misaligned oven can sabotage even the most carefully measured recipes. According to appliance engineers at the National Kitchen & Bath Association, “Up to 30% of household ovens operate more than 25°F off their set point, leading to inconsistent cooking and frequent baking failures.”
“An oven that runs hot on the bottom isn't just inconvenient—it's fundamentally altering the chemistry of your bake. Sugar caramelizes faster, proteins set unevenly, and leavening agents activate prematurely.” — Dr. Lena Torres, Food Scientist & Baking Technologist
For cookies, where precise timing and temperature govern spread, browning, and texture development, even a 20°F deviation can result in disaster. Overheated bottoms cause rapid Maillard reactions and carbonization before the interior has time to cook through. Meanwhile, insufficient top heat prevents proper rise and structure formation.
How to Test Your Oven’s Accuracy
You don’t need specialized tools to assess your oven’s performance. Here’s a simple method using an affordable oven thermometer:
- Place an oven-safe thermometer on the center of the middle rack.
- Set your oven to 350°F (177°C) and allow it to preheat fully (at least 20 minutes).
- Record the actual temperature once stabilized.
- Repeat the test at 325°F and 375°F to check consistency across ranges.
- Move the thermometer to different locations—front, back, left, right, near the bottom—to identify hot spots.
If the reading differs by more than ±15°F from the set temperature, your oven requires recalibration. Some digital models offer self-calibration features; others may need professional service.
Step-by-Step Guide to Calibrating Your Oven
Follow this sequence to correct temperature discrepancies and eliminate burning issues:
- Confirm the Problem: Use an independent oven thermometer to verify inaccurate readings across multiple settings.
- Consult the Manual: Locate calibration instructions specific to your model. Many modern ovens allow adjustment via control panel menus.
- Access Calibration Mode: Typically involves pressing and holding certain buttons (e.g., “Bake” + “Broil”) until a code appears.
- Adjust Temperature Offset: If your oven reads 50°F too high, input a -50°F offset. For low readings, use a positive value.
- Test Again: After saving changes, retest with the thermometer to confirm correction.
- Map Hot Spots: Place slices of bread on each rack and toast at 350°F for 5–7 minutes. Observe which areas brown fastest—these are your hot zones.
Baking Adjustments to Prevent Burnt Bottoms
Even with a perfectly calibrated oven, small tweaks in your baking approach can further prevent bottom burning:
- Use Light-Colored Metal Pans: Dark or nonstick baking sheets absorb more heat, increasing the risk of scorching. Opt for aluminum or shiny stainless steel.
- Double Up on Baking Sheets: Nest one sheet inside another to create insulation and reduce direct heat transfer to the cookie base.
- Elevate the Rack Position: Bake on the upper third of the oven rather than the bottom rack to distance cookies from the primary heat source.
- Add a Layer of Insulation: Place a silicone baking mat or parchment paper between the pan and dough to moderate heat absorption.
- Reduce Oven Temperature: Lower the temp by 25°F and extend baking time slightly to promote even cooking without surface charring.
| Factor | Do This | Avoid This |
|---|---|---|
| Oven Rack Position | Middle to upper third | Bottom rack |
| Baking Sheet Color | Light aluminum | Dark or nonstick pans |
| Preheating | 20+ minutes with thermometer verification | Trusting beep-only signals |
| Cookie Sheet Setup | Doubled pans or insulated mats | Singles on dark trays |
| Temperature Setting | 325–350°F with extended time | High heat for speed |
Real Example: Sarah’s Chocolate Chip Cookie Fix
Sarah, a passionate home baker from Portland, struggled for months with her favorite chocolate chip recipe. Despite following instructions precisely, every batch emerged with blackened undersides and gooey centers. She tried chilling the dough, flattening portions less, and switching brands of flour—but nothing worked. Finally, she invested in an oven thermometer and discovered her oven was running 45°F above the set temperature at the bottom rack. After calibrating her oven and switching to a double-layered baking sheet placed on the middle rack, her next batch came out perfectly golden and evenly baked. “It wasn’t my recipe,” she said. “It was my oven lying to me.”
Essential Checklist for Perfect Cookies
Before every bake, run through this checklist to avoid common pitfalls:
- ✅ Verify oven temperature with a standalone thermometer
- ✅ Preheat for at least 20 minutes
- ✅ Position rack in the upper-middle section
- ✅ Use light-colored, heavy-gauge baking sheets
- ✅ Line pans with parchment or silicone mats
- ✅ Rotate trays halfway through baking
- ✅ Calibrate oven every 6–12 months
- ✅ Avoid overcrowding—leave 2 inches between cookies
Frequently Asked Questions
Can I fix an uncalibratable oven?
Yes. If your oven lacks calibration options, compensate by adjusting baking times and temperatures based on thermometer readings. You can also install an external thermostat controller or upgrade to a convection oven with better heat circulation.
Why do some recipes suggest baking at 325°F instead of 350°F?
Lower temperatures slow down browning reactions, allowing the interior to catch up to the exterior. This is especially useful in ovens with strong bottom heat or poor air circulation.
Does convection help with even baking?
Absolutely. Convection ovens use a fan to circulate hot air, reducing hot spots and promoting uniform cooking. When using convection for cookies, reduce the temperature by 25°F and monitor closely, as they may bake faster.
Final Tips for Long-Term Success
Consistently great cookies depend on more than just ingredients—they rely on accurate equipment and mindful practices. Treat your oven like a precision instrument, not just an appliance. Schedule regular checks, especially after moving homes, power surges, or heavy usage periods like holidays. Keep a log of thermometer readings and adjustments to track performance over time.
Also, remember that ambient factors matter: opening the oven door frequently causes temperature drops, humidity affects dough hydration, and altitude influences boiling points and spread. While oven calibration solves the core issue of burnt bottoms and raw centers, holistic awareness ensures lasting success.
“The best bakers aren’t just recipe followers—they’re temperature detectives, always verifying, adjusting, and refining.” — Marcus Reed, Pastry Chef & Culinary Instructor
Take Control of Your Baking Results
Your dream of perfectly baked cookies is entirely achievable. Start today by testing your oven’s true temperature, making necessary calibrations, and applying smart baking strategies. Small investments in knowledge and tools pay off in consistently golden, chewy, and evenly cooked treats. Share your journey, leave a comment with your own fixes, or challenge a friend to test their oven too—because great baking begins with trust in your oven’s honesty.


 浙公网安备
33010002000092号
浙公网安备
33010002000092号 浙B2-20120091-4
Comments
No comments yet. Why don't you start the discussion?