
It’s a familiar holiday frustration: you string up your favorite set of miniature incandescent lights, plug them in—and nothing. Not a flicker. You check the outlet, test the fuse, even swap power strips—only to find that one tiny, unassuming bulb has silently sabotaged the entire string. Unlike modern LED strings that stay lit despite individual failures, traditional mini lights often go dark en masse when a single bulb burns out. This isn’t faulty wiring or poor craftsmanship—it’s intentional electrical design. Understanding *why* this happens—and whether your lights use shunted or non-shunted bulbs—is essential for effective troubleshooting, safe repairs, and smarter purchasing decisions.
The Physics Behind the Blackout: Series Circuits Explained
Most incandescent mini light strings manufactured before the mid-2000s—and many still sold today—operate on a simple but unforgiving principle: they’re wired in series. In a series circuit, electricity flows through each bulb in sequence, like beads on a single thread. The current must pass through bulb #1 to reach bulb #2, then #3, and so on—until it completes the loop back to the power source.
This design keeps manufacturing costs low and allows the use of low-voltage bulbs (typically 2.5V or 3.5V) across standard 120V household circuits. A 50-light string of 2.5V bulbs, for example, divides the voltage evenly: 50 × 2.5V = 125V—close enough to safely operate on 120V mains with minor tolerance.
But series wiring carries a critical vulnerability: if any single point in the path breaks—whether from a broken filament, loose connection, or corroded socket—the circuit opens. No current flows. Every bulb goes dark. That’s why one dead bulb can kill an entire 100-light strand.
Enter the shunt—a tiny, clever fail-safe engineered into some bulbs to prevent total failure.
What Is a Shunt—and Why Does It Matter?
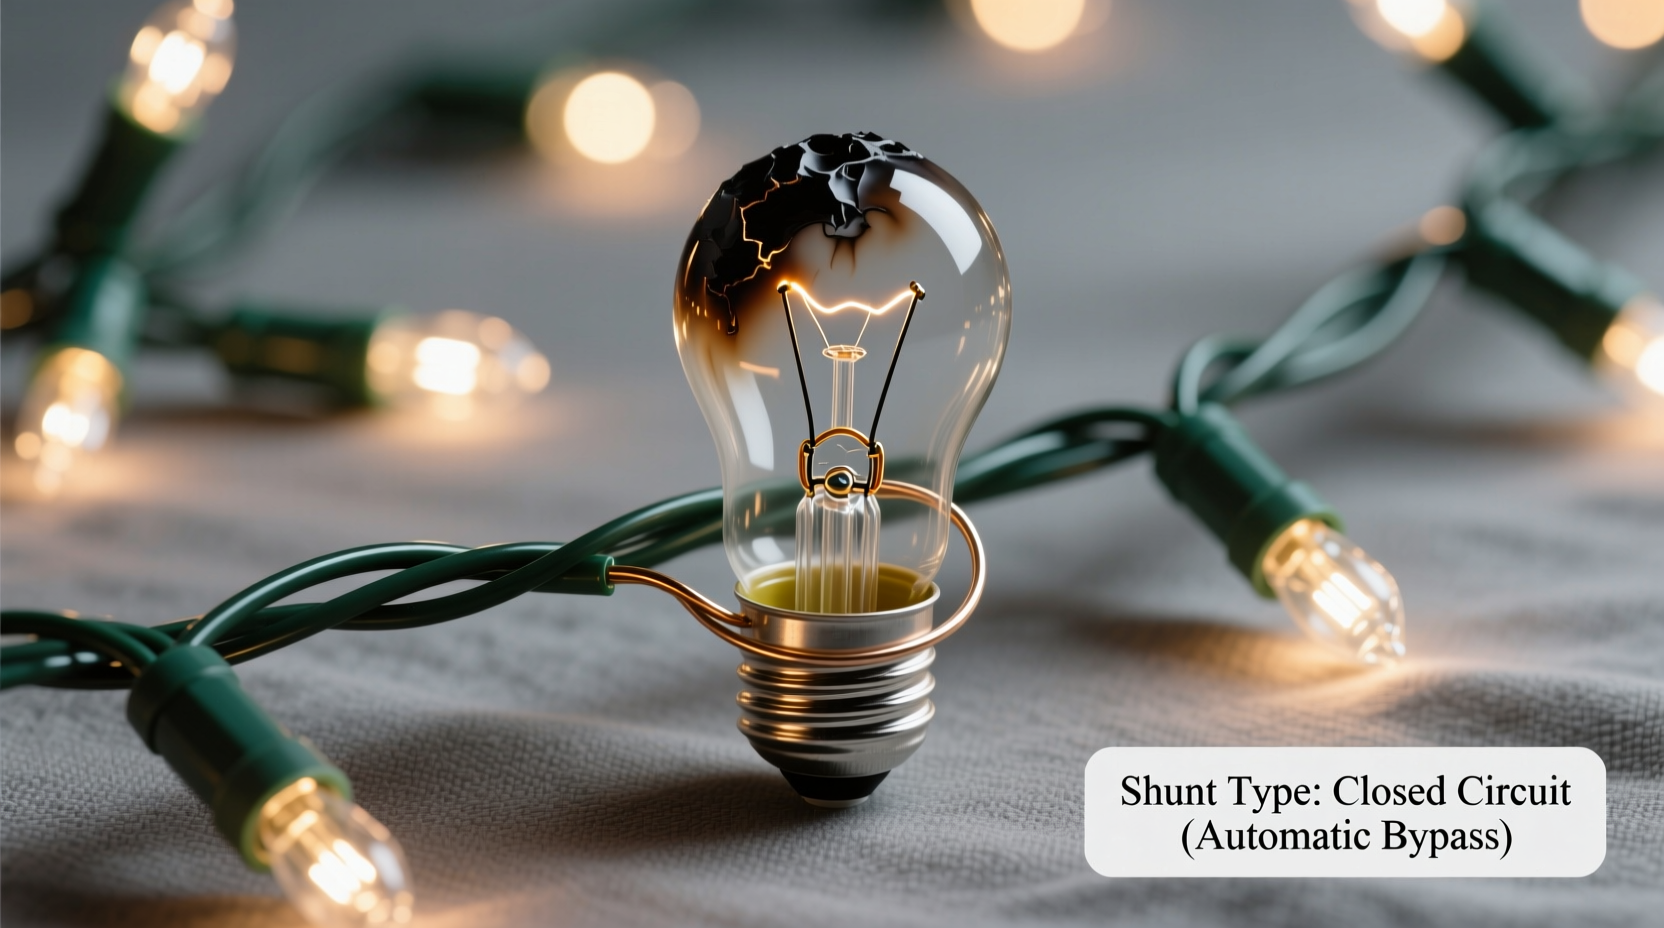
A shunt is a microscopic bypass wire embedded inside the base of certain mini bulbs. It’s not visible to the naked eye, but it’s made of a special alloy—often a fusible zinc-copper compound—that remains inert under normal operation. When the bulb’s tungsten filament is intact and conducting current, the shunt sits idle. But the moment the filament breaks and stops conducting, a brief voltage surge occurs across the open gap. That surge heats the shunt material just enough to melt and bridge the gap—creating a new conductive path around the dead bulb.
In essence, the shunt “closes the circuit” where the filament “opened” it. Light continues flowing to the remaining bulbs. The string stays lit—though now operating at slightly higher voltage per remaining bulb (e.g., 49 bulbs share 120V instead of 50), which may shorten the lifespan of adjacent bulbs over time.
Crucially, not all mini bulbs have shunts. Many budget or older sets use non-shunted bulbs—especially those labeled “replacement only” or sold in bulk packs without brand markings. Without shunts, every filament failure triggers a full-string blackout.
How to Identify Shunt-Type Mini Bulbs: A Practical Field Guide
You can’t rely on packaging alone. Labels like “shunted,” “shunt-equipped,” or “fuse-type” are helpful—but inconsistent, often omitted, or misleading. Here’s how to verify shunt presence reliably:
- Visual inspection (base view): Hold the bulb upright and look closely at the metal base where the wires enter. Shunted bulbs typically have two small, parallel wire leads soldered to the base—one connected to the filament, the other to the shunt. Non-shunted bulbs usually show only one lead connecting to the filament; the second contact is simply a metal sleeve or blank post.
- Resistance test (multimeter required): Set your multimeter to continuity or lowest ohms setting. Touch probes to both metal contacts at the bulb’s base. A shunted bulb will read between 2–10 ohms—even with a visibly broken filament—because the shunt provides a low-resistance path. A non-shunted bulb with a broken filament reads “OL” (open loop) or infinite resistance.
- Functional test (safe & low-risk): Carefully remove one bulb from a working string. Insert a known-good shunted bulb into its socket. If the string stays lit, the original bulb was likely non-shunted—or its shunt had failed. Repeat with several bulbs to spot patterns.
- Manufacturer cross-reference: Major brands like NOMA (pre-2010), GE, and Light-O-Rama historically used shunted bulbs in consumer-grade incandescent sets. Bulk “generic” replacements sold at hardware stores or dollar stores rarely include shunts unless explicitly stated.
Keep in mind: shunts degrade over time. Repeated surges, moisture ingress, or corrosion can cause a shunt to fail “open” (no longer bridging) or “short” (bypassing even a good filament). A bulb with a functional filament but a fused-shut shunt may cause erratic behavior—like flickering or partial dimming.
Shunted vs. Non-Shunted: Key Differences at a Glance
| Feature | Shunted Bulbs | Non-Shunted Bulbs |
|---|---|---|
| Circuit behavior when filament fails | String remains lit (shunt activates) | Entire string goes dark |
| Base construction | Two distinct wire leads visible at base; often stamped “S” or “SH” | One lead + metal sleeve; no secondary conductor |
| Voltage tolerance | Designed for tight voltage distribution; sensitive to overvoltage if too many shunts activate | More tolerant of minor voltage fluctuations—until failure occurs |
| Replacement compatibility | Must be replaced with shunted bulbs only—mixing types risks open circuits or overheating | Can only be used in non-shunted strings; inserting into shunted string may cause shorts |
| Lifespan under stress | Shorter average life when multiple shunts activate (increased per-bulb voltage) | Longer individual life—until catastrophic failure |
Real-World Case Study: The Neighborhood Light Swap
Last December, Sarah in Portland spent three evenings troubleshooting her vintage 1998 NOMA mini light string—50 red bulbs, passed down from her grandmother. Each time she replaced a burnt-out bulb, the string would glow briefly… then die again within hours. Frustrated, she bought a $5 “universal replacement pack” from a big-box store. She swapped all 50 bulbs. Still black.
She brought the string to a local lighting repair shop. The technician tested one bulb with a multimeter: 8.2 ohms—shunt present. He tested a replacement bulb: “OL.” The universal pack contained non-shunted bulbs. Worse, installing them into a shunt-designed string created intermittent opens—not because the filament broke, but because the non-shunted bulbs lacked the internal bypass needed to maintain continuity during thermal cycling.
The fix? Returning the generic pack and sourcing genuine NOMA shunted replacements—same voltage, same base, same shunt profile. Within 15 minutes, the string stayed lit for the full season. Sarah kept a spare bulb taped to the plug housing—shunted, verified, and labeled.
“Shunt technology isn’t magic—it’s precision metallurgy timed to microsecond voltage transients. A failed shunt doesn’t mean ‘bad bulb’; it means the system did its job once, and fatigue set in. Treat shunted strings like calibrated instruments: respect their design limits.” — Dr. Alan Reyes, Electrical Engineer & Holiday Lighting Consultant, UL Certified Testing Lab
Step-by-Step: Diagnosing and Fixing a Dead Mini Light String
- Unplug the string immediately. Never work on live circuits—even low-voltage ones can deliver a jolt if damp or damaged.
- Inspect the plug and fuse. Many mini light plugs contain a small, slide-out glass fuse (usually 3A or 5A). Check for discoloration or a broken filament. Replace only with identical amperage.
- Test voltage at the plug. Use a non-contact voltage tester or multimeter to confirm power reaches the first socket. If not, the issue is upstream (outlet, extension cord, or plug).
- Use the “half-split” method. Unplug the string. Remove the bulb from the middle socket. Plug in the first half. If lit, the break is in the second half. If dark, the break is in the first half—or the removed bulb itself is faulty. Repeat, halving each time, until you isolate the dead section.
- Check each bulb in the suspect section. Use a bulb tester (or multimeter on continuity mode) on every bulb. Discard any reading “OL” *if* you know the string is shunted—or keep it if non-shunted and confirm filament integrity visually.
- Verify shunt type before replacement. Match base size (E10 or T1¾), voltage (2.5V, 3.5V), and shunt status. When in doubt, buy from the original manufacturer or a reputable lighting specialist—not generic online sellers.
FAQ: Common Questions About Shunt-Type Mini Lights
Can I add a shunt to a non-shunted bulb?
No—and attempting to do so is unsafe. Shunts require precise alloy composition, thermal mass, and placement relative to the filament. DIY modifications risk short circuits, overheating, or fire. Always replace with correctly specified bulbs.
Why do some new LED mini lights also go dark when one bulb fails?
Many entry-level LED strings mimic series wiring for cost reasons—and lack individual LED drivers or parallel circuitry. True reliability comes from professionally engineered LED strings with built-in constant-current drivers and redundant pathways. Look for “parallel-wired” or “individually fused” specifications—not just “LED.”
Do shunted bulbs work in non-shunted strings—and vice versa?
Physically, yes—they fit the same sockets. Electrically, no. Installing a shunted bulb in a non-shunted string creates no harm but offers no benefit. Installing a non-shunted bulb in a shunted string breaks the circuit permanently when that bulb fails—defeating the shunt system’s purpose. Consistency is mandatory.
Conclusion: Light Up with Confidence, Not Guesswork
Understanding why your mini lights go dark—and how shunt technology quietly works to prevent it—transforms holiday lighting from a seasonal chore into a manageable, even satisfying, technical task. You no longer need to treat every outage as a mystery. With a multimeter, a systematic approach, and knowledge of shunt identification, you gain control over reliability, safety, and longevity. Whether preserving a family heirloom string or selecting new lights for next year, prioritize clarity over convenience: check for shunts, match specs precisely, and invest in quality components. These small habits prevent frustration, reduce waste, and honor the quiet engineering that turns simple bulbs into joyful, dependable light.


 浙公网安备
33010002000092号
浙公网安备
33010002000092号 浙B2-20120091-4
Comments
No comments yet. Why don't you start the discussion?