
As the holiday season approaches, twinkling Christmas lights bring warmth and cheer to homes across the country. But nothing disrupts the festive mood faster than a string of lights that won’t stay steady—flickering, blinking, or cutting out entirely. While some lights are designed to blink as part of their charm, unintended flickering is often a sign of an underlying issue. Whether you're dealing with vintage incandescent strands or modern LED sets, understanding the root causes and knowing how to fix them can save time, money, and frustration.
This guide breaks down the most common reasons behind erratic Christmas light behavior and offers practical, tested solutions to restore reliable illumination. From loose bulbs to voltage fluctuations, we’ll walk through each potential culprit and equip you with the tools to diagnose and repair flickering strings confidently.
Understanding How Christmas Lights Work
To troubleshoot flickering effectively, it helps to understand the basic design of most holiday light strings. The majority of traditional Christmas lights are wired in series, meaning electricity flows from one bulb to the next in a continuous loop. If one connection fails—whether from a missing, loose, or burnt-out bulb—the entire circuit can be disrupted, leading to partial or total failure.
In contrast, newer LED light strings often use parallel wiring or include shunt wires within each bulb socket. Shunts are small conductive pathways that activate when a filament burns out, allowing current to bypass the dead bulb and keep the rest lit. However, even with this fail-safe feature, poor connections, power inconsistencies, or manufacturing defects can still cause flickering.
Some light sets are intentionally designed to blink using special flasher bulbs or built-in controllers. These contain bimetallic strips that heat up and cool down, breaking and restoring the circuit at regular intervals. When these components fail or are misplaced, they can cause irregular flashing or persistent flickering in non-blinking sections.
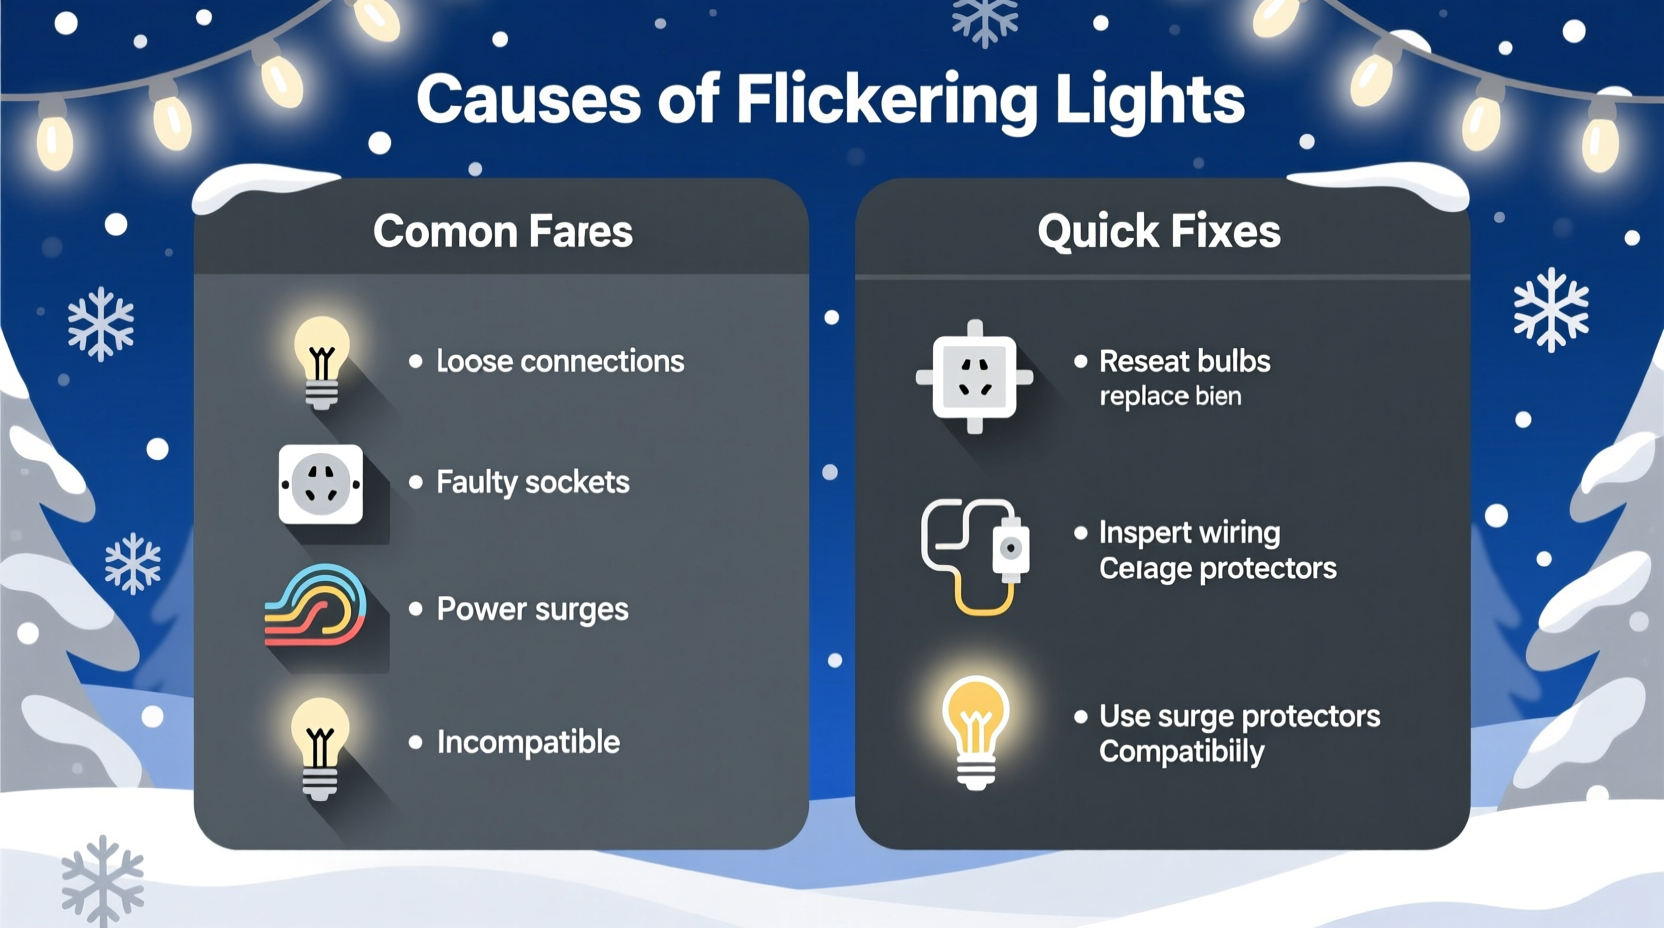
Common Causes of Flickering Christmas Lights
Flickering isn’t random—it’s a symptom. Identifying the source requires checking both physical components and electrical conditions. Below are the six most frequent causes of unsteady lighting.
- Loose or improperly seated bulbs: Even a slightly dislodged bulb can interrupt the flow of electricity in a series circuit, causing intermittent flickering.
- Burnt-out or failing bulbs: A dying bulb may not break the circuit completely but can create resistance, leading to fluctuating brightness.
- Damaged sockets or frayed wires: Cracked sockets or exposed wiring can cause short circuits or inconsistent conductivity.
- Overloaded circuits or voltage drops: Plugging too many strings into one outlet or using undersized extension cords can reduce voltage, making lights dim or flicker.
- Moisture or corrosion: Outdoor lights exposed to rain, snow, or humidity may develop internal corrosion, especially in older sets.
- Defective or mismatched flasher bulbs: Using a flasher bulb in a non-blinking string—or installing multiple flashers—can cause chaotic blinking patterns.
Step-by-Step Guide to Fix Flickering Light Strings
Follow this systematic approach to diagnose and resolve flickering issues efficiently.
- Unplug the lights and remove them from any mounting surface for safe inspection.
- Inspect the entire length of the strand for visible damage—look for cracked sockets, exposed wires, or melted insulation.
- Check each bulb by gently pressing it into its socket. Reseat any that feel loose. Remove and examine bulbs for darkened glass or broken filaments.
- Replace any suspect bulbs with identical replacements (matching voltage and wattage). Use a bulb tester if available.
- Test for continuity using a multimeter set to continuity mode. Place probes on the metal base and side contact of each socket to verify electrical flow.
- Verify flasher bulb placement. Only one flasher bulb should be used per string, and only in sets designed for blinking. Remove extra flashers or replace them with steady bulbs.
- Plug in and test the string away from flammable materials. Observe for consistent performance over several minutes.
- If problems persist, divide the string into sections mentally and isolate where the flickering begins—this helps locate faulty segments.
For LED strings, ensure compatibility between controllers and power supplies. Some flickering occurs when third-party adapters or dimmer switches interfere with low-voltage operation.
Do’s and Don’ts: Best Practices for Stable Lighting
| Do’s | Don’ts |
|---|---|
| Use UL-listed extension cords rated for outdoor use if needed. | Don’t daisy-chain more than three light strings unless labeled safe. |
| Store lights coiled loosely around a cardboard reel to prevent wire stress. | Don’t yank lights down by the cord during removal. |
| Clean plug contacts with a dry cloth before connecting. | Don’t use water or cleaning sprays on electrical components. |
| Label blinking vs. steady-light strings separately after testing. | Don’t mix different brands or voltages on the same circuit. |
| Inspect lights annually before installation. | Don’t leave damaged or flickering lights unattended while powered. |
Mini Case Study: The Neighbor’s Blinking Porch Display
Last December, Sarah noticed her neighbor’s elaborate rooftop light display had one section that blinked erratically—sometimes staying off for minutes, then flashing rapidly. Curious, she offered to help after recalling a similar issue with her own garage lights.
Upon inspection, they found no obvious damage. After unplugging the strand, Sarah reseated each bulb in the problematic section. One bulb at the midpoint was slightly loose and showed signs of arcing—tiny black marks inside the socket. They replaced it with a spare from Sarah’s toolkit. When reconnected, the entire section lit steadily.
The root cause? Vibration from wind had gradually loosened the bulb over weeks, creating an intermittent connection. A five-minute fix restored the full display. The neighbor later shared that he’d been planning to replace the whole string—a $35 expense avoided with simple troubleshooting.
Expert Insight: What Electricians Say About Holiday Lighting
“Most flickering issues stem from poor connections, not power supply problems. A single corroded or loose bulb can mimic a larger electrical fault. Always start at the component level before assuming wiring or outlet issues.” — Marcus Reed, Master Electrician & NFPA Contributor
“Modern LED strings are more energy-efficient but more sensitive to voltage fluctuations. Using a surge-protected power strip can stabilize input and extend lifespan.” — Lena Torres, Residential Lighting Specialist
Tips for Preventing Future Flickering
Prevention is far easier than repair. Implement these habits to minimize future issues:
- Label and separate blinking and steady strings during storage to avoid accidental mismatches.
- Invest in light-testing tools like a continuity checker or dedicated bulb tester for faster diagnostics.
- Use timers or smart plugs to control on/off cycles and reduce wear from manual switching.
- Inspect before storing: Fix minor issues at season’s end rather than waiting until next year.
- Keep a repair kit with spare bulbs, fuses, electrical tape, and a small screwdriver.
FAQ: Common Questions About Flickering Christmas Lights
Why do my new LED Christmas lights flicker even when first installed?
New LED strings may flicker if connected to incompatible dimmer switches, low-quality power adapters, or overloaded circuits. Ensure you’re using a direct wall outlet without intermediaries. Also, verify that all connectors are fully snapped together—many flickering issues stem from partially engaged male-female plugs.
Can I convert a blinking string into a steady-lit one?
Yes. Identify the flasher bulb—it usually has a red or silver tip and is located near the middle or end of the string. Replace it with a standard bulb of the same type. Once removed, the entire string should remain constantly lit. Avoid removing other bulbs unless faulty, as this can break the circuit.
How many light strings can I safely connect together?
Most manufacturers recommend connecting no more than three incandescent strings end-to-end. LEDs draw less power, so some allow up to 40 or more connected sets—but always check the label. Exceeding limits causes voltage drop, overheating, and increased flickering risk.
Final Checklist: Troubleshooting Flickering Lights
- Unplug the light string.
- Visually inspect for damaged wires, sockets, or plugs.
- Reseat all bulbs firmly in their sockets.
- Replace any darkened, broken, or suspicious bulbs.
- Ensure only one flasher bulb is present (if applicable).
- Check fuses in the plug (common in mini-light sets).
- Test on a different outlet with a known-good extension cord.
- Confirm the outlet is functioning and not controlled by a switch.
- Plug in and observe for at least 5 minutes.
- If still flickering, retire the string or send for professional repair.
Conclusion: Keep Your Holiday Lights Steady and Safe
Flickering Christmas lights don’t have to ruin your seasonal decor. With a methodical approach and a few basic tools, most issues can be diagnosed and resolved in under 15 minutes. Understanding the difference between intentional blinking and problematic flickering empowers you to maintain a beautiful, reliable display year after year.
Regular maintenance, proper storage, and attention to electrical safety not only prevent flickering but also reduce fire hazards and extend the life of your investment. As you prepare your home for the holidays, take a moment to test each string before hanging it. A little effort upfront ensures a brighter, safer, and more joyful season for everyone.


 浙公网安备
33010002000092号
浙公网安备
33010002000092号 浙B2-20120091-4
Comments
No comments yet. Why don't you start the discussion?