
It’s a familiar holiday frustration: you plug in your string of Christmas lights, and only half of them come on. The top section glows cheerfully while the bottom remains dark, or one segment flickers weakly before giving up entirely. This isn’t just bad luck—it’s usually a symptom of how traditional light strings are designed. Understanding why this happens is the first step toward fixing it quickly and getting your display back in shape.
Most older or budget-friendly Christmas light sets use a series circuit design, meaning the bulbs are connected in a single electrical loop. When one bulb fails, burns out, or becomes loose, it breaks the entire circuit downstream, leaving part—or all—of the string dark. But why does only *half* go out? And more importantly, how can you fix it without replacing the whole strand?
The Science Behind Half-Lit Christmas Lights
In a typical series-wired light string, electricity flows from the plug through each bulb in sequence before returning to complete the circuit. If a single bulb burns out or develops a poor connection, the current stops at that point. However, many modern mini-light strands are divided into two or more sub-circuits within a single string. These are often referred to as “dual-wave” or “parallel-series hybrid” designs.
This means a 100-bulb strand might actually consist of two separate 50-bulb circuits wired side by side. If one circuit fails due to a dead bulb or broken shunt (more on that later), only half the lights will illuminate. That explains why you often see exactly 50% of the strand working—because electrically, it’s functioning as intended, just with one leg down.
Another factor is voltage distribution. Each bulb in a standard incandescent mini-light set is rated for about 2.5 volts. In a 50-light series, they share the 120-volt household current evenly. When one bulb fails open (no continuity), the circuit breaks. But if the failed bulb has a working shunt—a tiny wire inside the base designed to bypass the filament when it burns out—the rest of the circuit may stay lit.
Common Causes of Partial Failure
Several issues can cause only half a Christmas light string to function. Identifying the root cause saves time and prevents repeated troubleshooting.
- Blown or loose bulb: A single missing, cracked, or poorly seated bulb can interrupt the circuit.
- Failed shunt: In incandescent bulbs, the internal shunt should carry current after the filament fails. If the shunt doesn’t activate, the circuit breaks.
- Damaged socket: Physical wear, moisture, or corrosion can degrade contact points in the bulb holder.
- Frayed or pinched wire: Especially near plugs or where lights bend sharply, wires can break internally while the insulation looks intact.
- Bad fuse: Many plug ends contain small replaceable fuses. One blown fuse can cut power to half the string in dual-circuit setups.
“Over 70% of partial lighting failures in holiday strands are caused by either a single faulty bulb or a blown fuse in the plug. Most people overlook the fuse because they don’t know it’s there.” — Greg Thompson, Electrical Technician & Holiday Lighting Installer
Step-by-Step Guide to Fix Half-Working Lights Fast
Follow this efficient process to diagnose and repair non-working sections of Christmas lights in under 30 minutes.
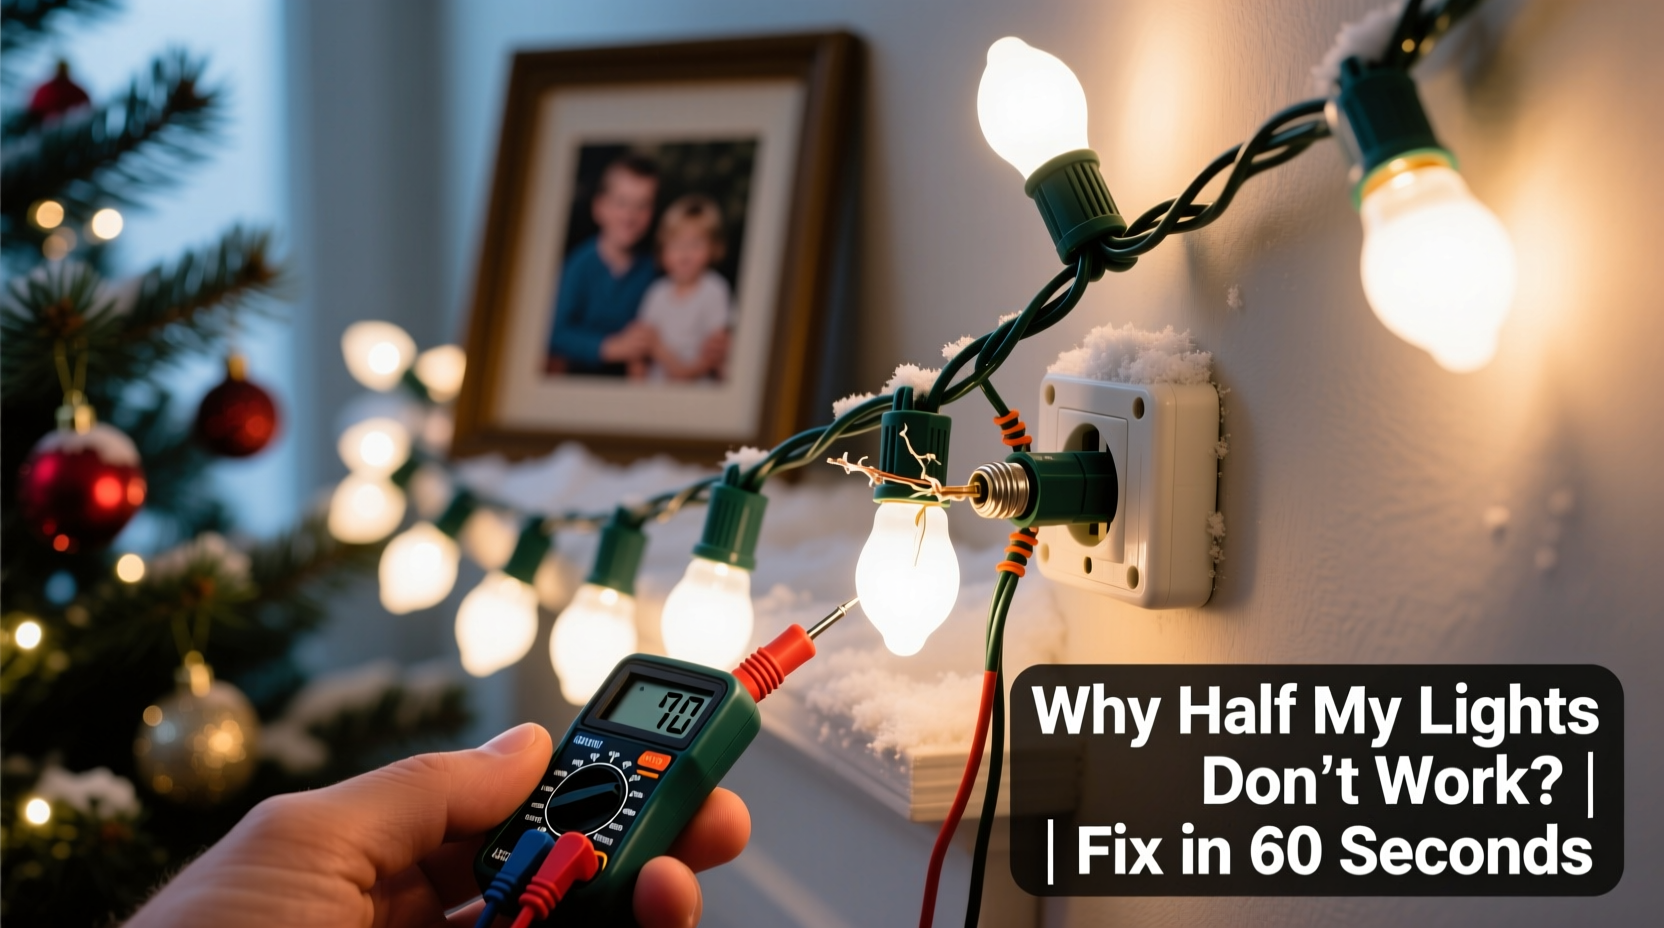
- Unplug the strand immediately. Never handle lights while energized.
- Inspect the plug for fuses. Flip over the male end. Some have a small sliding door revealing one or two glass fuses (usually 3–5 amp). Use a flashlight to check for discoloration or broken filaments. Replace with identical-rated fuses if needed.
- Test continuity with a multimeter (optional). Set to continuity mode. Touch probes to both prongs of the plug. A working circuit should beep. No sound means a full break—likely a fuse, severed wire, or total bulb failure.
- Divide and conquer visually. Look closely at every bulb in the dark half. Signs of damage include blackened glass, melted sockets, or loose fit. Gently press each bulb down to ensure it’s fully seated.
- Use a light tester tool. Slide a non-contact voltage detector or dedicated light keeper tester along the dark section. These devices detect live current without direct contact and can pinpoint where voltage drops off.
- Replace suspect bulbs one at a time. Start from the first dark bulb after the last working one. Swap in known-good replacements. Many kits come with spare bulbs—use them.
- Check for wire damage. Run fingers along the wire, especially near bends, hooks, or tight wraps. A soft lump or stiff spot could indicate an internal break. Cut and splice with waterproof wire connectors if necessary.
- Reconnect and test. Plug in the strand. If still not working, repeat steps focusing on the transition point between working and non-working sections.
Do’s and Don’ts: Best Practices for Repair and Prevention
| Do | Don't |
|---|---|
| Store lights wrapped around a cardboard reel or spool to prevent tangling and wire stress. | Wrap lights tightly around sharp edges like rulers or hangers, which can nick wires. |
| Use LED replacement bulbs—they generate less heat and last longer. | Mix old incandescent bulbs with new LEDs on the same strand unless labeled compatible. |
| Invest in commercial-grade light testers or voltage tracers for frequent repairs. | Assume all lights are parallel-wired; most affordable strands are still series-based. |
| Keep spare fuses and bulbs on hand during holiday setup season. | Leave damaged strands plugged in unattended—fire risk increases with exposed wiring. |
| Clean contacts with isopropyl alcohol if corrosion is visible. | Use water or household cleaners on electrical components. |
Real Example: How Sarah Fixed Her Porch Lights in 20 Minutes
Sarah had been using the same 200-light strand across her front porch for five years. This December, she noticed only the first 100 bulbs lit up. She unplugged the set and began checking from the plug end. Using a flashlight, she spotted a slightly discolored bulb near the middle—the exact transition point between light and dark.
She removed it and found the metal base was corroded. After cleaning the socket with a cotton swab dipped in rubbing alcohol and inserting a fresh bulb, she plugged it back in. Nothing happened. Then she remembered reading about fuses in the plug. She opened the compartment and discovered one of the two fuses was blackened.
She replaced it with a spare from her holiday toolkit and tried again. The entire strand lit up instantly. Total time: 18 minutes. By understanding the dual-circuit design and checking both bulbs and fuses, she avoided buying a new string altogether.
When to Upgrade: Knowing the Limits of Repair
Not every strand is worth fixing. Frequent repairs, brittle wires, or multiple broken sockets signal it’s time to retire the set. Modern LED light strings offer significant advantages:
- Lower energy consumption (up to 90% less than incandescent)
- Built-in parallel circuits—so one bulb failure doesn’t kill the whole section
- Longer lifespans (often rated for 25,000+ hours)
- Less heat output, reducing fire risk
If you’re repairing the same strand every year, consider upgrading. Look for terms like “replaceable bulbs,” “shatterproof,” and “UL-listed” when shopping. While slightly more expensive upfront, durable LED strings save money and hassle over time.
FAQ
Can I connect two half-working light strings together?
No—if either string has an open circuit or blown fuse, connecting them may result in neither working, or create uneven loads. Only daisy-chain fully functional, compatible strands rated for it.
Why do some bulbs look fine but still cause failure?
The filament may be broken even if the glass appears intact. Also, the internal shunt might not have activated. Shunts rely on heat from the burning filament to weld closed—if the burnout was too sudden, the shunt won’t engage.
Are there tools that make finding bad bulbs easier?
Yes. Devices like the LightKeeper Pro use pulse technology to clear shunt failures and test bulbs without removal. They can revive entire dark sections in seconds and are widely used by professional installers.
Conclusion
Half-working Christmas lights aren’t magic—they’re mechanics. Whether it’s a blown fuse, a corroded socket, or a single faulty bulb disrupting a series circuit, the solution is usually simple once you know where to look. With basic tools, a methodical approach, and an understanding of how your lights are wired, you can restore full brightness quickly and safely.
Don’t let a dimmed display dampen your holiday spirit. Most fixes take less than half an hour and cost nothing but a few spare bulbs. And next time you pack them away, store them properly so they’ll light up reliably for years to come.


 浙公网安备
33010002000092号
浙公网安备
33010002000092号 浙B2-20120091-4
Comments
No comments yet. Why don't you start the discussion?