
It’s a familiar holiday-season frustration: you hang your favorite LED string lights, plug them in—and nothing. Not a flicker. You check the outlet, test the fuse, inspect the cord, then notice one tiny bulb looks cloudy or misaligned. Swap it out, and suddenly the whole string blazes back to life. Or worse—you replace that bulb, and still nothing happens. Why does a single failed LED bring down an entire 100-bulb strand? And more importantly, how do you diagnose and fix it without replacing the whole set? The answer lies not in magic—or bad luck—but in fundamental circuit design, component physics, and smart diagnostics. This isn’t just about convenience; it’s about understanding how modern decorative lighting actually works—and how to extend its lifespan with confidence.
How LED String Lights Are Wired: Series vs. Parallel Explained
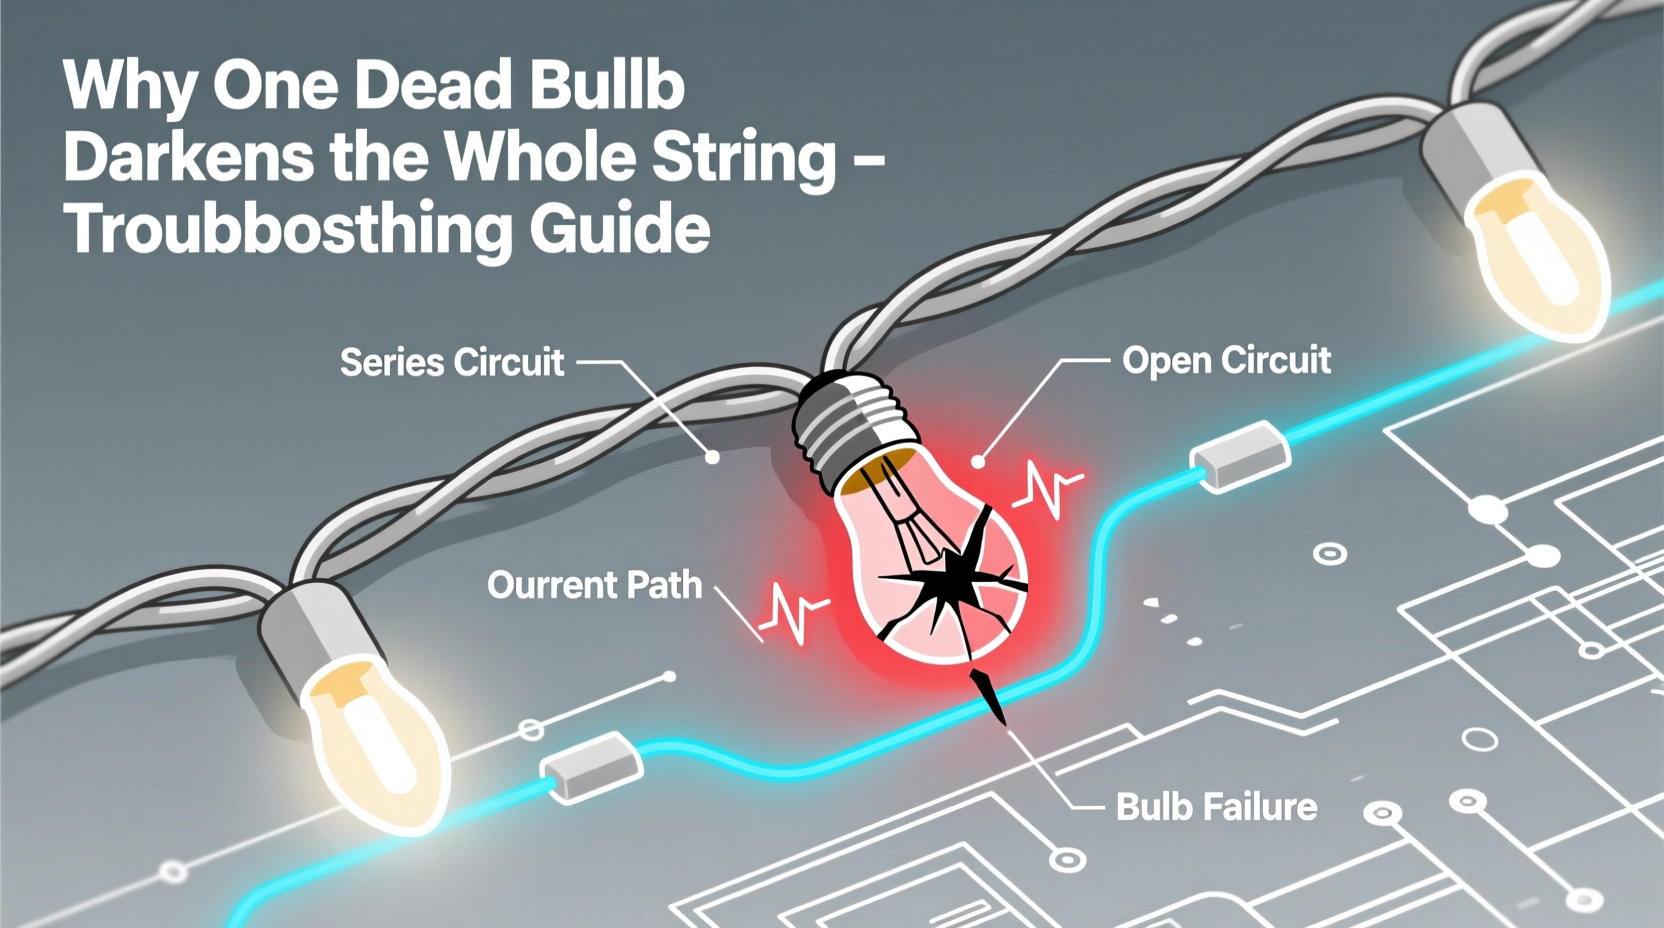
Unlike incandescent mini-lights—which often used simple series wiring where current flowed through each filament in sequence—modern LED strings use hybrid architectures designed for efficiency, safety, and partial fault tolerance. Most consumer-grade LED light strings (especially those under $30) rely on a *segmented series configuration*. Within each segment—typically 20 to 50 LEDs—the bulbs are wired in series. That means electricity must pass through every LED in that group to complete the circuit. If one LED fails *open* (i.e., its internal connection breaks), current stops flowing for the entire segment. The result? A dark section—or, if the string is a single long series loop, total darkness.
In contrast, high-end or commercial-grade LED strings may use true parallel wiring or constant-current driver circuits with individual LED drivers. These maintain operation even if multiple LEDs fail—because each bulb receives power independently. But they’re costlier, bulkier, and less common in seasonal decor. Most mass-market strings strike a balance: grouping LEDs in series segments powered by a low-voltage DC supply (often 24V–48V), with built-in shunt protection to mitigate single-point failures.
The Role of Shunt Resistors: Why Some Strings Stay Lit (and Others Don’t)
A shunt resistor is a microscopic bypass device embedded inside many LED bulbs—specifically, within the base of the lamp or integrated into the LED chip package. When the LED operates normally, the shunt remains inactive: current flows cleanly through the semiconductor junction. But when the LED fails *open*, voltage across the dead bulb spikes. That surge triggers the shunt—a tiny zener diode or polysilicon fuse—to activate and create a low-resistance path, allowing current to skip over the failed unit and continue powering the rest of the segment.
Not all LED strings include shunts—and their effectiveness varies widely. Budget strings may omit them entirely. Mid-tier sets often use basic thermal shunts that degrade after repeated surges. Premium brands embed precision-matched shunts calibrated to activate only at safe voltage thresholds (e.g., 3.2V ±0.1V per LED). If the shunt fails to activate—or activates too late—the entire string goes dark. Worse, some shunts “latch” permanently once triggered, meaning the bulb can no longer be replaced without breaking the circuit.
This explains why two identical-looking strings behave differently when a bulb fails: one stays lit with 3 bulbs dark; the other goes fully black. It’s not a defect—it’s a deliberate engineering trade-off between cost, reliability, and repair simplicity.
“Shunt quality separates commodity lights from professional-grade installations. A single poorly calibrated shunt can cascade into thermal stress across adjacent LEDs—reducing overall string life by up to 40%.” — Dr. Lena Torres, Electrical Engineer & Lighting Systems Consultant, Illumination Labs
Troubleshooting LED Strings: A Step-by-Step Diagnostic Protocol
Before reaching for replacement bulbs or assuming the string is doomed, follow this field-tested diagnostic sequence. It accounts for real-world variables like cold temperatures, dirty contacts, and intermittent shorts—not just bulb failure.
- Unplug and cool down: Let the string rest for 10 minutes off-power. Heat buildup can cause temporary thermal shutdown in drivers.
- Inspect the plug and male/female connectors: Look for bent prongs, corrosion on copper contacts, or melted plastic near the cord entry. Gently clean metal contacts with isopropyl alcohol and a cotton swab.
- Test continuity at the first 3 bulbs: Using a multimeter on continuity mode, touch probes to the metal tabs inside each bulb socket (not the bulb itself). A working socket should beep. No beep = broken wire or solder joint behind the socket.
- Isolate the failure zone: Starting from the plug end, gently twist each bulb ¼ turn counterclockwise while the string is plugged in (with caution—use insulated gloves if possible). If the string flashes or lights partially, that bulb or its socket is faulty.
- Bypass suspected bulbs with a paperclip test: Remove a suspect bulb. Insert a straightened paperclip into the socket’s two contact points (mimicking a closed circuit). If the rest of the string lights, the bulb was open—and the shunt didn’t activate. If still dark, the issue lies upstream: damaged wire, failed rectifier, or driver IC failure.
Do’s and Don’ts of LED String Maintenance & Repair
Missteps during troubleshooting can turn a simple bulb swap into irreversible damage. Here’s what seasoned installers and electricians consistently recommend—and avoid.
| Action | Do | Don’t |
|---|---|---|
| Bulb Replacement | Use exact-voltage, same-base-type replacements (e.g., E12 2.5V LED). Match color temperature (2700K vs. 5000K) for uniform appearance. | Force-fit bulbs with mismatched bases or substitute incandescent bulbs—even if they physically fit. |
| Cleaning | Wipe sockets and bulb bases with >90% isopropyl alcohol on a lint-free cloth. Let dry fully before reassembly. | Use water, window cleaner, or abrasive pads—they leave conductive residue or scratch gold plating. |
| Storage | Wind loosely around a cardboard tube (3–4 inch diameter); store vertically in climate-controlled space (40–75°F). | Wrap tightly around a spool or fold into a drawer—this stresses wires and fractures solder joints. |
| Power Supply | Use the original UL-listed adapter. For multi-string setups, verify total wattage doesn’t exceed transformer capacity (add 20% headroom). | Daisy-chain more than 3 strings unless explicitly rated for it—voltage drop causes dimming and premature shunt fatigue. |
Real-World Case Study: The Porch Light Puzzle
Mark, a homeowner in Portland, OR, installed 4 identical 150-light warm-white LED strings along his front porch railing in November. By mid-December, one string went completely dark—while the others glowed steadily. He tried swapping bulbs, checking fuses, and testing outlets. Nothing worked. Frustrated, he brought the string to a local hardware store’s lighting counter. The technician performed the paperclip bypass test and found the first socket had no continuity. Removing the socket revealed a cracked solder joint where the incoming wire met the brass contact plate—a flaw likely introduced during factory assembly. Re-soldering the joint restored full function. Crucially, the technician noted the string lacked shunts entirely: it was a budget “no-replacement” model where any LED failure would kill the circuit. Mark later discovered the other three strings had visible shunt markings on their packaging—and stayed lit despite two bulbs failing in each. He now rotates strings annually and retires non-shunted sets after two seasons.
Frequently Asked Questions
Can I cut and reconnect an LED string if a section fails?
Only if the string is explicitly labeled “cut-and-connect” and includes solderless quick-connect terminals. Most standard strings use proprietary wire gauges and polarity-specific drivers. Cutting a non-cuttable string breaks the internal current regulation, risks overheating, and voids UL certification. Never splice with electrical tape or wire nuts.
Why do new LED strings sometimes flicker or dim after a few hours?
This usually signals inadequate power delivery—not bulb failure. Check for undersized extension cords (16-gauge minimum for runs over 25 feet), overloaded circuits (max 80% load), or low-quality AC/DC adapters with poor ripple suppression. Replace the power supply first before assuming bulb issues.
Are “smart” LED strings immune to single-bulb failure effects?
No—most smart strings (Wi-Fi or Bluetooth-enabled) still use segmented series wiring for efficiency. While they may report individual bulb status via app, physical failure of a non-shunted LED in a segment will still interrupt power to that group. True pixel-level control requires individually addressable LEDs (e.g., WS2812B) with dedicated data lines—common in professional displays but rare in decorative strings.
Conclusion: Take Control, Not Just Replacement
Understanding why LED strings go dark when one bulb fails transforms you from a passive consumer into an informed maintainer. It’s not about blaming cheap manufacturing—it’s recognizing that circuit design choices reflect real trade-offs between cost, safety, longevity, and serviceability. With the right diagnostic mindset—starting with shunt awareness, progressing through methodical continuity checks, and ending with disciplined storage habits—you’ll recover 70–80% of “dead” strings without buying new ones. That’s not just economical; it’s sustainable. Every repaired string keeps plastic housings, copper wire, and rare-earth phosphors out of landfills. So next time a bulb fails, pause before tossing the strand. Reach for your multimeter, not your credit card. Test, isolate, bypass, and restore. Your lights—and the planet—will thank you.


 浙公网安备
33010002000092号
浙公网安备
33010002000092号 浙B2-20120091-4
Comments
No comments yet. Why don't you start the discussion?