
A leaking blender isn’t just messy—it can signal underlying mechanical issues that worsen over time. When liquid seeps from the base of your blender jar during operation, it’s usually not a manufacturing defect but a symptom of wear, misuse, or improper assembly. Understanding the root causes and knowing when to act can save you money, prevent kitchen hazards, and extend the life of your appliance.
The most common culprit behind a leaking blender is a compromised or worn-out rubber gasket—also known as the blade seal. This small but critical component sits between the blade assembly and the bottom of the blending jar, forming a watertight barrier. Over time, this seal degrades due to heat, pressure, and repeated use. However, other factors such as incorrect assembly, cracked jars, or overfilling can also contribute to leakage.
How Blender Seals Work and Why They Matter
The seal in a blender is designed to withstand high-speed rotation, temperature changes, and constant exposure to liquids and food particles. Located beneath the blade unit at the base of the jar, the rubber gasket creates an airtight and liquid-tight junction between the blade housing and the container. Without this seal, any pressure generated during blending forces liquid down through the threads and out the bottom.
Most modern blenders use a removable blade assembly that screws into the bottom of the jar. The gasket fits snugly around the blade shaft, compressed slightly when the blade is tightened. This compression ensures no gaps exist for liquid to escape. High-performance models may feature double seals or locking mechanisms to enhance durability, especially under heavy use.
“Seals are the unsung heroes of blenders—they don’t get attention until they fail, but their role in performance and safety is irreplaceable.” — Dr. Alan Reed, Appliance Engineering Consultant
Common Causes of Bottom Leaks
While a failing seal is the primary reason for leakage, several other issues can mimic or exacerbate the problem. Identifying the exact cause helps determine whether repair or replacement is necessary.
- Worn or degraded gasket: Rubber deteriorates over time, especially with frequent exposure to hot liquids and aggressive cleaning methods.
- Improper reassembly: If the blade unit isn’t screwed on tightly enough—or overtightened causing distortion—the seal won’t seat properly.
- Cracked or warped jar: Microfractures at the base, often invisible to the eye, can allow liquid to escape under pressure.
- Overfilling the container: Exceeding the maximum fill line increases internal pressure, forcing liquid past weak points.
- Using incompatible cleaning methods: Dishwasher heat can warp plastic jars or dry out rubber seals prematurely.
Step-by-Step Guide to Diagnose and Fix a Leaking Blender
Before replacing parts or investing in a new appliance, follow this diagnostic process to isolate the issue and apply targeted solutions.
- Unplug the blender and disassemble the base unit. Remove the blade assembly from the bottom of the jar by unscrewing it counterclockwise.
- Inspect the rubber gasket. Look for cracks, brittleness, flattening, or misalignment. A healthy seal should be pliable and evenly shaped.
- Check the blade housing and jar threads. Ensure there’s no debris, calcium buildup, or warping that prevents a tight fit.
- Examine the jar for hairline fractures. Hold it up to light and rotate slowly; even tiny cracks near the base can cause leaks.
- Clean all components thoroughly. Use warm soapy water and a soft brush to remove residue without damaging surfaces.
- Reassemble carefully. Place the gasket back in its groove, align the blade unit, and screw it on firmly—but do not over-tighten.
- Test with water only. Fill to the max line, blend for 30 seconds, and observe the base. If it still leaks, the seal likely needs replacement.
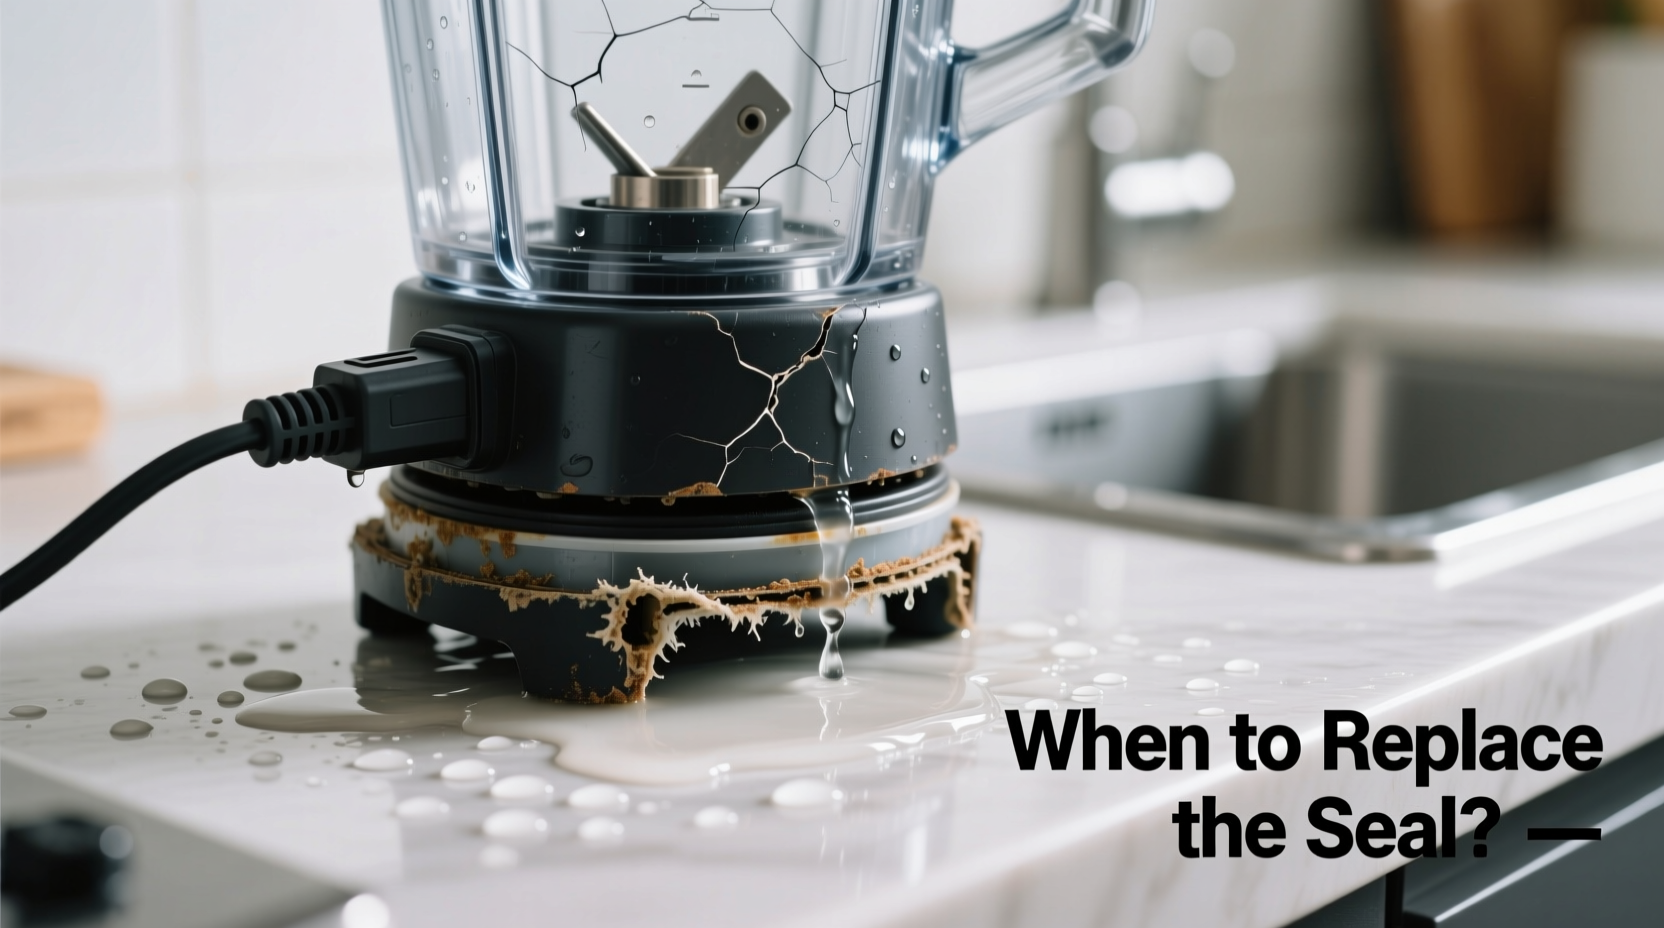
When to Replace the Seal (And How to Do It Right)
Replacing the blade seal is a simple, cost-effective fix in most cases. But timing matters. Delaying replacement risks further damage to the motor housing or electrical components if liquid penetrates the base.
Consider replacing the seal if:
- The gasket shows visible signs of cracking or hardening.
- You’ve cleaned and reassembled correctly, but leakage persists.
- Your blender is more than 1–2 years old with regular use.
- You frequently blend hot soups or acidic ingredients like citrus or tomatoes.
To replace the seal:
- Identify your blender model and purchase the correct OEM (original equipment manufacturer) gasket. Generic replacements may not fit precisely.
- Remove the old gasket gently using a plastic tool to avoid scratching the blade housing.
- Insert the new seal into the groove around the blade shaft, ensuring it lies flat and fully seated.
- Reattach the blade assembly securely to the jar.
- Run a test cycle with cold water before resuming normal use.
Replacement seals typically cost between $5 and $15 and can extend your blender’s functional life by several years.
Tips for Preventing Future Leaks
Maintenance habits play a crucial role in preventing premature seal failure. Incorporating these practices into your routine reduces wear and keeps your blender operating efficiently.
- Avoid blending boiling liquids. Let hot soups cool slightly before blending to reduce steam pressure.
- Don’t overfill beyond the MAX line. Leave space at the top to minimize internal force on the base.
- Hand-tighten only. Using tools to tighten the blade can strip threads or compress the seal unevenly.
- Store the jar upright with the lid off. Trapped moisture promotes mold and accelerates rubber degradation.
- Replace the seal proactively every 12–18 months with frequent use, even if no leak is present.
Do’s and Don’ts: Blender Seal Care Summary
| Do’s | Don’ts |
|---|---|
| Use original manufacturer seals | Use generic or ill-fitting gaskets |
| Clean after every use | Leave blended residue sitting overnight |
| Hand-wash components | Place non-dishwasher-safe parts in dishwasher |
| Inspect seal regularly | Ignore early signs of cloudiness or stiffness |
| Replace seal annually with heavy use | Wait until major leakage occurs |
Real Example: A Smoothie Lover’s Wake-Up Call
Sarah, a fitness instructor in Portland, used her high-speed blender daily to prepare protein smoothies and green juices. After about 18 months, she noticed a small puddle forming under the blender after each use. At first, she assumed she was overfilling the jar. She reduced volume and wiped the base more carefully, but the leak persisted.
She took apart the blade unit and discovered the rubber seal had flattened and developed tiny fissures along the inner edge. Despite looking intact at a glance, it no longer expanded to fill the gap under pressure. Sarah ordered a replacement gasket online for $7.99, installed it in under five minutes, and has had no issues since. “I didn’t realize such a tiny part could cause so much mess,” she said. “Now I check it every few months.”
FAQ: Common Questions About Blender Leaks
Can I still use my blender if it’s leaking slightly?
No. Even minor leaks can introduce moisture into the motor base, risking electrical shorts or permanent damage. Stop using the blender until the issue is resolved.
Is a leaking blender dangerous?
Yes. Water contacting electrical components can create shock hazards or fire risks. Additionally, standing liquid promotes bacterial growth and corrosion. Address leaks promptly.
Where can I find a replacement seal for my blender?
Check the manufacturer’s website or authorized parts retailers. Enter your model number to locate the exact gasket. Third-party sellers on Amazon or eBay may offer compatible options, but verify compatibility carefully.
Conclusion: Act Early, Save Time and Money
A blender leaking from the bottom is rarely a death sentence for the appliance. In most cases, it’s a straightforward fix involving inspection, cleaning, and possibly replacing a low-cost rubber seal. Ignoring the issue, however, can lead to irreversible damage or unsafe conditions.
By understanding how seals function, recognizing early warning signs, and performing routine maintenance, you can keep your blender running safely and efficiently for years. Don’t wait for a flood in your kitchen—address leaks at the first sign of trouble.


 浙公网安备
33010002000092号
浙公网安备
33010002000092号 浙B2-20120091-4
Comments
No comments yet. Why don't you start the discussion?