
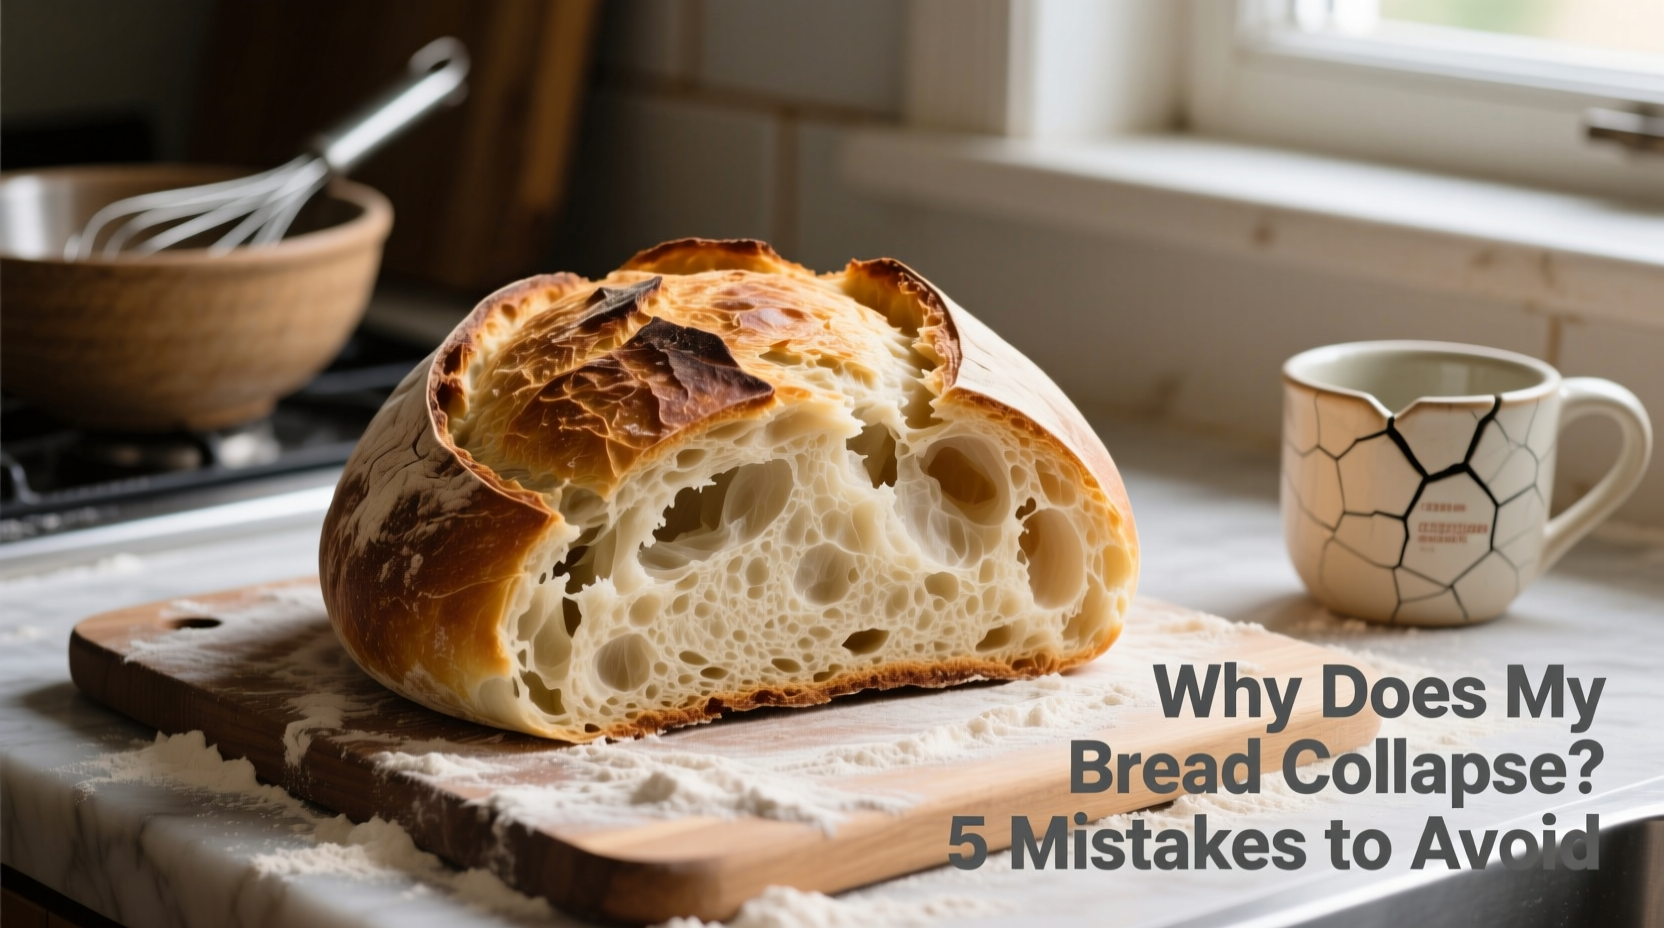
Baking bread is both a science and an art. Even when you follow a recipe to the letter, your loaf might still collapse after rising—either during the final proof or just as it comes out of the oven. This frustrating outcome can leave even experienced bakers puzzled. The truth is, several subtle but critical factors influence how well your bread holds its structure through fermentation and baking. From overproofing to improper gluten development, understanding these pitfalls is key to achieving that dreamy, airy crumb with a golden, resilient crust.
This guide dives deep into the most common reasons bread collapses post-rise, backed by practical insights and expert observations. Whether you're new to sourdough or refining your sandwich loaf technique, avoiding these mistakes will help you bake consistently beautiful bread.
Overproofing: The Silent Loaf Killer
One of the leading causes of collapsed bread is overproofing—the stage where dough ferments too long before baking. When yeast consumes too much sugar, it produces excess gas, stretching the gluten network beyond its capacity. Eventually, the structure weakens and can't support the loaf during oven spring, causing it to deflate.
Overproofed dough feels fragile and puffy. A simple test known as the \"poke test\" helps determine readiness: gently press a fingertip about half an inch into the dough. If the indentation springs back slowly and partially, it’s ready. If it doesn’t spring back at all, it's overproofed. If it springs back immediately, it needs more time.
Temperature plays a crucial role. Warm kitchens accelerate proofing, sometimes cutting ideal times in half. Using a temperature-controlled proofing box or placing dough in the refrigerator for a retarded rise can prevent accidental overproofing.
Weak Gluten Development: Structure Starts Early
Gluten forms when flour and water combine and are agitated—typically through kneading or folding. This network of proteins gives bread its elasticity and strength, allowing it to trap gas produced by yeast. Without sufficient gluten development, the dough lacks the structural integrity to hold its shape during expansion.
Under-kneaded dough tends to be slack, sticky, and unable to retain gas. Conversely, over-kneading can break down the gluten matrix, especially in high-hydration doughs. The solution lies in balanced mixing and proper handling techniques.
For artisan loaves, many bakers use autolyse—a rest period after combining flour and water before adding salt and yeast. This allows gluten strands to form naturally, reducing mechanical kneading time. After bulk fermentation, a series of stretch-and-folds further strengthens the dough without damaging its structure.
“Gluten isn’t just about strength—it’s about balance. A well-developed dough should feel taut yet supple, like a filled water balloon.” — Daniel Leader, author of *Local Breads* and founder of Bread Alone Bakery
Oven Spring Failure: Why Your Loaf Doesn’t Rise in the Oven
Oven spring refers to the rapid rise bread undergoes in the first 10–15 minutes of baking, driven by CO₂ expansion, steam creation, and yeast activity before heat kills the microbes. If this phase fails, the loaf may appear dense or collapse shortly after entering the oven.
Several factors disrupt oven spring:
- Inadequate preheating: An underheated oven won’t generate enough initial heat to trigger rapid gas expansion.
- Lack of steam: Steam keeps the crust flexible early in baking, allowing the loaf to expand fully. Without it, the surface hardens too soon.
- Poor scoring: Shallow or improperly angled cuts restrict expansion, forcing pressure to escape unpredictably—sometimes causing blowouts or collapse.
To maximize oven spring, preheat your baking vessel (Dutch oven, stone, or steel) for at least 45 minutes. Introduce steam by placing a pan of boiling water on the oven floor or spritzing the dough before closing the door. Score with a sharp blade (lame or razor) at a 30–45° angle, about ½ inch deep, depending on hydration.
Common Baking Mistakes That Cause Collapse
Beyond technique, small oversights can sabotage your bake. Here are the most frequent errors—and how to fix them:
| Mistake | Why It Causes Collapse | Solution |
|---|---|---|
| Opening the oven too early | Heat loss destabilizes rising structure; steam escapes prematurely | Wait at least 20 minutes before checking |
| Using old or incorrect yeast | Weak fermentation leads to poor gas production and unstable rise | Check expiration dates; proof active dry yeast in warm water |
| Incorrect flour choice | Low-protein flours (e.g., cake flour) lack gluten strength | Use bread flour or high-protein all-purpose flour (11.5%+ protein) |
| Underbaking | Internal structure hasn’t set; moisture remains too high | Bake until internal temp reaches 190–210°F (88–99°C), depending on type |
| Rough handling after proofing | Degassing delicate bubbles just before baking | Transfer gently using a peel or parchment; minimize jostling |
A Real Example: Sarah’s Sourdough Struggle
Sarah, a home baker in Portland, had been making sourdough weekly for months. Her starter was bubbly, her ingredients precise—but every third loaf would rise beautifully in the banneton, then flatten in the oven. Frustrated, she recorded her process and noticed a pattern: on warmer days, she wasn’t adjusting proofing time.
She began refrigerating her shaped loaves overnight, which slowed fermentation and strengthened flavor. She also started preheating her Dutch oven for a full hour and scoring deeper slashes at a sharper angle. The result? Consistent oven spring and no more collapses. “I realized I was trusting the clock instead of the dough,” she said. “Once I started watching texture and temperature, everything changed.”
Sarah’s experience highlights a universal truth: successful bread baking requires adaptability. Recipes provide guidance, but environmental variables demand real-time judgment.
Step-by-Step Guide to Prevent Collapse
Follow this timeline to minimize risks and produce stable, well-risen loaves:
- Day 1 – Starter Preparation (if using sourdough): Feed your starter 8–12 hours before mixing dough. It should be active and double in size.
- Mix & Autolyse: Combine flour and water; rest for 30–60 minutes. Add salt and leavening agent afterward.
- Bulk Fermentation: Perform 3–4 sets of stretch-and-folds over 2–3 hours. Watch for volume increase (about 30–50%) and bubbly texture.
- Shape Gently: Pre-shape, rest 20–30 minutes, then final shape. Avoid degassing; create surface tension.
- Final Proof: Use the poke test. For enriched doughs, proof until 80–90% risen. For sourdough, consider cold proofing overnight.
- Preheat Thoroughly: Heat oven and baking vessel (Dutch oven, stone) for 45–60 minutes at 450–475°F (230–245°C).
- Score & Bake: Transfer carefully, score decisively, and add steam. Bake covered for 20 minutes, then uncovered for 20–25 minutes until deeply browned.
- Cool Completely: Let bread rest on a wire rack for at least 1–2 hours. Cutting too soon releases trapped steam and can make the crumb gummy or cause collapse.
“The moment you slice into hot bread, you stop the carryover cooking and release moisture essential for structure.” — Ken Forkish, baker and author of *Flour Water Salt Yeast*
Frequently Asked Questions
Can I rescue a collapsed loaf?
Sometimes. If the bread collapses due to underbaking, return it to the oven for 5–10 minutes. However, if structural failure occurred from overproofing or weak gluten, the texture will likely remain dense. While not ideal for slicing, collapsed loaves work well for croutons, breadcrumbs, or strata.
Why does my bread rise in the oven but fall right after taking it out?
This often points to underbaking. The internal crumb hasn’t set firmly enough to support itself once external heat is removed. Always check internal temperature: soft-centered breads like sandwich loaves should reach 190°F (88°C), while crusty sourdoughs need 205–210°F (96–99°C).
Does humidity affect bread proofing?
Yes. High humidity slows evaporation and can extend proofing times slightly, but more importantly, it affects flour absorption. In humid climates, reduce water in your recipe by 5–10% to maintain proper dough consistency. Dry environments may require slightly more hydration.
Essential Checklist Before Baking
Run through this checklist to catch issues before they ruin your bake:
- ✅ Is my starter/yeast active and fresh?
- ✅ Has the dough developed good gluten (windowpane test passed)?
- ✅ Did I perform the poke test? Is the dough properly proofed—not under or over?
- ✅ Is my oven fully preheated—with baking vessel included?
- ✅ Do I have a way to introduce steam?
- ✅ Are my scoring tools sharp and clean?
- ✅ Have I allowed enough cooling time before slicing?
Conclusion: Master the Details, Elevate Your Bread
Bread that collapses after rising isn’t a lost cause—it’s feedback. Each failed loaf offers clues about timing, temperature, technique, or ingredient balance. By paying attention to gluten development, proofing conditions, and baking fundamentals, you transform setbacks into progress.
The journey to perfect bread isn’t about perfection on the first try. It’s about learning to read the dough, respect the process, and adjust with confidence. Now that you know the most common mistakes—and how to avoid them—you’re equipped to bake loaves that rise proudly and stay strong.


 浙公网安备
33010002000092号
浙公网安备
33010002000092号 浙B2-20120091-4
Comments
No comments yet. Why don't you start the discussion?