
Baking bread is both a science and an art. When your loaf rises beautifully during proofing only to deflate dramatically in the oven, it’s not just disappointing—it’s puzzling. One of the most common yet misunderstood culprits behind collapsed bread is improper yeast management. Too much or too little yeast, combined with imbalanced fermentation times or temperature, can destabilize gluten structure and gas retention, leading to structural failure mid-bake. Understanding how yeast ratios influence dough development—and how to correct them—is essential for achieving reliable results.
The Role of Yeast in Bread Structure
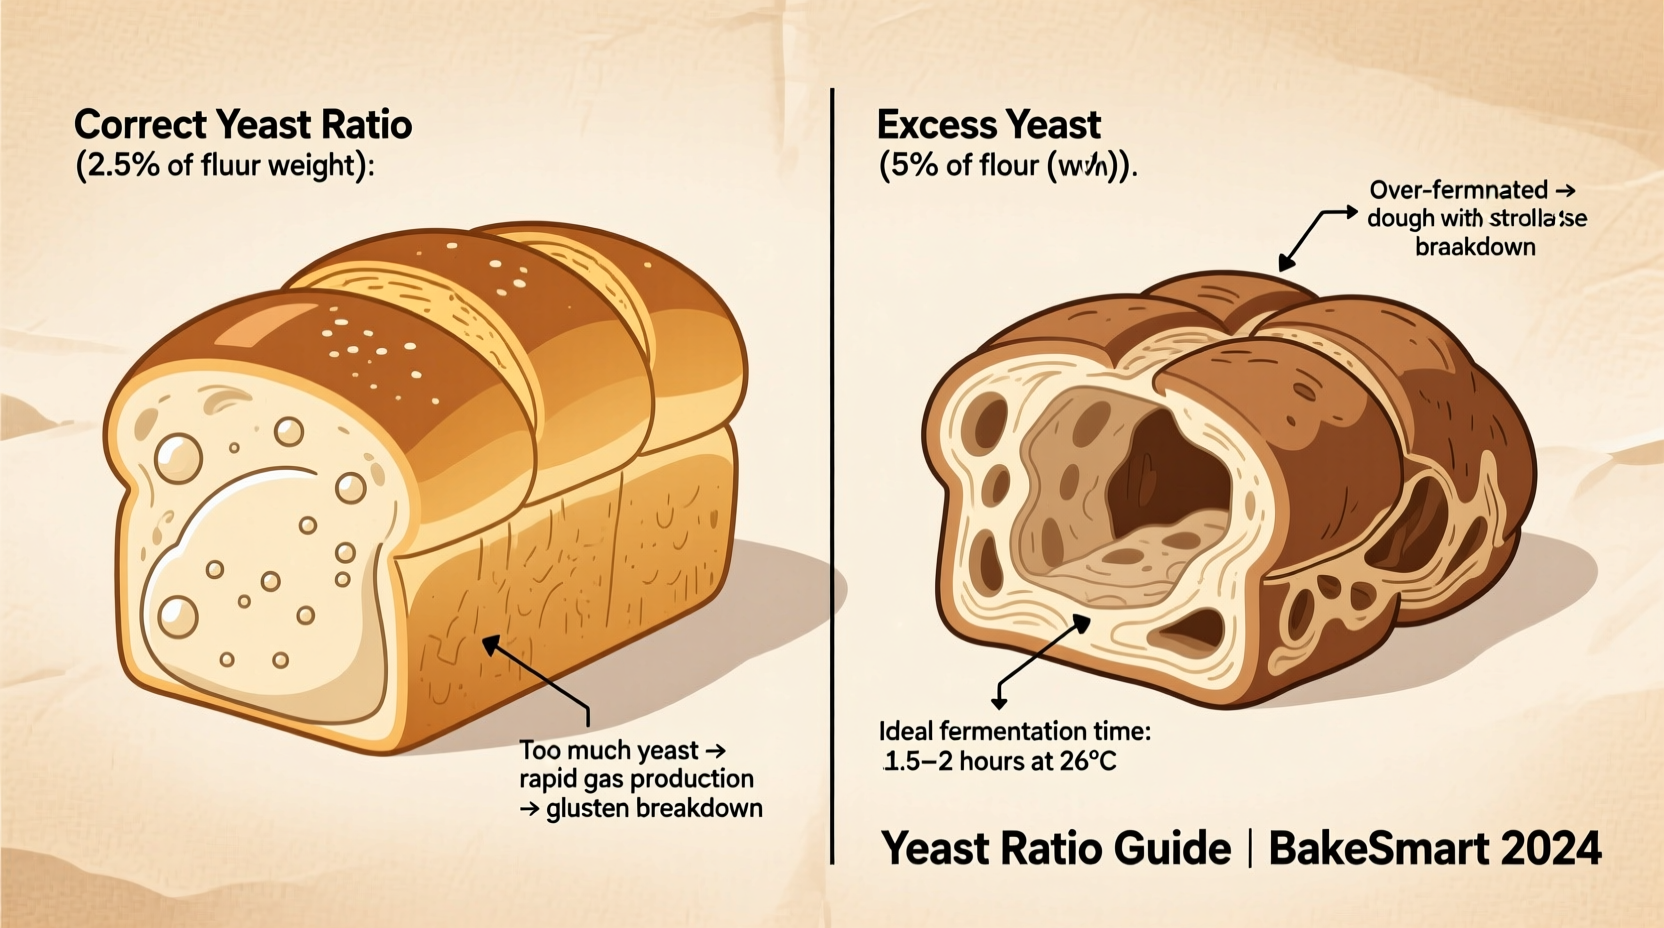
Yeast is responsible for leavening: converting sugars into carbon dioxide and alcohol through fermentation. These gas bubbles become trapped in the elastic network of gluten, causing the dough to expand. However, this process must be carefully balanced. Excess yeast accelerates fermentation, producing too much gas too quickly. While this may seem beneficial, it often leads to overproofed, fragile dough that lacks the tensile strength to hold its shape when exposed to oven heat.
Conversely, insufficient yeast results in underdeveloped dough with poor volume. The challenge lies in finding the sweet spot where yeast activity supports steady, controlled rise without compromising structural integrity.
“Yeast isn’t just about making dough rise—it’s about timing, balance, and managing microbial activity within the dough matrix.” — Dr. Laura Chen, Food Scientist & Fermentation Specialist
Common Causes of Oven Collapse Linked to Yeast Ratios
Oven spring—the final burst of expansion when bread hits the hot oven—depends on a delicate equilibrium between gas production, gluten strength, and starch gelatinization. Disruptions in any of these areas can cause collapse. Here are the primary yeast-related causes:
- Overactive fermentation from excessive yeast: High yeast levels speed up CO₂ production, weakening gluten over time as acids accumulate.
- Underdeveloped gluten due to rushed bulk fermentation: When yeast acts too fast, bakers may skip proper windowpane development, leaving the structure vulnerable.
- Inconsistent proofing environments: Warm kitchens amplify yeast activity, turning standard recipes into overproofed disasters if not adjusted.
- Premature oven entry after cold ferment: Dough pulled straight from the fridge without adequate warm-up can experience thermal shock, disrupting gas pockets.
Optimal Yeast Ratios by Bread Type
There is no universal yeast percentage. Different bread styles require different fermentation timelines and yeast loads. Below is a reference table based on baker’s percentages (yeast weight relative to flour weight):
| Bread Type | Yeast (Instant, % of flour) | Fermentation Time | Notes |
|---|---|---|---|
| Standard White Loaf | 1.0–1.5% | 1.5–2 hours (room temp) | Ideal for beginners; allows strong gluten development |
| Whole Wheat Bread | 1.5–2.0% | 1.5–2 hours | Higher absorption and weaker gluten need slightly more yeast |
| Sourdough (with commercial yeast boost) | 0.2–0.5% | 3–5 hours or overnight | Low yeast preserves acidity and complexity |
| French Baguette | 0.75–1.0% | 3–4 hours (cool room) | Slow rise enhances flavor and crust formation |
| Rolls or Dinner Buns | 2.0–2.5% | 1–1.5 hours | Faster turnaround requires higher yeast but risks collapse if overdone |
For example, in a 500g flour recipe:
- Standard loaf: 5g to 7.5g instant yeast
- Baguette: 3.75g to 5g
- Dinner rolls: 10g to 12.5g
Using too much yeast—even 1 extra gram per 500g flour—can reduce fermentation control and increase risk of collapse, especially in enriched doughs containing butter, eggs, or sugar.
Step-by-Step Guide to Troubleshooting Yeast-Related Collapse
If your bread consistently collapses, follow this diagnostic protocol to identify and correct yeast imbalance issues:
- Review your yeast measurement method. Are you using a digital scale? Measuring spoons vary widely. Switch to grams for accuracy.
- Assess fermentation timeline. Did your dough double in 45 minutes at room temperature? That suggests excess yeast or a hot environment.
- Check dough texture pre-oven. Overproofed dough feels fragile, puffs easily when touched, and doesn’t spring back. It may have large, irregular air pockets near the surface.
- Evaluate oven spring. If the loaf initially rises then sinks, the internal structure couldn’t withstand steam expansion. This often stems from weakened gluten due to overfermentation.
- Adjust yeast downward by 25%. For your next bake, reduce yeast and extend bulk fermentation time. Cooler ambient temperatures help slow fermentation.
- Perform a poke test before baking. Gently press the dough: if the indentation fills slowly, it’s ready. If it stays indented, it’s overproofed.
- Bake immediately after scoring. Delaying entry into the oven gives yeast a final surge, potentially pushing the dough past its structural limit.
Real-World Example: The Weekend Baker’s Mistake
Sarah, an enthusiastic home baker, followed a popular online recipe for rustic sourdough. She used 10g of instant yeast with 500g of flour—intending to speed up the process. Her kitchen was warm (27°C / 80°F), so the dough doubled in 60 minutes. Excited, she shaped it and let it proof again for another 45 minutes. In the oven, the loaf surged upward, cracked beautifully, then deflated halfway through baking, leaving a dense, sunken center.
The issue wasn’t her technique—it was her yeast ratio. At 2% yeast, the dough fermented far too quickly. The rapid acid and gas production degraded gluten before it could fully organize. By reducing yeast to 1% (5g) and moving bulk fermentation to the fridge overnight, Sarah achieved a stable, well-structured loaf with excellent oven spring and no collapse.
Do’s and Don’ts: Managing Yeast for Structural Integrity
| Do’s | Don’ts |
|---|---|
| Use a scale to measure yeast in grams | Measure yeast by heaping teaspoons |
| Adjust yeast based on ambient temperature | Use the same yeast amount year-round regardless of season |
| Retard dough in the fridge for longer fermentation | Rush fermentation with excess yeast |
| Look for signs of proper proofing (slow springback, airy but resilient texture) | Assume visual doubling equals readiness |
| Combine small amounts of commercial yeast with preferments for balance | Double yeast to compensate for old or weak starter |
Comprehensive Checklist: Prevent Bread Collapse from Yeast Imbalance
Before every bake, run through this checklist to minimize the risk of oven collapse:
- ✅ Weigh all ingredients, including yeast, using a calibrated scale
- ✅ Confirm room temperature—adjust yeast down by 0.25% if above 24°C (75°F)
- ✅ Perform a windowpane test after bulk fermentation to verify gluten development
- ✅ Limit bulk fermentation to no more than 2.5x volume increase
- ✅ Use retarded proofing (overnight in fridge) for better control and flavor
- ✅ Conduct the fingertip poke test before baking
- ✅ Preheat oven thoroughly and use steam for first 15 minutes
- ✅ Avoid opening oven door during initial bake phase
- ✅ Cool bread completely on a wire rack before slicing
Frequently Asked Questions
Can I fix overproofed dough?
Yes, but only partially. Gently degas the dough, reshape, and allow a second, shorter proof. This won’t fully restore gluten strength, but it can salvage the bake. Better prevention: lower yeast and monitor time/temperature closely.
Does using less yeast always prevent collapse?
Not necessarily. Too little yeast leads to underproofed, dense bread that lacks oven spring. The goal is balance—enough yeast for lift, but not so much that fermentation undermines structure. Adjust gradually and keep records of each batch.
Is active dry yeast different from instant in terms of ratios?
Yes. Active dry yeast is slightly less potent than instant. Use about 25% more active dry yeast by weight when substituting. For example, replace 4g instant with 5g active dry. Always hydrate active dry in warm water first unless the recipe states otherwise.
Final Thoughts: Mastering Balance for Reliable Results
Bread collapse isn't random—it's a signal. When your loaf falls in the oven, it’s telling you something went wrong in the fermentation equation. More often than not, the root cause traces back to yeast quantity interacting with time and temperature. Precision in measurement, patience in fermentation, and awareness of environmental conditions transform unpredictable outcomes into consistent success.
Great bread doesn’t come from rushing the rise. It comes from respecting the biology of dough. By fine-tuning yeast ratios and aligning them with thoughtful handling, you gain control over one of baking’s most elusive variables. The result? Loaves that rise confidently, crack elegantly, and hold their shape from oven to cooling rack.


 浙公网安备
33010002000092号
浙公网安备
33010002000092号 浙B2-20120091-4
Comments
No comments yet. Why don't you start the discussion?