
Baking bread in a machine offers convenience, consistency, and the comforting aroma of fresh-baked loaves—until something goes wrong. One of the most frustrating issues home bakers face is a loaf that rises beautifully during the bake cycle only to collapse in the center or emerge dense, gummy, or misshapen. These texture problems aren’t random; they stem from specific imbalances in ingredients, machine settings, or environmental factors. Understanding the root causes and applying targeted corrections can transform your bread machine results from disappointing to bakery-quality.
The Science Behind Bread Structure and Collapse
Bread relies on a delicate balance between gluten development, yeast activity, moisture, and heat. In a bread machine, this process is automated, but it’s still subject to the same biochemical principles as traditional baking. When a loaf collapses, it typically means the internal structure couldn’t support the expansion created by gas during fermentation and baking.
Gluten forms the elastic network that traps carbon dioxide produced by yeast. If gluten is underdeveloped or overstretched, the dough lacks structural integrity. Similarly, if the oven spring (the final burst of rise during early baking) happens too quickly or the crust sets too late, the loaf may rise too fast and then fall as steam escapes and the crumb softens.
Temperature plays a critical role. Most bread machines use a heating element at the base, which can create uneven baking—hotter on the bottom, cooler on top. This imbalance may delay crust formation, allowing the loaf to over-expand before setting, leading to collapse.
Common Causes of Collapsing Loaves and Texture Problems
Several interrelated factors contribute to poor bread machine results. Identifying which one applies to your situation is key to fixing the issue.
1. Incorrect Ingredient Ratios
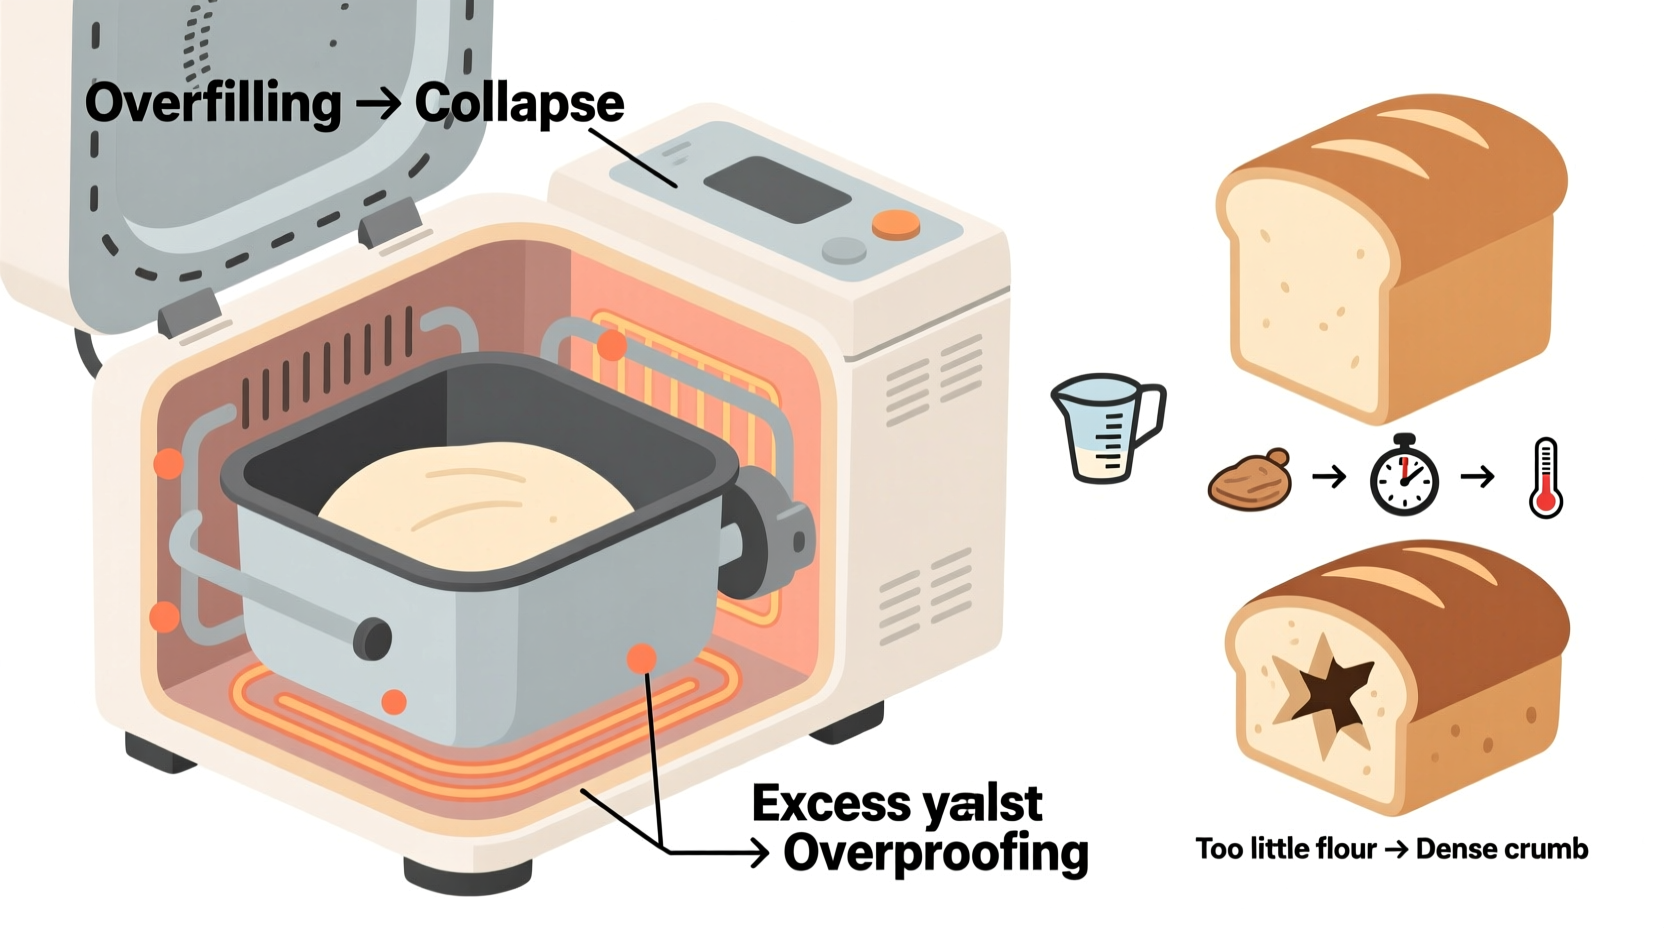
Too much liquid weakens gluten and creates a sticky, fragile dough. Too little water leads to a dry, dense crumb. Excess sugar or fat can inhibit gluten development and over-feed yeast, causing rapid fermentation and eventual collapse.
2. Yeast Mismanagement
Using expired yeast, mixing it directly with salt, or adding liquids that are too hot will kill or weaken yeast. Conversely, using too much yeast causes overly rapid rising, which can lead to large air pockets and structural failure.
3. Poor Gluten Development
Inadequate kneading time or low-protein flour prevents proper gluten formation. Some bread machines have shorter knead cycles, especially in “rapid” modes, which may not develop enough strength in the dough.
4. Improper Cycle Selection
Choosing the wrong setting—such as using a light crust cycle for a heavy whole grain loaf—can result in underbaking or premature cooling. Rapid cycles often skip the second rise, increasing the risk of collapse.
5. Environmental Factors
High humidity increases moisture absorption in flour, throwing off hydration ratios. Cold kitchens slow fermentation, while warm environments accelerate it unpredictably.
“Many bread machine failures trace back to ingredient timing and hydration. The machine can’t compensate for human error in measuring.” — Dr. Linda Chen, Food Scientist & Baking Technologist
Troubleshooting Guide: Step-by-Step Fixes
Follow this structured approach to diagnose and correct common bread machine issues.
- Verify ingredient freshness: Check expiration dates on yeast, baking powder (if used), and flour. Old ingredients lose potency and alter dough behavior.
- Weigh ingredients: Use a kitchen scale for accuracy. Volume measurements (cups) vary significantly based on scooping method.
- Check liquid temperature: Warm liquids should be between 75°F and 80°F (24–27°C). Too hot kills yeast; too cold slows activation.
- Layer ingredients correctly: Follow your machine’s manual—typically, liquids first, then flour, with yeast placed in a corner away from moisture until mixing begins.
- Select the right cycle: Use the “basic” or “regular” cycle for standard white loaves. Choose “whole wheat” for denser flours, and avoid rapid cycles for best texture.
- Monitor dough during kneading: After 10 minutes of kneading, open the lid and check consistency. The dough should form a smooth ball that pulls away from the sides. If sticky, add flour 1 tsp at a time. If dry, add water similarly.
- Cool properly: Remove the loaf immediately after baking and place it on a wire rack. Trapped steam inside the pan softens the crust and can cause collapse.
Do’s and Don’ts: Quick Reference Table
| Do’s | Don’ts |
|---|---|
| Use bread flour for better gluten development | Substitute all-purpose flour without adjusting liquid |
| Measure liquids and flour precisely | Scoop flour directly from the bag (packs too much) |
| Store yeast in the freezer for longevity | Mix yeast directly with salt or sugar |
| Allow full cooling time before slicing | Leave the loaf in the machine after baking |
| Use filtered water if tap water is chlorinated | Use very hot water with instant yeast |
Real Example: From Failure to Perfect Loaf
Sarah, a home baker in Portland, struggled for months with her bread machine producing sunken, rubbery loaves. She followed recipes exactly but saw no improvement. After reviewing her process, she realized she was using a rapid 1-hour cycle for a whole wheat recipe—which requires longer fermentation to develop flavor and structure. She also discovered she had been scooping flour directly from the bag, resulting in up to 20% more flour than intended.
She switched to weighing ingredients, began using the “whole grain” cycle, and started checking dough consistency during the knead phase. Within two weeks, her loaves were rising evenly, had an open crumb, and held their shape perfectly. Her biggest takeaway? “The machine does the work, but I had to give it the right inputs.”
Expert Tips for Consistent Texture
Texture issues like gumminess, crumbliness, or toughness are often symptoms of deeper process flaws. Here’s how to address them:
- Gummy crumb: Usually caused by underbaking or slicing too soon. Ensure the internal temperature reaches at least 190°F (88°C). Use an instant-read thermometer to verify.
- Dense or heavy loaf: Indicates poor rise. Check yeast viability, avoid over-flouring, and confirm the machine’s kneading paddle is turning freely.
- Crumbling texture: Often due to insufficient moisture or too much whole grain without added vital wheat gluten. Try increasing liquid by 1–2 tablespoons or adding 1 tsp of vital wheat gluten per cup of whole grain flour.
- Lopsided or lopsided rise: May point to a worn kneading paddle or uneven heating. Clean the paddle shaft regularly and consider replacing it if worn.
Essential Checklist for Flawless Bread Machine Results
Keep this checklist handy each time you bake:
- ✅ Fresh yeast stored properly (freezer for long-term)
- ✅ Accurate measurement: use a scale for flour and liquids
- ✅ Correct ingredient order per manufacturer instructions
- ✅ Dough checked during knead cycle (adjust hydration if needed)
- ✅ Appropriate cycle selected (not rapid for dense or whole grain loaves)
- ✅ Machine lid closed securely during operation
- ✅ Loaf removed immediately after baking and cooled on a rack
- ✅ Blade removed promptly to prevent rust and ensure clean slicing
Frequently Asked Questions
Why does my loaf rise and then sink in the middle?
This usually happens when the dough expands too quickly—often due to excess yeast, too much sugar, or high room temperature—causing the structure to overextend. When the oven heat sets in, the weakened walls collapse. It can also occur if the loaf isn’t baked long enough to set the crumb fully.
Can I open the bread machine during the cycle to check the dough?
You can briefly open it during the first 10–15 minutes (kneading phase) to inspect or adjust dough consistency. Avoid opening during rising or baking, as heat loss disrupts the process and may cause collapse.
Is it normal for the bread to stick to the pan?
No. Sticking usually means the non-stick coating is degrading or the loaf wasn’t removed promptly. Cool the bread in the pan for only 5 minutes max, then transfer to a rack. If sticking persists, consider replacing the pan or lightly greasing it (even if non-stick).
Final Thoughts: Mastering Your Machine
Your bread machine is only as good as the inputs you give it. While it automates mixing, rising, and baking, it cannot correct imprecise measurements, expired ingredients, or inappropriate settings. By treating the machine as a tool rather than a magic box, you gain control over outcomes. Start with reliable recipes, measure accurately, and pay attention to dough behavior during the first cycle. Small adjustments yield dramatic improvements.
Texture issues and collapsed loaves are not signs of failure—they’re feedback. Each imperfect loaf teaches you something about hydration, timing, and balance. With consistent practice and attention to detail, you’ll produce bread that rivals artisanal bakeries, all from your countertop.


 浙公网安备
33010002000092号
浙公网安备
33010002000092号 浙B2-20120091-4
Comments
No comments yet. Why don't you start the discussion?