
Candles are more than just a source of light—they evoke warmth, comfort, and ambiance. But nothing is more frustrating than lighting a new candle only to find it burning straight down the center, leaving thick walls of unused wax around the edges. This phenomenon, known as \"candle tunneling,\" not only shortens the candle’s lifespan but also diminishes its fragrance throw and aesthetic appeal. The good news? Tunneling is preventable. With proper wick trimming and smart burn techniques, you can enjoy an even, clean, and long-lasting burn every time.
What Causes Candle Tunneling?
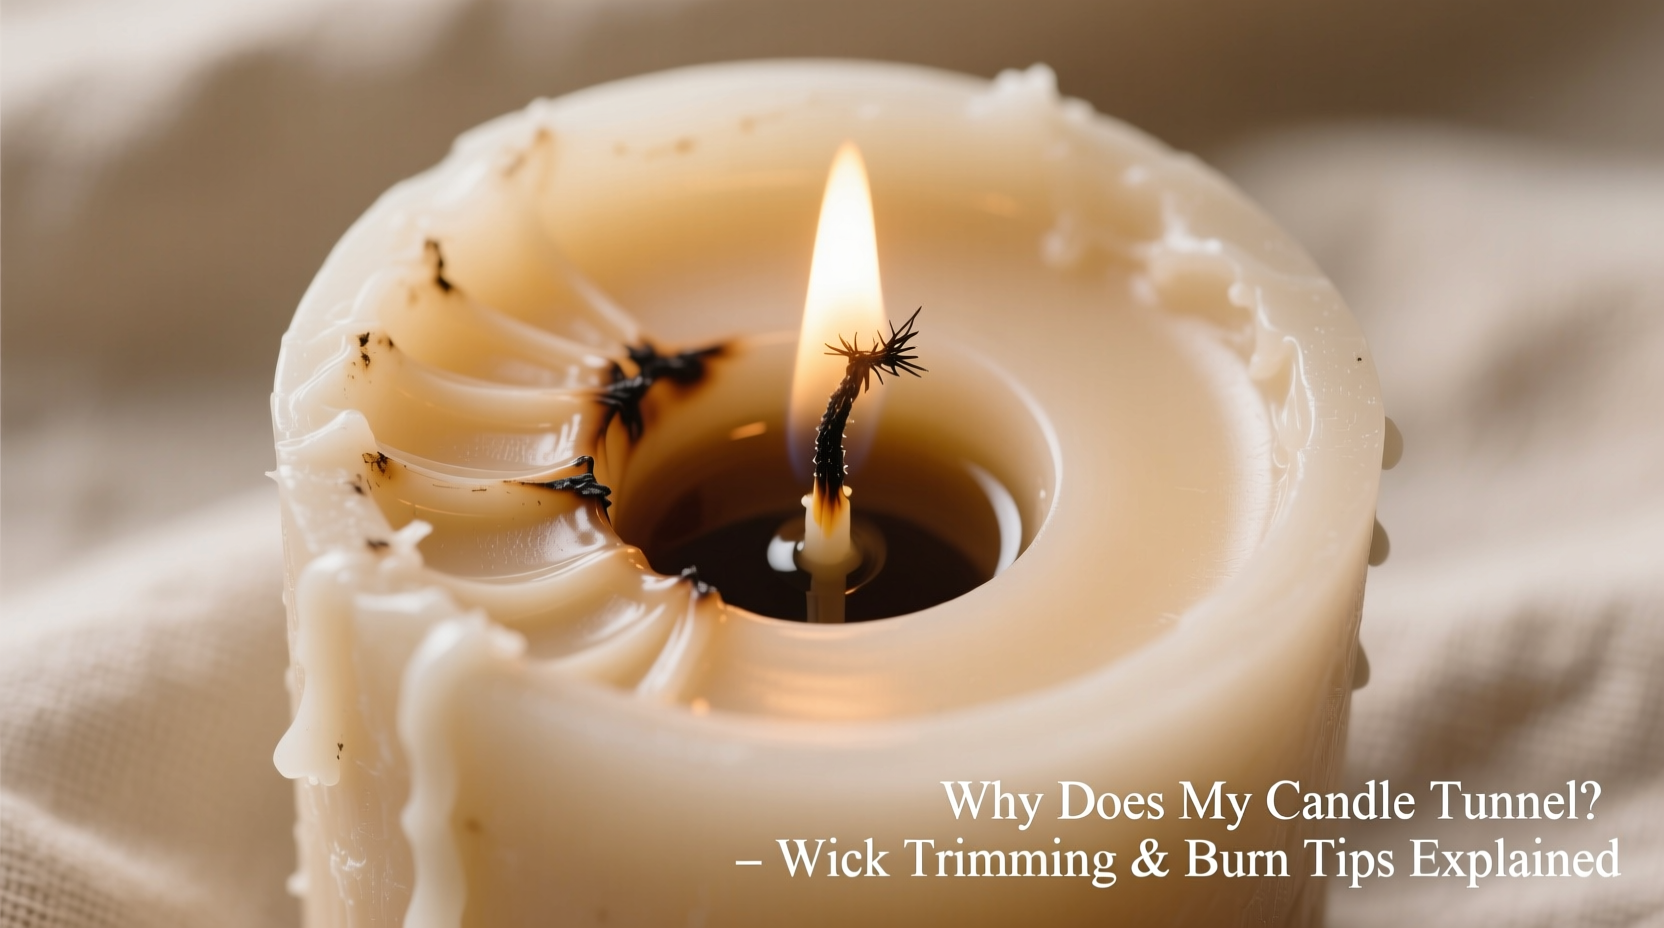
Candle tunneling occurs when the flame burns straight down through the center of the candle, leaving hardened wax along the sides of the container. This wasted wax reduces burn time and can make relighting difficult after a few uses. Tunneling is primarily caused by improper initial burns and inconsistent maintenance—but it's rarely due to a defective candle.
The root issue lies in how the wax melts during the first burn. Most candles, especially those made from soy, paraffin, or coconut blends, have a \"memory.\" That means the way a candle burns the very first time sets the pattern for all future burns. If the melt pool—the liquid wax surrounding the wick—doesn’t reach the edges of the container during that first lighting, the candle will continue to burn only within that narrow diameter.
The Role of Wick Trimming in Preventing Tunneling
Wick length plays a crucial role in how evenly your candle burns. A wick that’s too long creates a larger flame, which may produce excess heat, soot, and uneven melting. Conversely, a wick that’s too short may drown in melted wax, causing the flame to flicker out prematurely.
The ideal wick length before each burn is between 1/8 inch (3 mm) and 1/4 inch (6 mm). Keeping it within this range ensures a controlled flame size that generates enough heat to melt wax evenly without overheating or smoking.
“Proper wick maintenance is the single most overlooked factor in candle care. A well-trimmed wick can extend burn time by up to 30%.” — Daniel Reyes, Artisan Candlemaker & Founder of Hearth & Wick Co.
How to Trim a Candle Wick Correctly
Trimming your wick isn’t complicated, but doing it consistently makes all the difference. Follow these steps for best results:
- Wait until the candle has cooled completely after use.
- Use clean, sharp scissors, nail clippers, or a dedicated wick trimmer.
- Cut the wick straight across, removing any charred black tips (known as “mushrooming”).
- Ensure the remaining wick stands no taller than 1/4 inch.
Avoid using fingers to pinch off wick ends—this can leave debris in the wax and create an uneven burn. Also, never trim the wick while the candle is lit or still warm.
Mastering the First Burn: Setting the Foundation
The first time you light a candle is arguably the most important. This initial burn establishes the candle’s melting behavior for its entire lifespan. To avoid tunneling, you must achieve what’s called a “full melt pool.”
A full melt pool means the liquefied wax extends from the center all the way to the inner edge of the container. For most standard 8–10 oz container candles, this takes about 1 hour per inch of diameter. So, a 3-inch-wide candle should burn for at least 3 hours on its first lighting—but no longer than 4 hours to prevent overheating.
| Candle Diameter | Recommended First Burn Time | Goal |
|---|---|---|
| 2 inches | 2 hours | Melt pool reaches glass edges |
| 3 inches | 3–4 hours | Full surface melt, no tunneling |
| 4 inches | 4 hours (can be done in two sessions) | Even wax consumption |
If you're unable to burn the candle long enough in one sitting, extinguish it safely and resume later the same day. Do not wait more than 24 hours between sessions, as partial burns can begin setting a tunneling pattern.
Real Example: Sarah’s Scented Soy Candle
Sarah bought a popular lavender-scented soy candle in a clear glass jar. Excited to try it, she lit it for just 90 minutes before going to bed. The next week, she burned it again for two hours. By the third use, she noticed the flame was sinking into a deep hole, surrounded by untouched wax walls. Frustrated, she assumed the candle was defective.
After reading about proper burn techniques, Sarah realized her mistake: she hadn’t allowed enough time for the first burn. She corrected her approach by letting the candle burn for nearly four hours on her next attempt. Within that session, the wax melted fully to the edges. From then on, with regular wick trimming and consistent burn times, the candle burned evenly and lasted significantly longer.
Burn Habits That Prevent Tunneling
Beyond the first burn, ongoing habits determine whether your candle continues to perform well. Here’s a checklist of best practices to follow with every use:
- Trim the wick before every lighting.
- Burn long enough to achieve a full melt pool (but not over 4 hours).
- Keep the candle away from drafts, vents, or fans.
- Center the wick if it drifts toward the side during burning.
- Allow the candle to cool completely before relighting.
- Remove any debris like matches or wick trimmings from the wax surface.
Drafts are a silent killer of even burns. Air currents cause the flame to lean, leading to uneven melting and potential wick drowning. Similarly, burning a candle for less than two hours repeatedly trains it to form a narrow melt pool—essentially programming it to tunnel.
Do’s and Don’ts of Candle Burning
| Do’s | Don’ts |
|---|---|
| Trim wick to 1/4 inch before each burn | Leave wicks untrimmed or too long |
| Burn for 1 hour per inch of diameter | Burn for less than 1–2 hours at a time |
| Let wax fully harden between burns | Relight a candle while wax is still soft |
| Place candle on a level, heat-resistant surface | Burn near open windows or ceiling fans |
| Use a wick dipper to extinguish flame | Blow out candle frequently (causes smoke and residue) |
Using a wick dipper—or even a metal spoon—to gently submerge the lit wick into the melted wax stops the flame without blowing and eliminates most smoke. It also repositions the wick into the center, ready for the next burn.
Fixing a Tunneling Candle: Can It Be Saved?
If your candle has already started tunneling, don’t discard it. You can often correct the issue with a method known as the “aluminum foil trick” or by using a warming technique to redistribute the wax.
Step-by-Step: Repairing a Tunneling Candle
- Extinguish and Cool: Make sure the candle is completely off and cooled.
- Clear Debris: Remove any loose wick fragments or dust from the wax pool.
- Apply Foil Shield (Optional): Take a small piece of aluminum foil and wrap it loosely around the rim of the jar, letting it drape slightly over the hardened wax walls. This helps reflect heat inward.
- Light and Monitor: Light the candle and allow it to burn for 2–3 hours. Watch as the reflected heat begins to soften the outer wax layers.
- Adjust Wick: If the wick starts to sink or flicker, extinguish safely and let cool. Reposition the wick upright using tweezers.
- Repeat if Needed: You may need 2–3 corrective burns to fully recover the candle.
This method works best with container candles where the wax walls haven’t become excessively thick. For deeply tunneled candles, placing them in a low oven (around 170°F) for 5–10 minutes can help melt the outer wax uniformly—but this should be done with extreme caution and never left unattended.
Frequently Asked Questions
Can I fix tunneling permanently once it starts?
Yes, in most cases. With consistent full melt pool burns and proper wick care, tunneling can be reversed. However, prevention is always easier than correction. Once a candle develops a strong memory of tunneling, it may require multiple recovery burns to reset its behavior.
Does the type of wax affect tunneling?
Absolutely. Soy wax tends to be softer and more prone to tunneling if not burned correctly. Paraffin holds shape better but can produce more soot. Coconut and beeswax blends often have excellent melt pool characteristics but are more expensive. Regardless of wax type, the principles of first burn and wick trimming apply universally.
Is it safe to burn a candle for more than 4 hours?
No. Burning a candle longer than 4 hours increases the risk of overheating the container, creating carbon buildup on the wick (“mushrooming”), and releasing excess soot. Always extinguish after 4 hours, let the candle cool for at least two hours, and then relight if needed.
Conclusion: Maximize Your Candle Experience
Candle tunneling isn’t a flaw—it’s a fixable consequence of improper burning habits. By understanding the science behind wax memory, committing to wick trimming, and mastering the first burn, you can dramatically extend the life and enjoyment of every candle you own. These small actions add up to cleaner burns, stronger fragrance throws, and better value for your money.
Whether you’re lighting a luxury home fragrance or a simple tea light, treat each candle with intention. Observe its behavior, respond to its needs, and maintain consistency. Over time, these practices become second nature—and your space will glow with both light and satisfaction.


 浙公网安备
33010002000092号
浙公网安备
33010002000092号 浙B2-20120091-4
Comments
No comments yet. Why don't you start the discussion?