
If your garage door begins to close but suddenly reverses direction before reaching the floor, it’s not just inconvenient—it can be alarming. This behavior is typically a safety response triggered by your garage door’s sensors. These infrared safety beams are designed to prevent accidents by detecting obstructions in the door’s path. When something interferes with their signal, the door automatically reverses to avoid damage or injury.
While this feature is essential for safety, false triggers or misalignment can cause persistent reversing issues. Understanding how these sensors work—and how to diagnose and fix common problems—can save you time, money, and frustration. This comprehensive guide walks through the mechanics behind sensor operation, identifies frequent causes of malfunction, and provides actionable steps to restore reliable performance.
How Garage Door Sensors Work
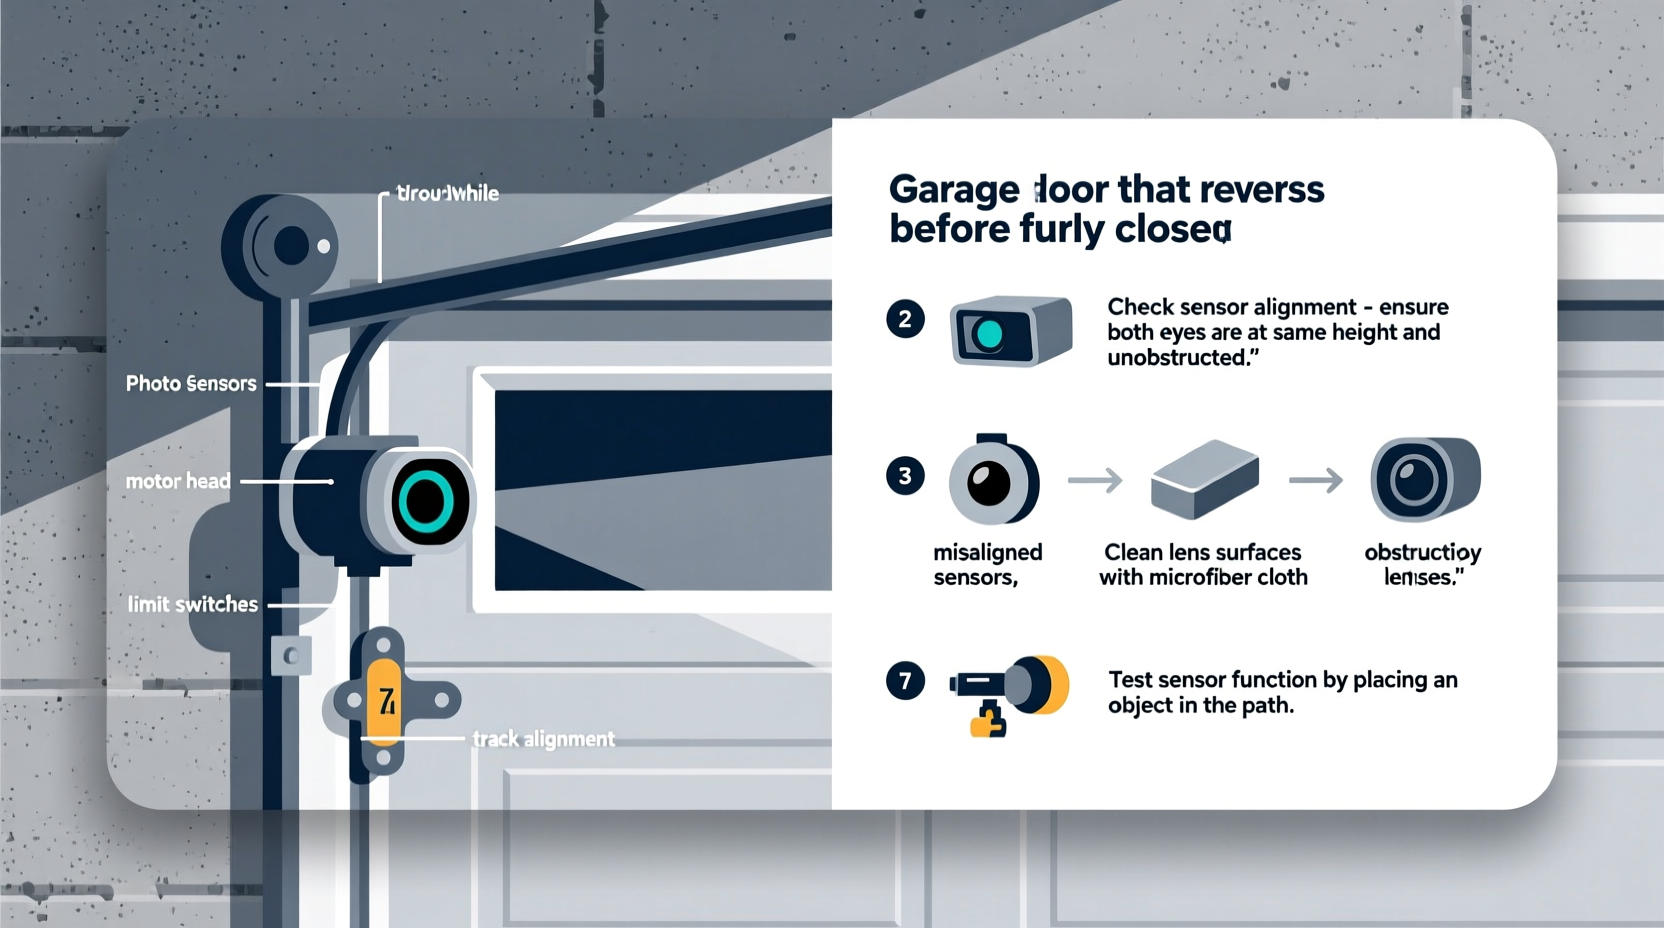
Modern garage doors are equipped with a pair of photoelectric sensors mounted on either side of the door near the floor. One emits an invisible infrared beam; the other receives it. When the beam is uninterrupted, the door operates normally. If the beam breaks—due to an object, debris, or misalignment—the receiving sensor signals the opener to stop and reverse.
This system complies with federal safety standards (UL 325) mandated since 1993. As James Holloway, a certified garage systems technician with over 18 years of experience, explains:
“Garage door sensors are fail-safe devices. They default to stopping the door if communication between units is lost. That means even a loose wire or dirty lens can trigger a reversal—no obstruction needed.”
The sensors are connected to the main opener unit via low-voltage wiring. Most models also include LED indicators that show whether the beam is properly aligned and active. A solid green or unlit indicator usually means normal operation; blinking or red lights suggest a problem.
Common Causes of Premature Reversal
Before attempting repairs, identify what might be disrupting the sensor system. The most frequent culprits include:
- Misaligned sensors – Even slight shifts from impact or vibration can break the beam.
- Dirt or debris on lenses – Dust, cobwebs, or grease can block the infrared signal.
- Loose or damaged wiring – Wires may become frayed, chewed by pests, or disconnected at terminals.
- Obstructions in the path – Toys, tools, or uneven flooring can interrupt the beam.
- Faulty sensors or opener logic board – Internal component failure requires replacement.
- Interference from sunlight or artificial light – Strong ambient light can overwhelm receiver sensitivity.
Step-by-Step Sensor Troubleshooting Guide
Follow this systematic process to diagnose and resolve why your garage door reverses prematurely:
- Disconnect power temporarily – Turn off the opener at the circuit breaker to safely inspect wiring and components.
- Inspect both sensor lenses – Look for dust, grime, or condensation. Clean gently with a soft cloth and glass cleaner.
- Check alignment – Stand at floor level and visually confirm both sensors face each other directly. Many models have small bubbles or guides to aid alignment.
- Verify LED status – Restore power and observe the indicator lights. Both should be steadily lit (usually green or amber). A blinking or off light indicates signal loss.
- Test the beam – Use a piece of cardboard or your hand to briefly block the beam. The receiving sensor should respond immediately (LED may blink or change color).
- Examine wiring connections – Trace wires from sensors to the opener. Ensure they’re securely fastened at both ends and free of cuts, kinks, or rodent damage.
- Eliminate environmental interference – Close the garage door and turn off bright overhead lights. Direct sunlight hitting the receiver during certain times of day can disrupt function—consider adding a sun shield.
- Bypass temporary obstructions – Remove any items near the track or floor that could reflect or block the beam.
- Realign sensors if necessary – Loosen mounting brackets slightly, adjust until LEDs stabilize, then retighten screws.
- Test door operation – Activate the opener. If the door still reverses, repeat checks or consider sensor replacement.
Sensor Maintenance Checklist
To prevent recurring issues, perform routine maintenance using this checklist every three months:
- ✅ Clean sensor lenses with a microfiber cloth
- ✅ Confirm both LEDs are illuminated and steady
- ✅ Visually inspect wiring for wear or disconnection
- ✅ Check for physical obstructions within 6 inches of sensors
- ✅ Test auto-reverse by placing a rolled towel under the door—door should reverse upon contact
- ✅ Listen for unusual grinding or hesitation during operation
- ✅ Inspect mounting brackets for looseness or corrosion
Do’s and Don’ts of Sensor Handling
| Do’s | Don’ts |
|---|---|
| Use only manufacturer-recommended replacement sensors | Never bypass sensors permanently—even for testing |
| Keep lenses clean and dry | Aim sensors upward or downward to “trick” alignment |
| Secure loose wires with zip ties away from moving parts | Ignore flickering LEDs—they indicate instability |
| Replace both sensors as a set if one fails | Install non-compatible third-party sensors without verification |
| Test safety reverse weekly | Allow children to play near sensors or opener mechanisms |
Real-World Example: The Case of the Phantom Obstruction
Homeowner Maria R. in Denver reported her garage door reversed halfway down each evening, only during late afternoon hours. Initial inspection showed clean, aligned sensors with stable LEDs. No objects were in the path.
After reviewing her setup, a technician noticed direct sunlight striking the receiver sensor between 5:15 PM and 5:45 PM due to seasonal sun angle changes. The intense light overwhelmed the receiver, mimicking a broken beam. The solution? A simple $7 plastic sun shield installed over the receiver blocked glare without affecting the infrared signal. The door operated smoothly thereafter.
This case illustrates how subtle environmental factors can mimic hardware failure. Always consider timing and lighting conditions when diagnosing intermittent issues.
When to Replace Sensors or Call a Professional
Despite careful troubleshooting, some problems require component replacement or expert intervention. Replace sensors if:
- LEDs remain off after cleaning and realignment
- Wiring is severely damaged or corroded
- You’ve tested with known-good replacements and only new sensors resolve the issue
- The opener consistently displays error codes related to sensor input
Professional service is recommended when:
- You're uncomfortable working with electrical circuits
- The opener motor hums but doesn’t engage (could indicate multiple system faults)
- Springs or cables show signs of wear—these components store lethal energy
- You suspect logic board failure in the opener unit
“The safest DIY rule? Handle sensors and controls with confidence, but leave springs, cables, and main drive mechanisms to licensed technicians.” — National Association of Home Inspectors (NAHI) Safety Bulletin, 2023
Frequently Asked Questions
Can I disable the sensors to stop the door from reversing?
No. Disabling safety sensors violates federal regulations and creates serious injury risks. Children, pets, or objects left unknowingly in the path could be crushed. Modern openers will often refuse to operate if sensors are disconnected.
My sensors are aligned, but the door still reverses. What now?
Try swapping the wires at the opener terminal. Some systems label terminals “Sensor A” and “Sensor B.” Reversing them can reveal polarity issues. If that fails, test with a multimeter for continuity in the wiring, or use a diagnostic tool to check signal strength. Persistent issues likely mean failed internal circuitry in one sensor.
How long do garage door sensors typically last?
Most sensors last 8–12 years under normal conditions. Lifespan depends on exposure to dust, moisture, temperature swings, and voltage stability. Units in humid coastal areas or unheated garages may degrade faster.
Conclusion: Take Control of Your Garage Door’s Reliability
A garage door that reverses unexpectedly isn't just a nuisance—it's a signal that your safety system is actively protecting your home, even if it's overreacting. By understanding how sensors function and following structured troubleshooting methods, most homeowners can diagnose and fix common issues without professional help.
Regular maintenance, attention to detail, and respect for safety protocols go a long way toward ensuring smooth, reliable operation. Whether it’s wiping a dusty lens, adjusting an inch of misalignment, or shielding a sensor from afternoon sun, small actions prevent bigger problems down the road.


 浙公网安备
33010002000092号
浙公网安备
33010002000092号 浙B2-20120091-4
Comments
No comments yet. Why don't you start the discussion?