
Handmade soap is a rewarding craft that blends artistry with chemistry. Yet even experienced soap makers occasionally face an unexpected issue: cracks forming across the surface of their bars during the curing process. These fissures not only affect appearance but can compromise structural integrity and shorten shelf life. Understanding the root causes—and how to prevent them—is essential for producing consistently high-quality soap. This guide breaks down the science behind cracking, explores common mistakes, and delivers practical solutions grounded in real-world experience.
The Science Behind Soap Cracking
Soap cracking typically occurs due to internal stress caused by uneven cooling, moisture loss, or chemical imbalances during saponification—the reaction between fats and lye that forms soap. When different parts of the soap bar contract at varying rates, tension builds up within the matrix. If this stress exceeds the material’s tensile strength, visible cracks appear, often radiating from the center outward.
Several physical processes contribute:
- Thermal shock: Rapid temperature changes cause outer layers to cool and harden faster than the core, leading to contraction stress.
- Moisture migration: As water evaporates during curing, it moves from the interior to the surface. Uneven drying creates weak zones prone to splitting.
- Exothermic reactions: Some recipes generate significant heat after pouring (known as \"gel phase\"), which can intensify internal pressure if not managed.
While minor surface checking may be unavoidable in certain formulations, deep or widespread cracking indicates a preventable flaw in technique or formulation.
Common Causes of Cracking and How to Avoid Them
1. Overheating During Saponification
When soap batter undergoes an intense gel phase, especially in large molds, the center can reach temperatures exceeding 180°F (82°C). This extreme heat accelerates water loss and expansion, followed by rapid contraction as it cools—creating ideal conditions for cracking.
To mitigate overheating:
- Pour at lower temperatures (around 100–110°F / 38–43°C).
- Avoid excessive insulation; use thin towels instead of thick blankets.
- Consider placing the mold in a cooler area of your workspace.
- For large batches, opt for smaller molds or loaf cuts to reduce thermal mass.
2. High Concentrations of Hard Oils
Formulas rich in coconut oil, palm kernel oil, or shea butter harden quickly and shrink significantly as they cure. While these oils contribute to a firm, long-lasting bar, their rapid solidification increases susceptibility to cracking.
Balancing your recipe is crucial. Aim for no more than 25–30% coconut oil in cold process soap unless you're experienced and prepared to manage its effects.
3. Pouring Too Thick or Air Incorporation
When soap batter reaches trace too far (especially beyond “pudding-like” consistency), it becomes difficult to release trapped air. Bubbles expand during heating and create weak points where cracks initiate. Similarly, vigorous stirring introduces excess air, increasing vulnerability.
Mix gently once emulsified and tap the mold firmly on the counter after pouring to release air pockets.
4. Environmental Factors
Drafts, dry air, and fluctuating room temperatures accelerate surface drying, causing the top layer to form a skin before the interior has stabilized. This differential drying pulls the surface apart.
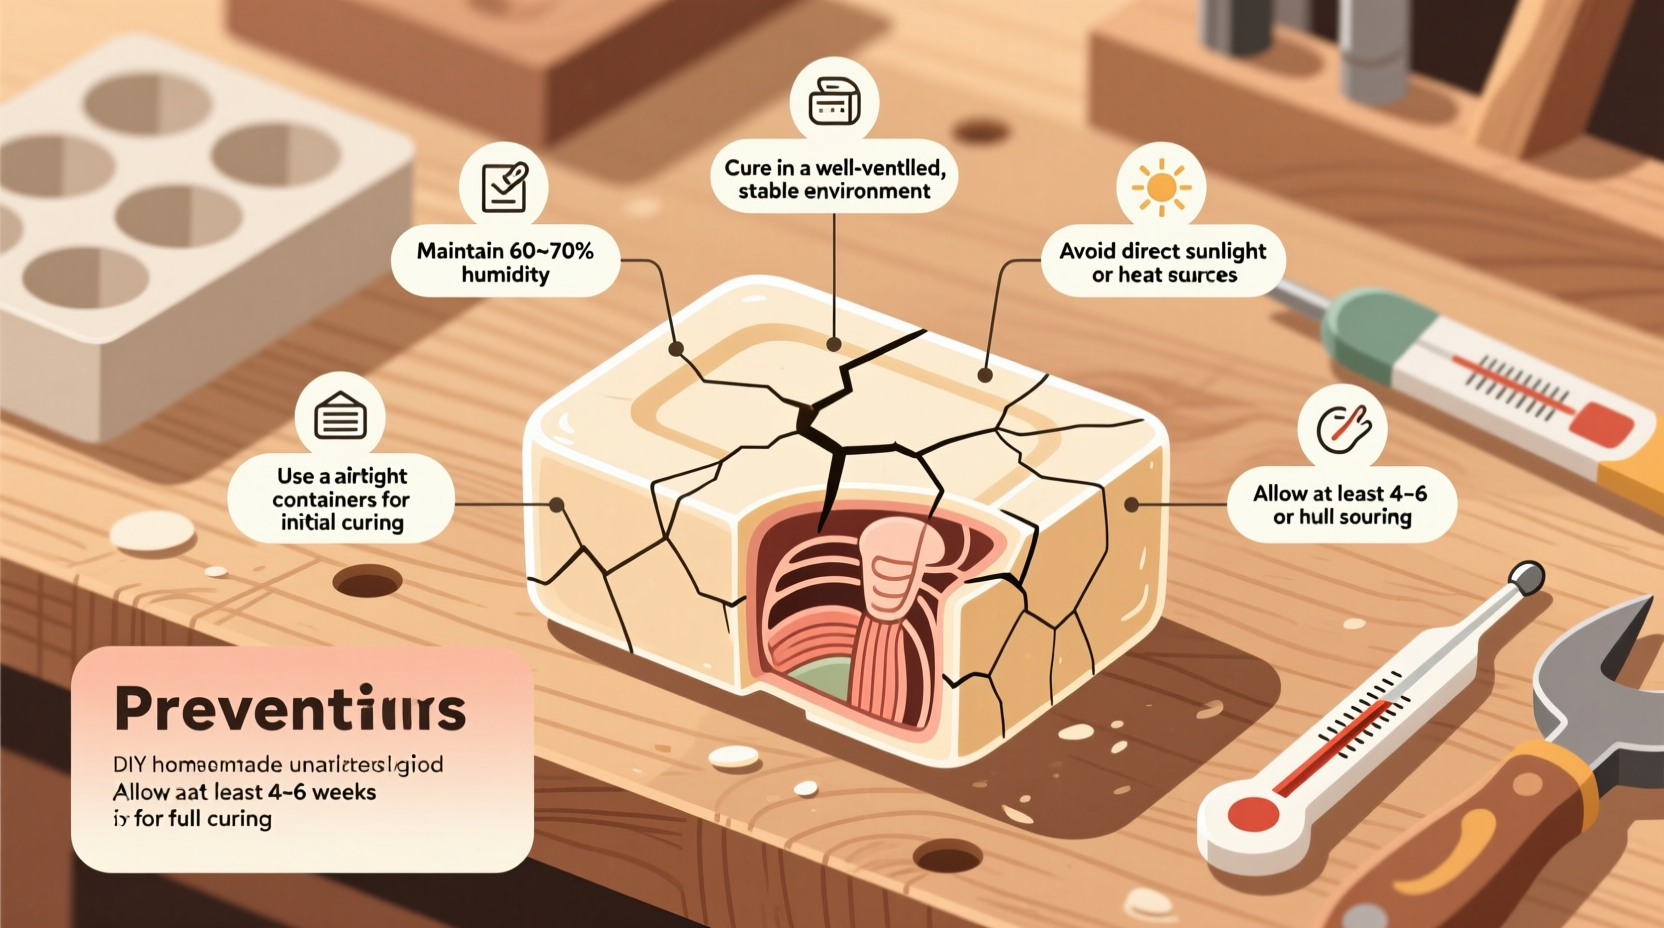
Maintain a stable environment: 70–75°F (21–24°C) and moderate humidity (40–60%) is ideal during the first 24–48 hours.
“Cracking isn’t just cosmetic—it signals imbalance. The best soaps emerge from controlled environments and balanced formulas.” — Dr. Lila Nguyen, Cosmetic Chemist & Artisan Soap Consultant
Prevention Checklist: Key Steps to Stop Cracking Before It Starts
Follow this actionable checklist each time you make a batch to minimize cracking risks:
- ✅ Use a digital thermometer to monitor lye and oil temps (target: 100–110°F)
- ✅ Blend to light to medium trace—avoid overmixing
- ✅ Tap mold firmly post-pour to eliminate air bubbles
- ✅ Cover loosely with parchment paper, then a light towel
- ✅ Keep mold away from drafts, vents, and direct sunlight
- ✅ Allow 24–48 hours in mold before unmolding and cutting
- ✅ Cure bars on breathable racks with space between them
- ✅ Rotate position weekly during curing to ensure even drying
Step-by-Step Guide: Managing Temperature for Stable Curing
Temperature control is one of the most effective ways to prevent cracking. Follow this timeline-based approach:
- Preparation (Before Mixing): Ensure both lye solution and oils are cooled to 100–110°F (38–43°C). Use a stainless steel or heat-safe plastic container placed in a water bath if needed.
- Pouring (0 minutes): Once trace is reached, pour immediately into the mold. Work efficiently but calmly to avoid introducing air.
- Initial Set (0–6 hours): Place the mold on a level surface. Cover with parchment paper (not plastic wrap, which traps condensation) and drape a single cotton towel over the top. Do not seal tightly.
- Monitoring (6–24 hours): Check periodically. If the mold feels very hot, remove the towel to allow heat dissipation. Never place in oven or freezer.
- Unmolding (24–48 hours): Test firmness by gently pressing the center. If it leaves an indentation, wait longer. Use gloved hands or a spatula to ease out the loaf.
- Cutting (After Unmolding): Cut with a sharp knife or wire cutter in one smooth motion. Wipe blade between cuts to maintain clean edges.
- Curing (Weeks 1–6): Place cut bars on a rack with airflow on all sides. Ideal conditions: 65–75°F (18–24°C), 40–60% humidity. Turn bars weekly.
This method promotes gradual, even saponification and minimizes thermal gradients that lead to fractures.
Do’s and Don’ts: Best Practices Compared
| Practice | Do | Don't |
|---|---|---|
| Insulation | Use a single layer of fabric or cardboard to retain mild warmth | Wrap tightly in plastic or heavy blankets that trap excessive heat |
| Pour Consistency | Pour at light to medium trace (like thin pudding) | Wait until thick trace or false trace, especially in warm climates |
| Mold Type | Use silicone or wood-lined molds that allow slight flex | Use rigid plastic or metal molds without flexibility |
| Environmental Control | Keep in a draft-free, climate-stable room | Place near windows, heaters, or AC vents |
| Cutting Timing | Wait 24–48 hours until fully set but still slightly soft | Unmold too early (causing breakage) or too late (increasing crack risk) |
Real Example: A Case Study in Cracking Recovery
Sarah, a home crafter in Colorado, began making cold process soap as a hobby. Her first few batches turned out beautifully—until she tried a new recipe with 40% coconut oil and added honey for extra lather. She poured the batter at 120°F, covered it with a wool blanket, and left it overnight. The next morning, she found deep radial cracks splitting the entire loaf.
She repeated the same recipe but adjusted her process: reduced coconut oil to 28%, poured at 105°F, used only a tea towel for insulation, and placed the mold in a closet away from airflow. This time, the soap set evenly with no cracks. By identifying the combination of high coconut content and excessive heat retention, Sarah learned how small changes yield major improvements.
Her takeaway? “I thought more insulation meant better results. But soap needs to breathe just like we do.”
Frequently Asked Questions
Can I fix cracked soap?
If cracks appear early (within 24 hours), you may be able to rebatch the soap using the hot process method. Grate the cracked bars, add a small amount of water or milk, and cook slowly in a crockpot until fully melted and homogeneous. Then re-mold and cure again. However, for aesthetic purposes, cracked soap is still safe and functional for personal use or laundry applications.
Does fragrance or additives increase cracking risk?
Yes, certain additives can exacerbate cracking. Honey, beer, wine, and sugars boost glycerin production and accelerate the gel phase, raising internal temperatures. Essential oils like cinnamon or clove can also speed trace and heat generation. When using these ingredients, reduce insulation, pour thinner batches, or consider skipping full gel phase by refrigerating briefly after pouring (though this carries its own risks).
How long should soap cure to prevent further cracking?
Most cracking occurs in the first 72 hours. After that, the structure stabilizes. However, proper curing (typically 4–6 weeks) allows remaining water to evaporate gradually, strengthening the bar. Continue storing cut pieces on ventilated racks, turning weekly. Extended curing reduces brittleness and improves longevity, even if initial cracks were avoided.
Final Thoughts: Quality Comes From Control
Cracking in homemade soap isn’t inevitable—it’s a signal. Whether it's a cry for better temperature management, a plea for formula balance, or a reminder to respect environmental conditions, each fissure offers insight into your process. By understanding the interplay between ingredients, technique, and timing, you gain greater mastery over your craft.
Every batch teaches something new. Track your variables: note oil percentages, pouring temperatures, ambient conditions, and outcomes. Over time, you’ll develop an intuitive sense for what works—and what doesn’t. That knowledge transforms occasional mishaps into consistent excellence.


 浙公网安备
33010002000092号
浙公网安备
33010002000092号 浙B2-20120091-4
Comments
No comments yet. Why don't you start the discussion?