
Lipstick is one of the most powerful tools in a makeup routine—capable of transforming a look with a single swipe. Yet, few frustrations rival watching your carefully applied color seep into fine lines minutes after application. Lipstick bleeding, also known as feathering or migrating, doesn’t just blur your lip line—it undermines precision, shortens wear time, and can make even high-end formulas look messy. Understanding why this happens and how to prevent it isn’t about using more product; it’s about mastering technique, preparation, and the right tools.
The truth is, lipstick bleeding isn’t random. It’s the result of a combination of biological factors, product choices, and application habits. The good news? With the right approach, you can achieve clean, defined lips that stay put from morning coffee to evening cocktails.
Why Does Lipstick Bleed?
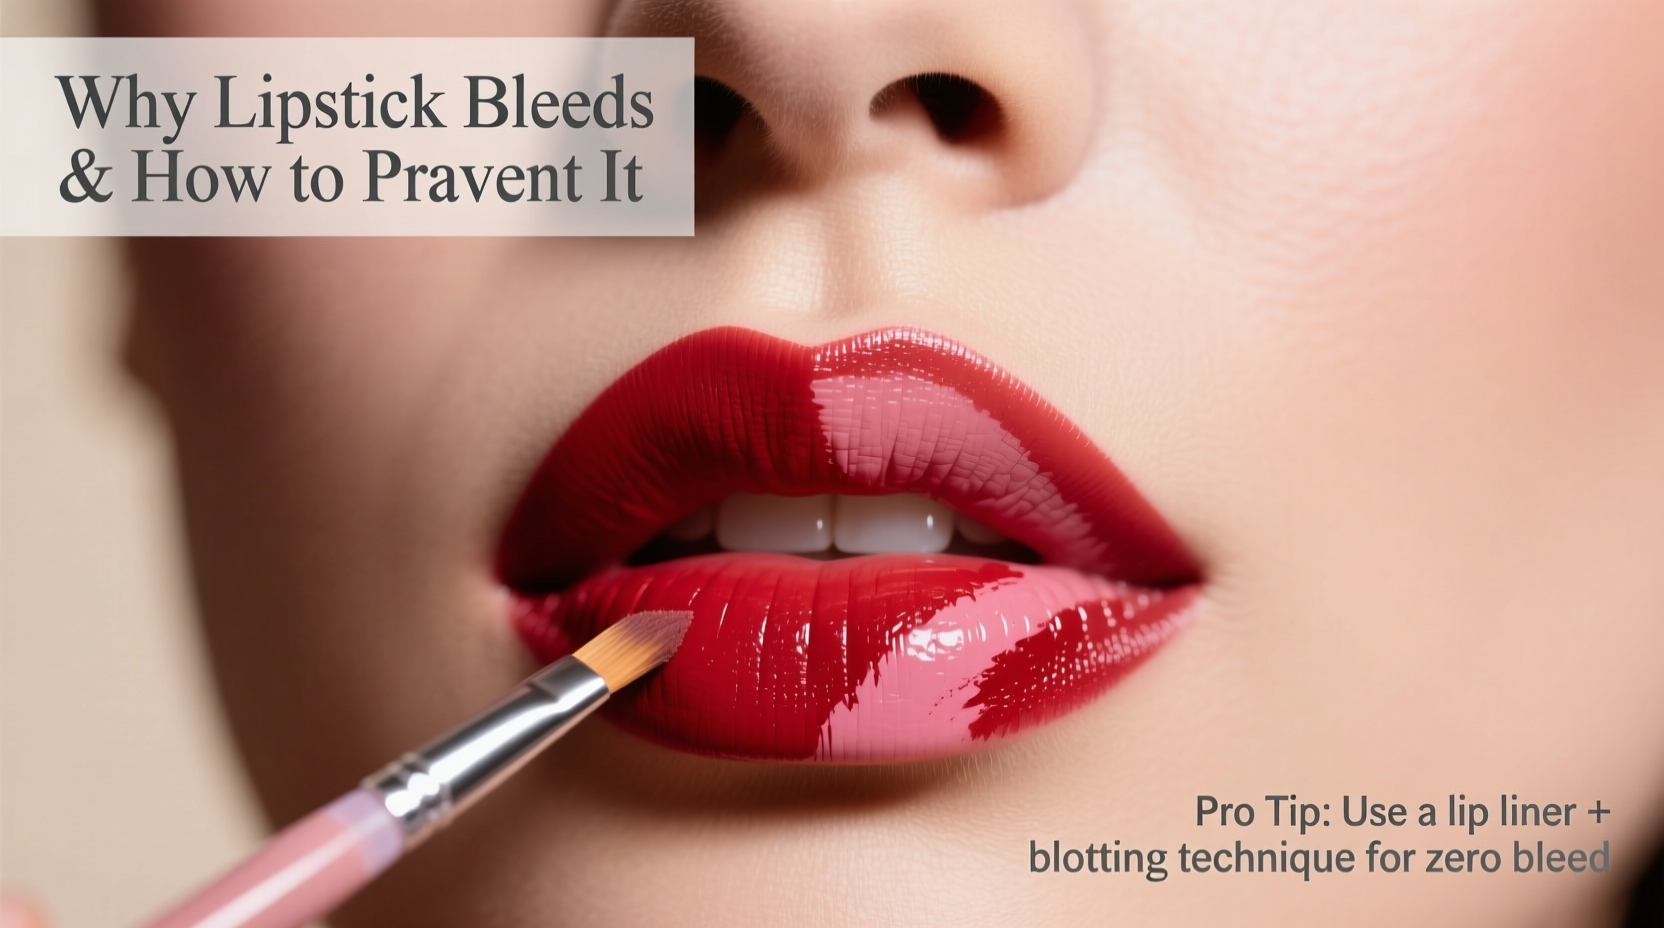
Lipstick bleeding occurs when pigment migrates beyond the natural lip line into surrounding skin, particularly around the Cupid’s bow and outer corners. This migration is often subtle at first but becomes more pronounced over time, especially with movement, eating, or temperature changes.
Several key factors contribute to this common issue:
- Natural lip texture and aging: As we age, lips lose volume and the border between lip and skin softens. Fine vertical lines (perioral rhytids) become more prominent, creating tiny crevices where pigment can settle and spread.
- Dryness and dehydration: Cracked or flaky lips create uneven surfaces. When lipstick settles into these cracks, it's more likely to shift and bleed outward as the day progresses.
- Oily skin or sebum production: Excess oil around the mouth area breaks down makeup faster. Even if your overall skin type isn’t oily, the T-zone often extends to the upper lip, accelerating product breakdown.
- Incompatible product formulas: Creamy, glossy, or hydrating lipsticks tend to be more prone to bleeding because they contain emollients like oils and silicones that slide easily—great for comfort, less so for longevity.
- Improper prep or lack of barrier: Skipping exfoliation or lip liner creates an unstable base. Without a defining edge, lipstick has no boundary to hold against.
These elements don’t act alone. For instance, someone with naturally dry lips who applies a buttery matte lipstick without lining may see minimal issues initially—but within two hours, slight movement and moisture exposure cause the color to soften and drift.
The Science Behind Feathering: What Dermatologists Say
To understand prevention, it helps to know what experts observe clinically. Dr. Lena Patel, board-certified dermatologist and cosmetic researcher, explains:
“Lipstick migration is not just a makeup flaw—it’s a reflection of epidermal dynamics. The vermillion border (the distinct line between lip and facial skin) thins with age and UV exposure. Combine that with repeated muscle movement from speaking and eating, and you have a zone primed for pigment displacement.” — Dr. Lena Patel, MD, Cosmetic Dermatology Specialist
This means anti-aging skincare habits directly impact makeup performance. Sun damage, repetitive facial expressions, and poor hydration accelerate structural weakening along the lip margin, making preventive care essential—not just cosmetic, but protective.
Moreover, research shows that trans-epidermal water loss (TEWL) is higher on the lips than on facial skin due to the absence of sebaceous glands. This makes them inherently drier and more vulnerable to cracking, which further enables pigment migration.
Step-by-Step Guide to Prevent Lipstick Bleeding
Preventing feathering isn't complicated, but it requires consistency and attention to detail. Follow this professional-grade sequence for flawless, lasting results:
- Exfoliate gently: Use a soft toothbrush, sugar scrub, or damp washcloth to remove dead skin cells. Do this 2–3 times per week, or daily if lips are very dry. Over-exfoliating can cause irritation, so use light pressure.
- Hydrate deeply: Apply a non-greasy balm (look for ingredients like shea butter, ceramides, or hyaluronic acid). Wait 10 minutes to let it absorb fully—this prevents the lipstick from sliding on top of a slick layer.
- Prime the lip area: Dab a small amount of concealer or foundation around the lip line. This creates a matte, stable surface that resists oil and minimizes contrast between lip and skin, reducing the visibility of any minor shifts.
- Define with liner: Choose a lip liner that matches your lipstick—or is slightly darker for added definition. Start at the Cupid’s bow and trace outward, following your natural shape. Don’t stretch the skin; instead, use short, controlled strokes.
- Fill in completely: Apply liner not just on the edges but across the entire lip surface. This creates a uniform base that grips the lipstick and prevents sinking into lines.
- Apply lipstick with precision: Use a brush for control, especially near corners. Avoid applying too close to the very edge—leave a hairline gap filled by the liner to avoid overlining accidents.
- Set with powder (optional): For long events or photoshoots, place a tissue over lips and dust translucent powder through it. This locks in color without dulling shine.
- Touch up strategically: Carry liner and lipstick for midday refresh. Reapply liner first if bleeding has started, then blot and reapply color.
This method works whether you prefer sheer tints or bold mattes. The key is building layers deliberately rather than rushing through steps.
Do’s and Don’ts: A Quick Reference Table
| Do | Don’t |
|---|---|
| Use a matching lip liner to define and fill | Use a lighter liner that creates visible gaps |
| Moisturize early enough to allow absorption | Apply lipstick immediately after balm |
| Blot and reapply for intensity and staying power | Layer lipstick thickly in one pass |
| Clean up edges with concealer on a fine brush | Wipe smudges with fingers (spreads pigment) |
| Store lip liners sharpened and cool to maintain firmness | Leave products in hot cars or direct sunlight |
Product Selection Matters: Choosing the Right Formulas
Not all lipsticks behave the same way. While personal preference plays a role, certain formulations are inherently more resistant to bleeding:
- Mattes and liquid lipsticks: These dry down to a transfer-resistant film that adheres tightly to the lip surface. Brands like Maybelline SuperStay or Fenty Beauty Pro Kiss offer long-wear options with minimal migration.
- Pigment-rich creams: Look for “stain” or “lacquer” finishes that bind to the skin rather than sitting on top. Examples include Glossier Generation G or Saie Slip Tint.
- Wax-based pencils: Some modern lip colors come in pencil form with built-in liners (e.g., Clinique Pop Plush). Their compact design ensures perfect alignment every time.
Avoid overly glossy or balm-like formulas if longevity is your goal. If you love shine, apply it only to the center of the lips after securing a precise base.
Real Example: From Frustration to Flawless
Sophia, a 42-year-old communications manager, struggled with lipstick bleeding during client presentations. She used a popular hydrating lipstick in rosewood, but by her second meeting, the color had blurred into fine lines above her upper lip, giving a tired appearance despite her polished outfit.
After consulting a makeup artist, she adjusted her routine: she began exfoliating twice weekly, switched to a creamy matte formula, and committed to full lip-liner filling. She also started using a tinted lip primer to even out pigmentation.
Within a week, her lipstick stayed intact for over eight hours—even through lunch. More importantly, she regained confidence in her professional image. “I didn’t realize how much I was subconsciously touching my lips until they stopped moving,” she said. “Now I feel put together all day.”
Checklist: Your Anti-Bleeding Routine
Keep this checklist handy for daily reference:
- ☑ Gently exfoliate lips (2–3x/week)
- ☑ Apply lip balm at least 10 minutes before makeup
- ☑ Blot excess moisture before proceeding
- ☑ Line and fill entire lip area with matching pencil
- ☑ Clean up edges with concealer on a flat brush
- ☑ Apply lipstick with precision, preferably via brush
- ☑ Blot lightly and reapply for staying power
- ☑ Carry liner and lipstick for touch-ups
- ☑ Avoid oily foods or straws that disrupt the surface
- ☑ Remove thoroughly at night to prevent buildup
Frequently Asked Questions
Can I stop lipstick bleeding without using liner?
It’s possible but significantly harder. Liner acts as a physical barrier and grip layer. Without it, even long-wear formulas are more likely to shift. If you dislike the feel of pencil, try a thin coat of matte lipstick used as a base instead.
Does lip liner really make a difference?
Absolutely. Studies show that pre-lining increases lipstick adherence by up to 40%. It fills micro-lines and creates a buffer zone that slows migration. Think of it as outlining a coloring book page before filling it in.
What if my lips are already lined or aging?
For deeper lines, consider a silicone-based lip primer (like MAC Prep + Prime Lip) that physically fills grooves. You can also use a tiny amount of dermal filler under professional care to restore volume and definition, which indirectly improves makeup application.
Conclusion: Precision Is Within Reach
Lipstick bleeding isn’t inevitable—it’s manageable with informed choices and consistent habits. Whether you're navigating the early signs of aging or simply want your color to last, the solution lies in preparation, precision, and product synergy. By treating your lips as a canvas that needs priming, defining, and protecting, you transform a fleeting beauty step into a lasting statement.
You don’t need expensive treatments or ten-step routines. Just a few mindful adjustments: exfoliate, hydrate, line, and lock in. These small actions compound into visible confidence—one sharp lip line at a time.


 浙公网安备
33010002000092号
浙公网安备
33010002000092号 浙B2-20120091-4
Comments
No comments yet. Why don't you start the discussion?