
Nothing disrupts the holiday spirit quite like a string of Christmas lights that refuses to turn on when expected. You’ve wrapped the eaves, draped the bushes, and synchronized the colors—only to find the timer dead in the water. Outdoor Christmas light timers are essential for automated displays, but they’re also one of the most common points of failure during the season. Moisture, power surges, wear and tear, and simple misconfiguration can all knock them offline. The good news? Most issues are diagnosable and repairable within minutes, often without needing to replace the entire unit.
Understanding the root causes behind a failing timer empowers you to troubleshoot efficiently and prevent future problems. Whether your lights stay on all night or never come on at all, this guide breaks down the most frequent failures, their causes, and actionable solutions to get your display back on schedule—fast.
Common Causes of Outdoor Light Timer Failure
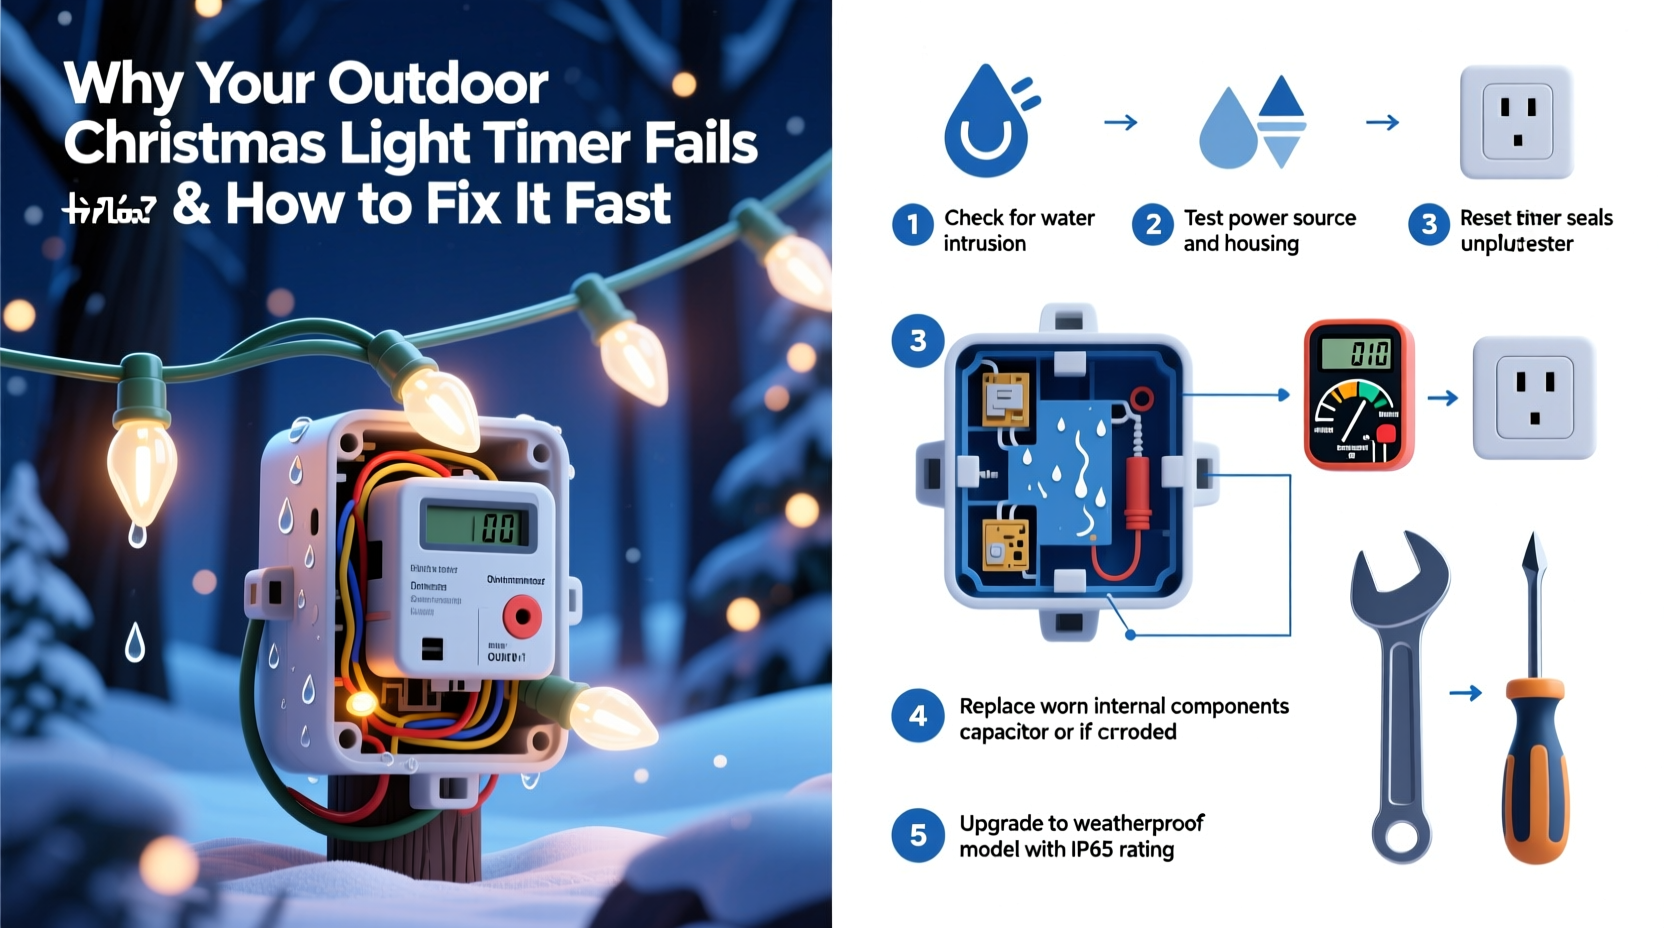
Outdoor light timers face harsher conditions than indoor electronics. They're exposed to rain, snow, temperature swings, UV radiation, and electrical fluctuations. Over time, these elements take a toll. Below are the most frequent culprits behind malfunctioning timers.
- Water Ingress: Even \"weatherproof\" timers can develop cracks or seal failures, allowing moisture inside. Water can short circuit internal components or corrode contacts.
- Power Surges: Lightning strikes or grid fluctuations can fry sensitive circuitry, especially if no surge protector is used.
- Battery Failure (for digital models): Many digital timers use backup batteries to retain settings during outages. A dead battery means lost programming.
- Overloaded Circuits: Plugging too many lights into a single timer outlet can overheat the internal relay, leading to permanent damage.
- Physical Damage: Accidental kicks, lawn equipment contact, or rodent chewing on cords can interrupt connectivity.
- Firmware Glitches: Digital timers with programmable features may freeze or reset due to software bugs.
- Incorrect Settings: Manual override, daylight saving time confusion, or accidental mode changes can make it seem like the timer failed when it’s just misconfigured.
Step-by-Step Guide to Diagnose and Fix Your Timer Fast
When your lights don’t respond as expected, follow this systematic approach to identify and resolve the issue in under 15 minutes.
- Check Power Supply: Verify the outlet is live by plugging in another device (e.g., a lamp). If nothing works, check your home’s breaker panel for tripped switches.
- Inspect the Timer Display: Is the screen blank? For digital units, press the reset button (if available) and check the backup battery. Replace it if corroded or drained.
- Test Manual Override Mode: Switch the timer to “ON” manually. If lights come on, the timer mechanism works; the issue is likely in programming or sensor logic.
- Examine Physical Condition: Look for cracked housing, frayed cords, or signs of water inside. If visible damage exists, discontinue use immediately.
- Unplug and Reset: Disconnect the timer for 3–5 minutes. This clears temporary glitches. Plug back in and reprogram if necessary.
- Reduce Load: Unplug half the lights and test again. If the timer works, it was overloaded. Use multiple timers or upgrade to a higher-rated model.
- Verify Time and Program Settings: Ensure the clock is correct and the programmed ON/OFF times match your expectations. Some models revert to default after a power loss.
- Check for Obstructions to Light Sensors: If using a photocell-based timer, ensure snow, dirt, or decorations aren’t blocking the sensor.
If none of these steps work, the internal relay or control board may be permanently damaged—replacement is likely needed.
Do’s and Don’ts When Using Outdoor Light Timers
| Do’s | Don’ts |
|---|---|
| Use a weatherproof enclosure or timer rated for outdoor use (UL-listed). | Don’t use indoor-only timers outside, even under cover. |
| Plug high-wattage displays into heavy-duty timers (rated for 15A or more). | Don’t daisy-chain multiple timers into one outlet without checking total load. |
| Install timers in shaded, elevated areas to reduce heat and water exposure. | Don’t let timers sit directly on wet ground or in standing water. |
| Label each timer with its zone (e.g., “Front Roof,” “Tree Lights”) for easy troubleshooting. | Don’t ignore flickering lights or intermittent operation—it’s an early warning sign. |
| Replace older mechanical timers with digital ones featuring surge protection. | Don’t assume a working outlet guarantees a healthy timer—test both separately. |
Real Example: How One Homeowner Fixed His Frozen Timer in 10 Minutes
Mark from Colorado Springs set up his annual light display the Friday after Thanksgiving. By Sunday evening, only half the lights turned on. He checked the breakers—fine. The outlets had power. But the main timer controlling the roofline icicle lights showed no display.
Instead of replacing it immediately, he followed a quick diagnostic process. First, he unplugged the timer and noticed moisture near the prongs. He dried it with a towel and left it in a warm room for 20 minutes. After reinserting the backup battery (which had minor corrosion), he pressed reset. The display flickered to life. He reprogrammed the ON time (7 PM) and tested manual mode—success.
The culprit? A small crack in the casing allowed condensation to form overnight, temporarily disabling the circuit. Mark sealed the crack with outdoor-rated silicone and mounted the timer under the eave for better protection. His display ran flawlessly the rest of the season.
“Most outdoor timer issues aren’t about hardware failure—they’re environmental. A little prevention goes much further than replacement.” — Carlos Mendez, Electrical Systems Technician with 18 years in seasonal lighting installations
Preventive Checklist for Long-Lasting Timer Performance
To avoid last-minute holiday headaches, perform these checks before and during the season:
- ✅ Inspect timer housing for cracks or worn seals before installation.
- ✅ Confirm the amperage rating matches your total light load (add up wattage and divide by voltage).
- ✅ Install in a covered, elevated location away from direct sprinkler spray.
- ✅ Use a surge-protecting power strip or outdoor-rated surge suppressor.
- ✅ Test all functions (manual, auto, program) before final mounting.
- ✅ Label cords and note which lights are on which timer.
- ✅ Monitor performance weekly; address flickering or delays immediately.
- ✅ At season’s end, clean, dry, and store the timer indoors in a climate-controlled space.
FAQ: Common Questions About Outdoor Light Timers
Why do my lights turn on earlier or later than scheduled?
This usually happens with photocell (dusk-to-dawn) timers reacting to changing daylight hours or obstructions like snow-covered sensors. For precise timing, switch to a digital timer with a fixed ON/OFF schedule and manual clock setting.
Can I use a smart plug instead of a traditional timer?
Absolutely. Smart outdoor plugs (like those from TP-Link, Wemo, or Kasa) offer app control, scheduling, voice integration, and remote rebooting. Just ensure the model is rated for outdoor use and connected to a GFCI outlet. They’re more reliable than basic timers and allow real-time troubleshooting from your phone.
How long should an outdoor light timer last?
A quality timer used seasonally should last 3–7 years. Mechanical models tend to fail sooner due to contact wear. Digital units last longer if protected from moisture and surges. Signs of aging include inconsistent timing, unresponsive buttons, or frequent resets.
Conclusion: Act Fast, Prevent Future Failures
A failed outdoor Christmas light timer doesn’t have to ruin your display or waste your time. Most issues stem from preventable causes—moisture, overload, or simple misprogramming—and can be resolved in minutes with a methodical approach. By understanding how timers fail and applying practical fixes, you regain control over your holiday lighting with confidence.
But beyond fixing the immediate problem, use this moment to improve your setup for next year. Invest in surge protection, upgrade to digital or smart timers, and install units in protected locations. Small upgrades now can eliminate recurring frustrations later.


 浙公网安备
33010002000092号
浙公网安备
33010002000092号 浙B2-20120091-4
Comments
No comments yet. Why don't you start the discussion?