
It’s the holiday season, and your prelit Christmas tree should be the centerpiece of festive cheer—glowing with warmth and color. But instead, you’re faced with a frustrating reality: patches of darkness where there should be light. Dead sections on a prelit tree are more common than you might think, and while they can feel like a sign the tree is beyond repair, most issues stem from solvable wiring or electrical faults. Understanding the root causes and knowing how to methodically test and resolve them can save your tree—and your holiday spirit.
Prelit trees offer undeniable convenience, but their integrated lighting systems come with inherent complexity. Unlike string lights you can simply unplug and replace, faulty circuits within a prelit tree require careful diagnosis. The good news? With basic tools, a little patience, and an understanding of how these systems work, many dead-section problems can be identified and fixed at home.
Understanding Prelit Tree Wiring Systems
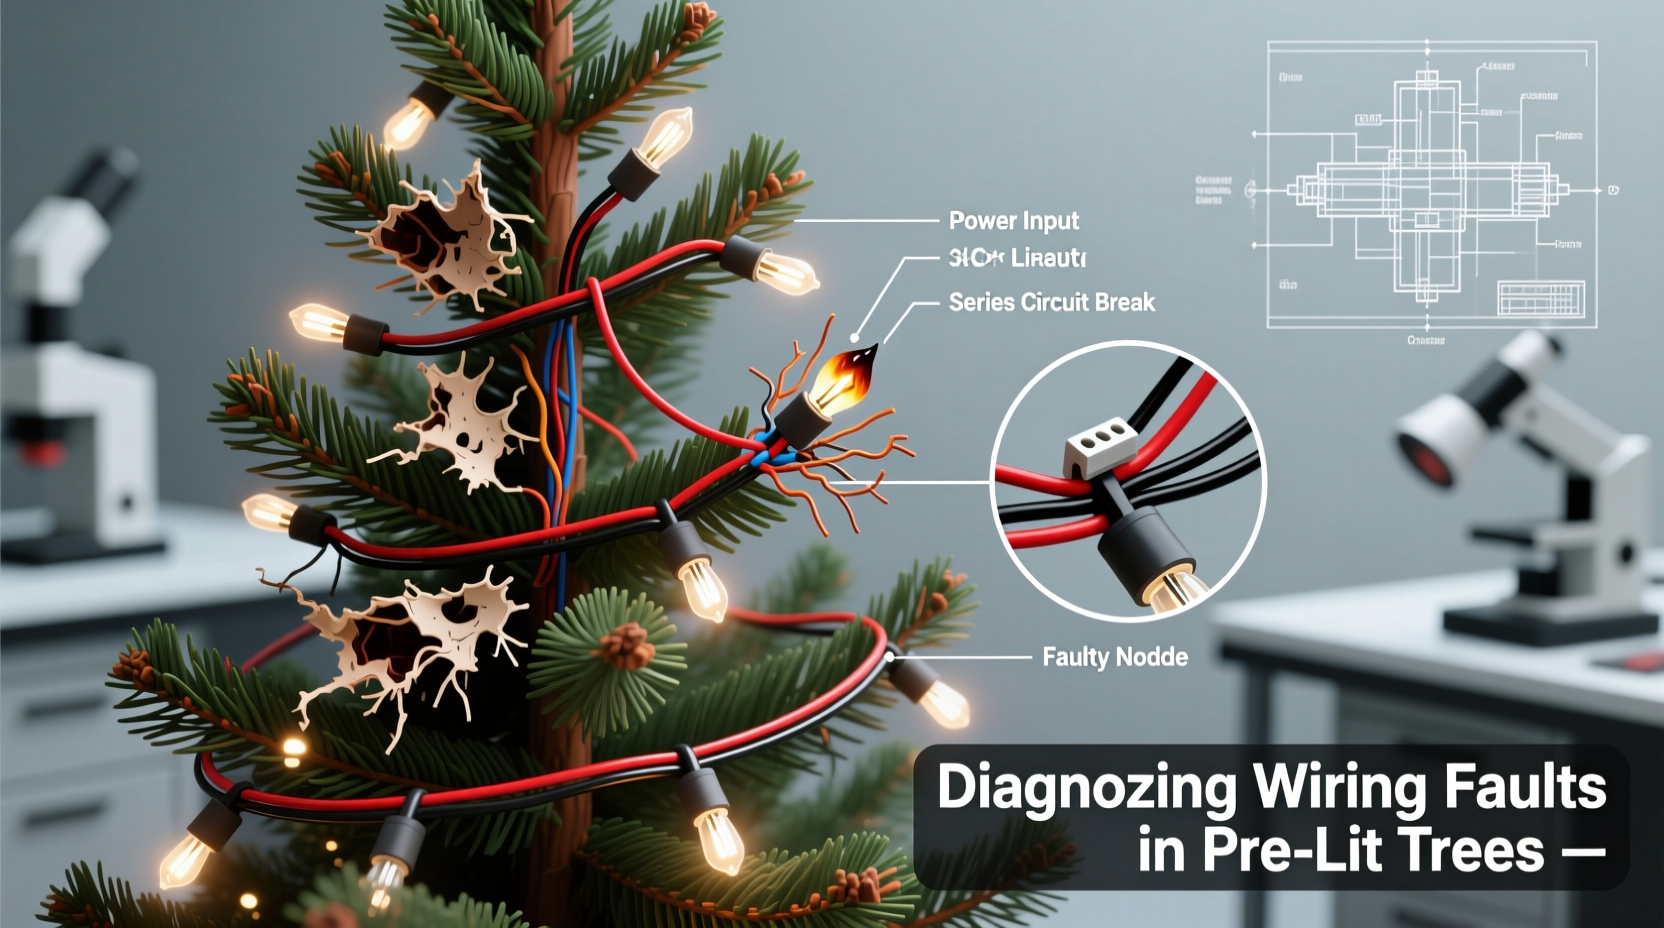
Prelit Christmas trees use either series-wired or parallel-wired light strings. Most older models rely on series wiring, where each bulb is part of a continuous circuit. If one bulb fails or becomes loose, it breaks the entire circuit, causing a whole section—or even the entire string—to go dark. Newer models increasingly use parallel wiring, which allows individual bulbs to fail without affecting others. However, even in parallel systems, larger sections may still go dark due to shared power feeds or damaged wires.
The tree’s branches are typically grouped into light sections, each fed by a separate wire harness connected to a central control box or plug-in junction. These harnesses run through the trunk and connect via plugs or hardwired joints at each level. A break, short, or poor connection anywhere along this path can result in a dead zone.
Manufacturers often design these systems with redundancy in mind, but years of storage, setup, and environmental exposure take their toll. Frayed wires, corroded connectors, and degraded insulation are common culprits behind inconsistent performance.
“Many so-called ‘dead’ prelit trees aren’t actually broken—they just need a systematic check of connections and voltage flow.” — David Lang, Electrical Technician & Holiday Lighting Specialist
Step-by-Step Guide to Diagnosing Wiring Problems
Before assuming the worst, follow this logical sequence to isolate the cause of dead sections. This process minimizes guesswork and helps avoid unnecessary disassembly or replacement.
- Unplug the tree and inspect visually. Look for obvious signs of damage: crushed wires, exposed copper, chew marks (if pets are present), or bent connectors. Pay close attention to stress points—where branches attach to the trunk or where wires enter plastic casings.
- Check all bulbs in the affected section. Even if they look intact, remove each bulb gently and inspect the filament. A broken filament may not be visible from the outside. Replace any questionable bulbs with spares of the same voltage and base type.
- Test continuity with a multimeter. Set your multimeter to continuity mode (or resistance). Place one probe on the metal base contact inside the socket and the other on the side contact. There should be a complete circuit when a bulb is inserted. No continuity suggests a faulty socket or internal wire break.
- Trace the wire path from the base. Follow the wiring from the power source up through each tier. Many trees have male/female connectors between levels. Unplug and reseat each connection firmly. Corrosion or dust can interrupt conductivity.
- Use a non-contact voltage tester. With the tree plugged in (and safety precautions observed), trace the live wire from the plug to the first lit section. When the signal stops, you’ve likely found the fault zone.
- Inspect the control box or dimmer unit. Some trees have built-in fuses or rectifiers. Check for blown fuses (usually located near the plug) and replace only with identical ratings.
Common Causes of Dead Sections and How to Fix Them
Dead zones rarely happen without reason. Below are the most frequent causes—and practical solutions.
- Loose or corroded connectors: Over time, repeated assembly and disassembly can loosen internal pins. Clean contacts with isopropyl alcohol and a cotton swab. Re-crimp connectors gently with needle-nose pliers if necessary.
- Wire breaks inside the trunk: Internal wires can snap due to bending during storage. If voltage disappears mid-trunk, you may need to access the central column. Some trees have removable panels; others require careful drilling to reroute a new wire.
- Shared circuit overload: One failed bulb in a series string kills the whole line. Use a light tester (like the LightKeeper Pro) to send a pulse that can sometimes restore continuity in shunted bulbs.
- Damaged branch wiring: Branches get bent and twisted. If a single branch is out, disconnect it and test with a known-good power source. If it lights, the issue is upstream. If not, the branch harness may need replacement.
- Faulty control module: Trees with multiple effects (twinkle, fade, steady) rely on electronic boards. If no sections light despite good voltage input, the module may be defective. Replacement units are sometimes available from manufacturers.
Mini Case Study: Reviving a 10-Year-Old Prelit Tree
Sarah had a 7.5-foot prelit tree she’d used annually since 2013. Last year, the top two tiers remained dark. She replaced bulbs, checked fuses, and reseated connectors—all to no avail. Using a multimeter, she discovered voltage reached the second tier but disappeared before the third. Upon closer inspection, she found a frayed wire where the harness passed through a metal grommet in the central pole. After cutting out the damaged segment and splicing in a new section with waterproof wire nuts, the full tree lit up again. Total repair time: under 45 minutes. Cost: less than $5.
This case highlights how localized damage—not systemic failure—is often the real issue.
Troubleshooting Checklist
Use this checklist to ensure no step is overlooked when diagnosing dead sections:
- ✅ Unplugged tree before beginning inspection
- ✅ Visually inspected all bulbs in dead section
- ✅ Checked and replaced any dark or broken bulbs
- ✅ Reseated all connectors between sections
- ✅ Tested continuity at sockets using multimeter
- ✅ Verified power delivery up to the last working section
- ✅ Checked fuse compartment and replaced if needed
- ✅ Used non-contact voltage tester to locate signal drop-off
- ✅ Inspected trunk and branch wiring for pinches or breaks
- ✅ Confirmed control module is receiving power
Do’s and Don’ts of Prelit Tree Maintenance
| Do | Don't |
|---|---|
| Do store the tree standing upright in a climate-controlled space | Don't compress branches tightly—this damages internal wires |
| Do wrap branches carefully with soft ties or fabric straps | Don't use metal twist-ties or rubber bands that degrade and stick |
| Do test lights before and after storage each year | Don't ignore flickering or dimming—it’s an early warning sign |
| Do clean connectors annually with isopropyl alcohol | Don't force connectors together if they don’t align easily |
| Do label all wire harnesses and tiers during disassembly | Don't pull on wires to move or adjust branches |
Frequently Asked Questions
Can I replace a damaged wire harness on my prelit tree?
Yes, in many cases. Manufacturers like Balsam Hill, National Tree Company, and Fraser Hill Farm sell replacement light sets and branch harnesses by model number. After identifying the faulty section, order the matching replacement and splice it in using wire nuts or factory-style connectors. Ensure voltage and bulb count match exactly.
Why do only some branches light up after storage?
This usually indicates a connection failure between tiers. During storage or setup, a connector may have become partially dislodged or corroded. Begin by unplugging and firmly reconnecting all level-to-level plugs. Clean contacts with rubbing alcohol if needed. If the problem persists, test for voltage at each junction point.
Is it safe to cut and repair internal wires?
Yes, as long as proper electrical practices are followed. Always unplug the tree before handling wires. Use insulated connectors or solder with heat-shrink tubing to prevent shorts. Avoid leaving exposed copper. If the repair involves high-voltage lines (rare in prelit trees), consult a qualified electrician.
Conclusion: Restore Your Tree’s Glow with Confidence
A prelit tree with dead sections isn’t necessarily destined for the curb. In most cases, the issue lies in a repairable wiring fault—one that careful inspection and systematic testing can uncover. From loose connectors to hidden wire breaks, the solutions are often simpler than they appear. By equipping yourself with a multimeter, a few basic tools, and this guide, you can extend the life of your tree for years to come.
More than just saving money, restoring your tree preserves tradition. That familiar glow, the way the lights catch the ornaments—it’s part of your holiday story. Don’t let a few dark branches dim the season. Take action now, apply these diagnostics, and bring back the full brilliance your tree was meant to shine.


 浙公网安备
33010002000092号
浙公网安备
33010002000092号 浙B2-20120091-4
Comments
No comments yet. Why don't you start the discussion?