
Printer jams are among the most common—and frustrating—issues faced by home users and small offices alike. One moment everything is working smoothly; the next, a red light flashes, and a message appears: “Paper Jam.” You open the tray, remove the crumpled sheet, and think it’s fixed—only for it to happen again minutes later. This cycle not only disrupts productivity but can also lead to long-term damage if ignored.
The good news is that most paper jams are preventable and often stem from simple causes like improper paper loading, worn rollers, or environmental conditions. With the right knowledge and a few careful steps, you can diagnose and resolve the issue yourself, saving time and money on service calls.
Understanding the Anatomy of a Printer Jam
Before diving into solutions, it helps to understand how printers handle paper. Most inkjet and laser printers use a series of rollers, trays, and sensors to pull sheets from the input tray, guide them through the print path, and eject them cleanly. A jam occurs when this process is interrupted—typically because the paper doesn’t move as intended.
Jams can occur in several locations:
- Input tray (feed roller area): Paper fails to enter the printer properly.
- Middle of the print path: Paper gets stuck between rollers or around the fuser (in laser printers).
- Output tray (exit rollers): Paper starts printing but doesn’t fully eject.
Each location points to different root causes, from misaligned paper to worn components. Identifying where the jam happens is the first clue to solving it.
Common Causes of Recurring Printer Jams
Repeated jams are rarely random. They usually point to one or more underlying issues. Here are the most frequent culprits:
- Poor paper quality or condition: Damp, wrinkled, or overly thin paper can slip or tear during feeding.
- Overloading the paper tray: Too many sheets reduce traction and increase friction, leading to multiple feeds or misfeeds.
- Dirt or debris in rollers: Dust, paper fibers, and toner buildup reduce grip and interfere with smooth movement.
- Worn or dirty pickup/feed rollers: These rubber components degrade over time and lose their ability to grip paper effectively.
- Incorrect paper type settings: If the printer thinks you're using thick cardstock but you've loaded standard copy paper, it may feed incorrectly.
- Environmental factors: High humidity warps paper, while static electricity in dry environments can cause sheets to stick together.
- Foreign objects: Small items like staples, paper clips, or torn fragments can get lodged inside the mechanism.
According to the International Journal of Imaging Systems and Technology, approximately 68% of home printer jams are caused by user-handling errors—most of which are easily correctable with proper technique.
“Most recurring jams aren’t mechanical failures—they’re maintenance oversights. Regular cleaning and correct paper handling solve 9 out of 10 cases.” — Dr. Alan Zhou, Printer Systems Engineer
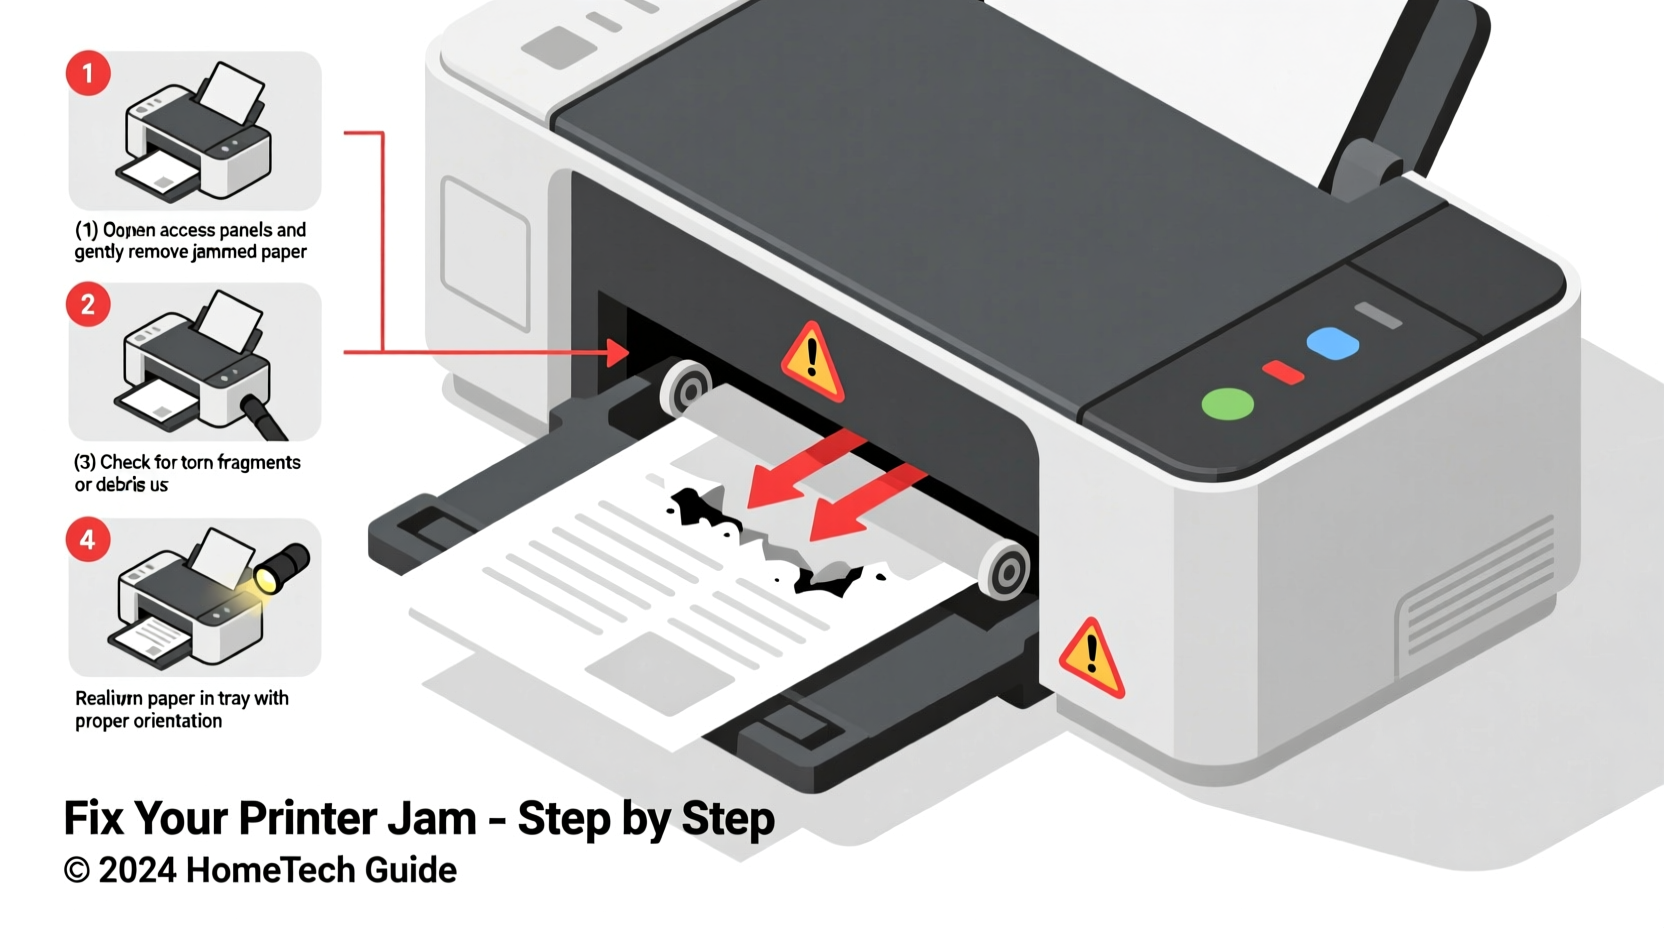
Step-by-Step Guide to Troubleshooting a Printer Jam at Home
Follow this systematic approach to identify, clear, and prevent future jams:
Step 1: Safely Power Down and Open the Printer
Turn off the printer and disconnect it from power. Open all accessible panels—front, rear, and top—as needed. Refer to your manual if unsure which parts open.
Step 2: Locate the Jammed Paper
Look for visible signs of crumpled or torn paper. Many printers have indicator lights or messages that specify the jam location (e.g., “Rear Tray Jam” or “Inside Fuser Unit”).
Step 3: Remove Paper Gently and Completely
Pull the paper slowly in the direction of the paper path—never backward—to avoid tearing. Use both hands to apply even pressure. If the paper tears, inspect thoroughly for remnants. Even a small fragment can trigger another jam.
Step 4: Inspect Internal Components
Check for:
- Frayed or worn rollers (look for shiny spots or cracks)
- Accumulated dust or toner residue
- Obstructions like staples or plastic bits
Step 5: Clean the Rollers
Moisten a lint-free cloth with distilled water (for inkjets) or isopropyl alcohol (70%, ideal for laser printers). Wipe the rollers gently, rotating them manually if possible. Allow all parts to dry completely before reassembly.
Step 6: Reload Paper Correctly
Use fresh, flat paper. Fan the stack before loading to reduce static cling. Adjust the side guides in the tray so they hold the paper snugly without bending it.
Step 7: Test Print
Reconnect the printer, power it on, and run a test page. Monitor the entire feed and output process. If the jam recurs, repeat the process and consider checking less accessible areas like the duplexer (if present).
Do’s and Don’ts When Handling Paper Jams
| Do’s | Don’ts |
|---|---|
| Always power off the printer before clearing jams | Never yank paper forcefully—this can damage gears |
| Fan paper stacks before loading to prevent sticking | Avoid using wrinkled, folded, or damp paper |
| Clean rollers every 2–3 months with proper solution | Don’t ignore recurring jams—address root causes early |
| Use manufacturer-recommended paper types and weights | Don’t overload the input tray beyond the fill line |
| Store paper in sealed containers in climate-controlled areas | Never use metal tools to remove debris near sensitive components |
Real Example: Solving a Persistent Jam in a Home Office Setup
Sarah, a freelance graphic designer in Portland, experienced daily jams with her HP LaserJet Pro MFP M428fdw. She’d clear the paper, restart, and resume work—only for the error to return within hours. Frustrated, she nearly replaced the machine until she noticed a pattern: jams always occurred after printing double-sided documents.
She followed the troubleshooting steps above and discovered a tiny staple fragment lodged near the duplex unit. After removing it and cleaning the rollers, the jams stopped entirely. The culprit wasn’t a failing machine—it was overlooked debris combined with high-volume double-sided printing.
Sarah now performs a monthly roller inspection and stores her paper in a dehumidified closet. Her printer, once deemed unreliable, has operated flawlessly for over eight months.
Preventive Maintenance Checklist
To minimize future jams, adopt this routine:
- ✅ Monthly: Clean feed and exit rollers with a damp lint-free cloth.
- ✅ Every 3 months: Inspect internal paths for debris or wear.
- ✅ Before each heavy print job: Fan and align paper in the tray.
- ✅ Annually: Replace worn rollers if accessible (kits available online).
- ✅ Ongoing: Store paper flat and away from moisture or direct sunlight.
- ✅ After every jam: Double-check for leftover paper fragments.
Investing 10 minutes a month in maintenance can save hours of downtime and extend your printer’s lifespan by years.
FAQ: Common Questions About Printer Jams
Why does my printer jam only when printing double-sided?
Double-sided printing requires paper to travel a longer, more complex path. Misalignment, worn duplex rollers, or excessive paper stiffness can cause jams. Ensure your paper weight setting matches the actual paper used, and clean the duplex unit regularly.
Can using third-party paper cause more jams?
Yes. Off-brand or recycled paper often has inconsistent thickness, rough edges, or moisture sensitivity. While cost-effective, lower-quality paper increases jam risk. Stick to reputable brands designed for your printer type.
Is it worth repairing an older printer with frequent jams?
It depends. If the printer is more than 5 years old and jams persist despite cleaning and proper use, replacement may be more economical. However, replacing rollers or fixing a broken sensor can sometimes restore full function at a fraction of the cost of a new device.
Conclusion: Take Control of Your Printer’s Performance
Recurring printer jams don’t have to be a fact of life. Most issues stem from simple, fixable problems—poor paper handling, dirty components, or overlooked debris. By understanding how your printer works and adopting a proactive maintenance routine, you can eliminate frustration and keep your device running smoothly for years.
Start today: clear any current jams, clean the rollers, and load fresh paper correctly. Then, schedule a monthly check to stay ahead of potential issues. A well-maintained printer is not only more reliable but also produces higher-quality prints and reduces waste.


 浙公网安备
33010002000092号
浙公网安备
33010002000092号 浙B2-20120091-4
Comments
No comments yet. Why don't you start the discussion?